A few days before Black Friday several years ago, I turned to my wife (who loves tea) & asked if she would like a fridgerator that dispenses hot water. Her eyes got big and said "yes!" I got a great deal on a GE Cafe fridge that had a freezer on the bottom and a cavernous fridge area (especially compared to our existing fridge at the time).
This kicked off a year and a half long project of renovating our 1973 kitchen. As you can imagine, there are numerous parts to this project. One of those parts was a homemade kitchen cabinet for storing trash cans & small appliances.
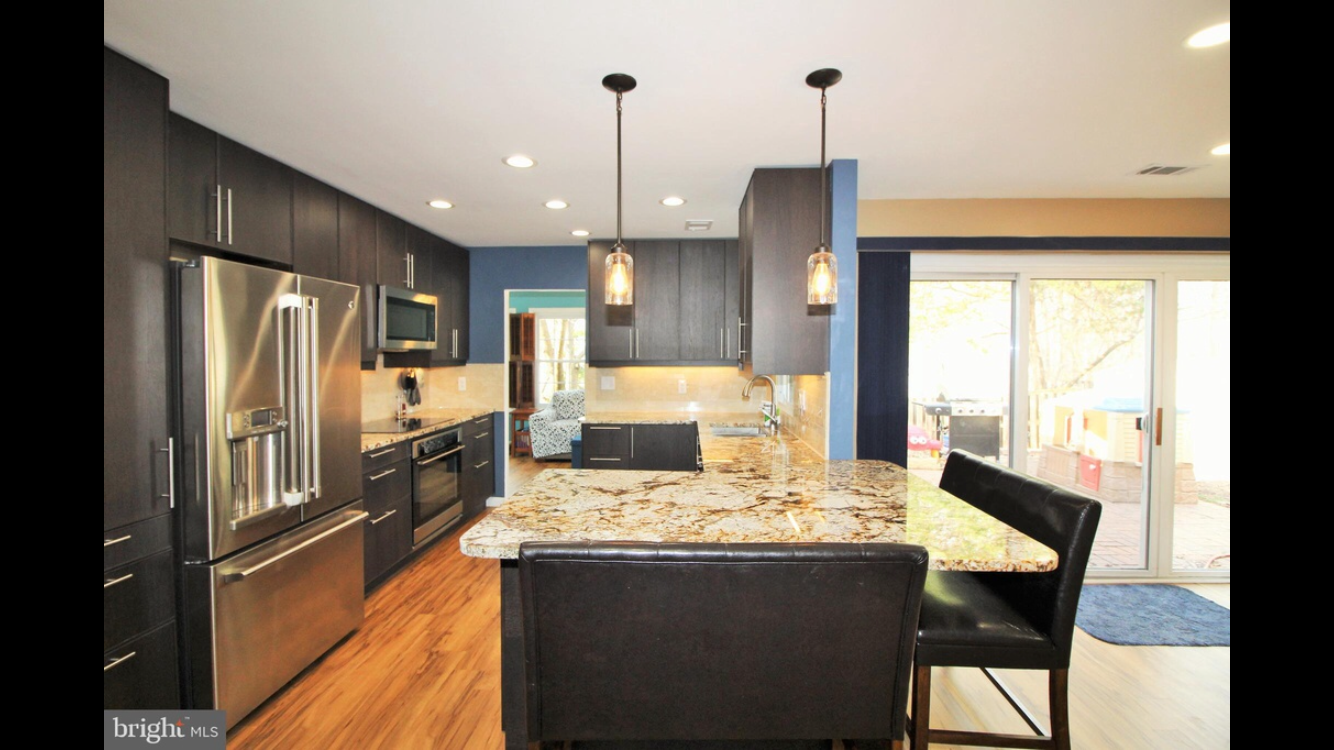
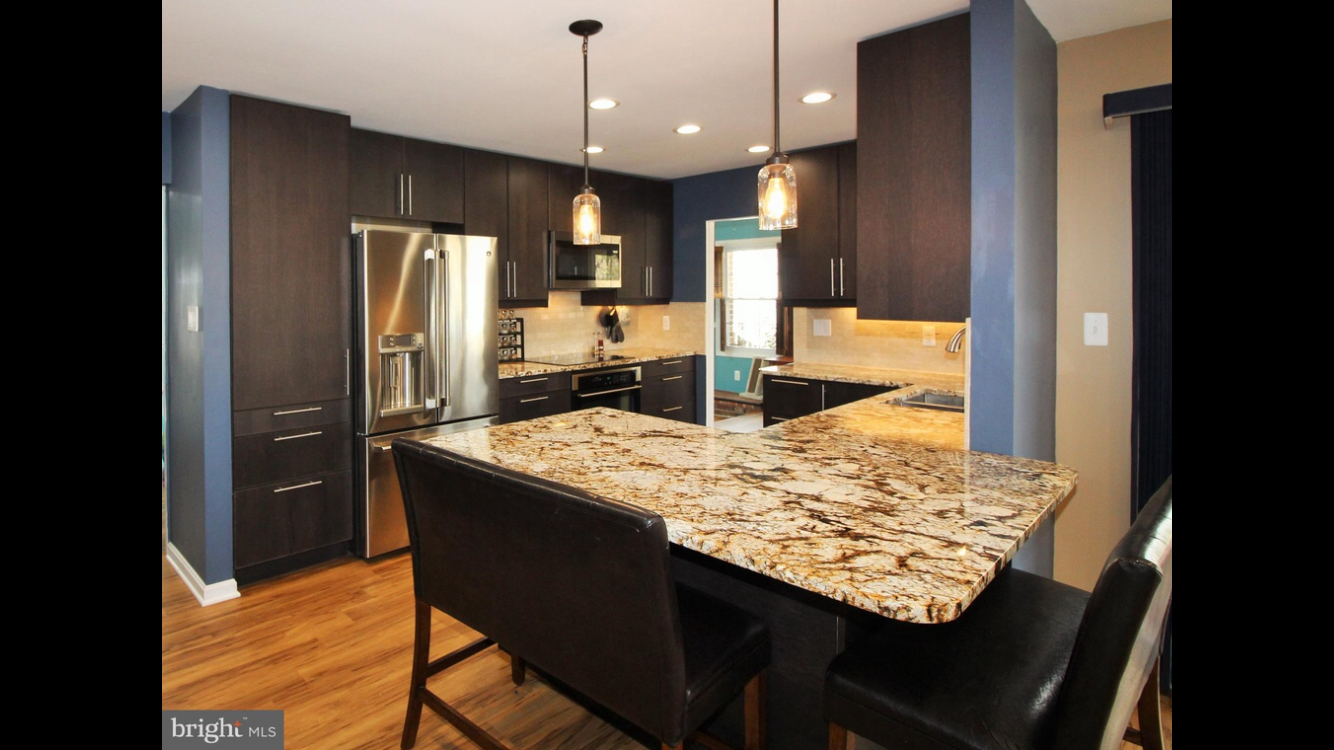
Here's a picture of what the kitchen looked like after it was completely done:
Read on for before & after pictures along with details on things that we didn't expect..
Before
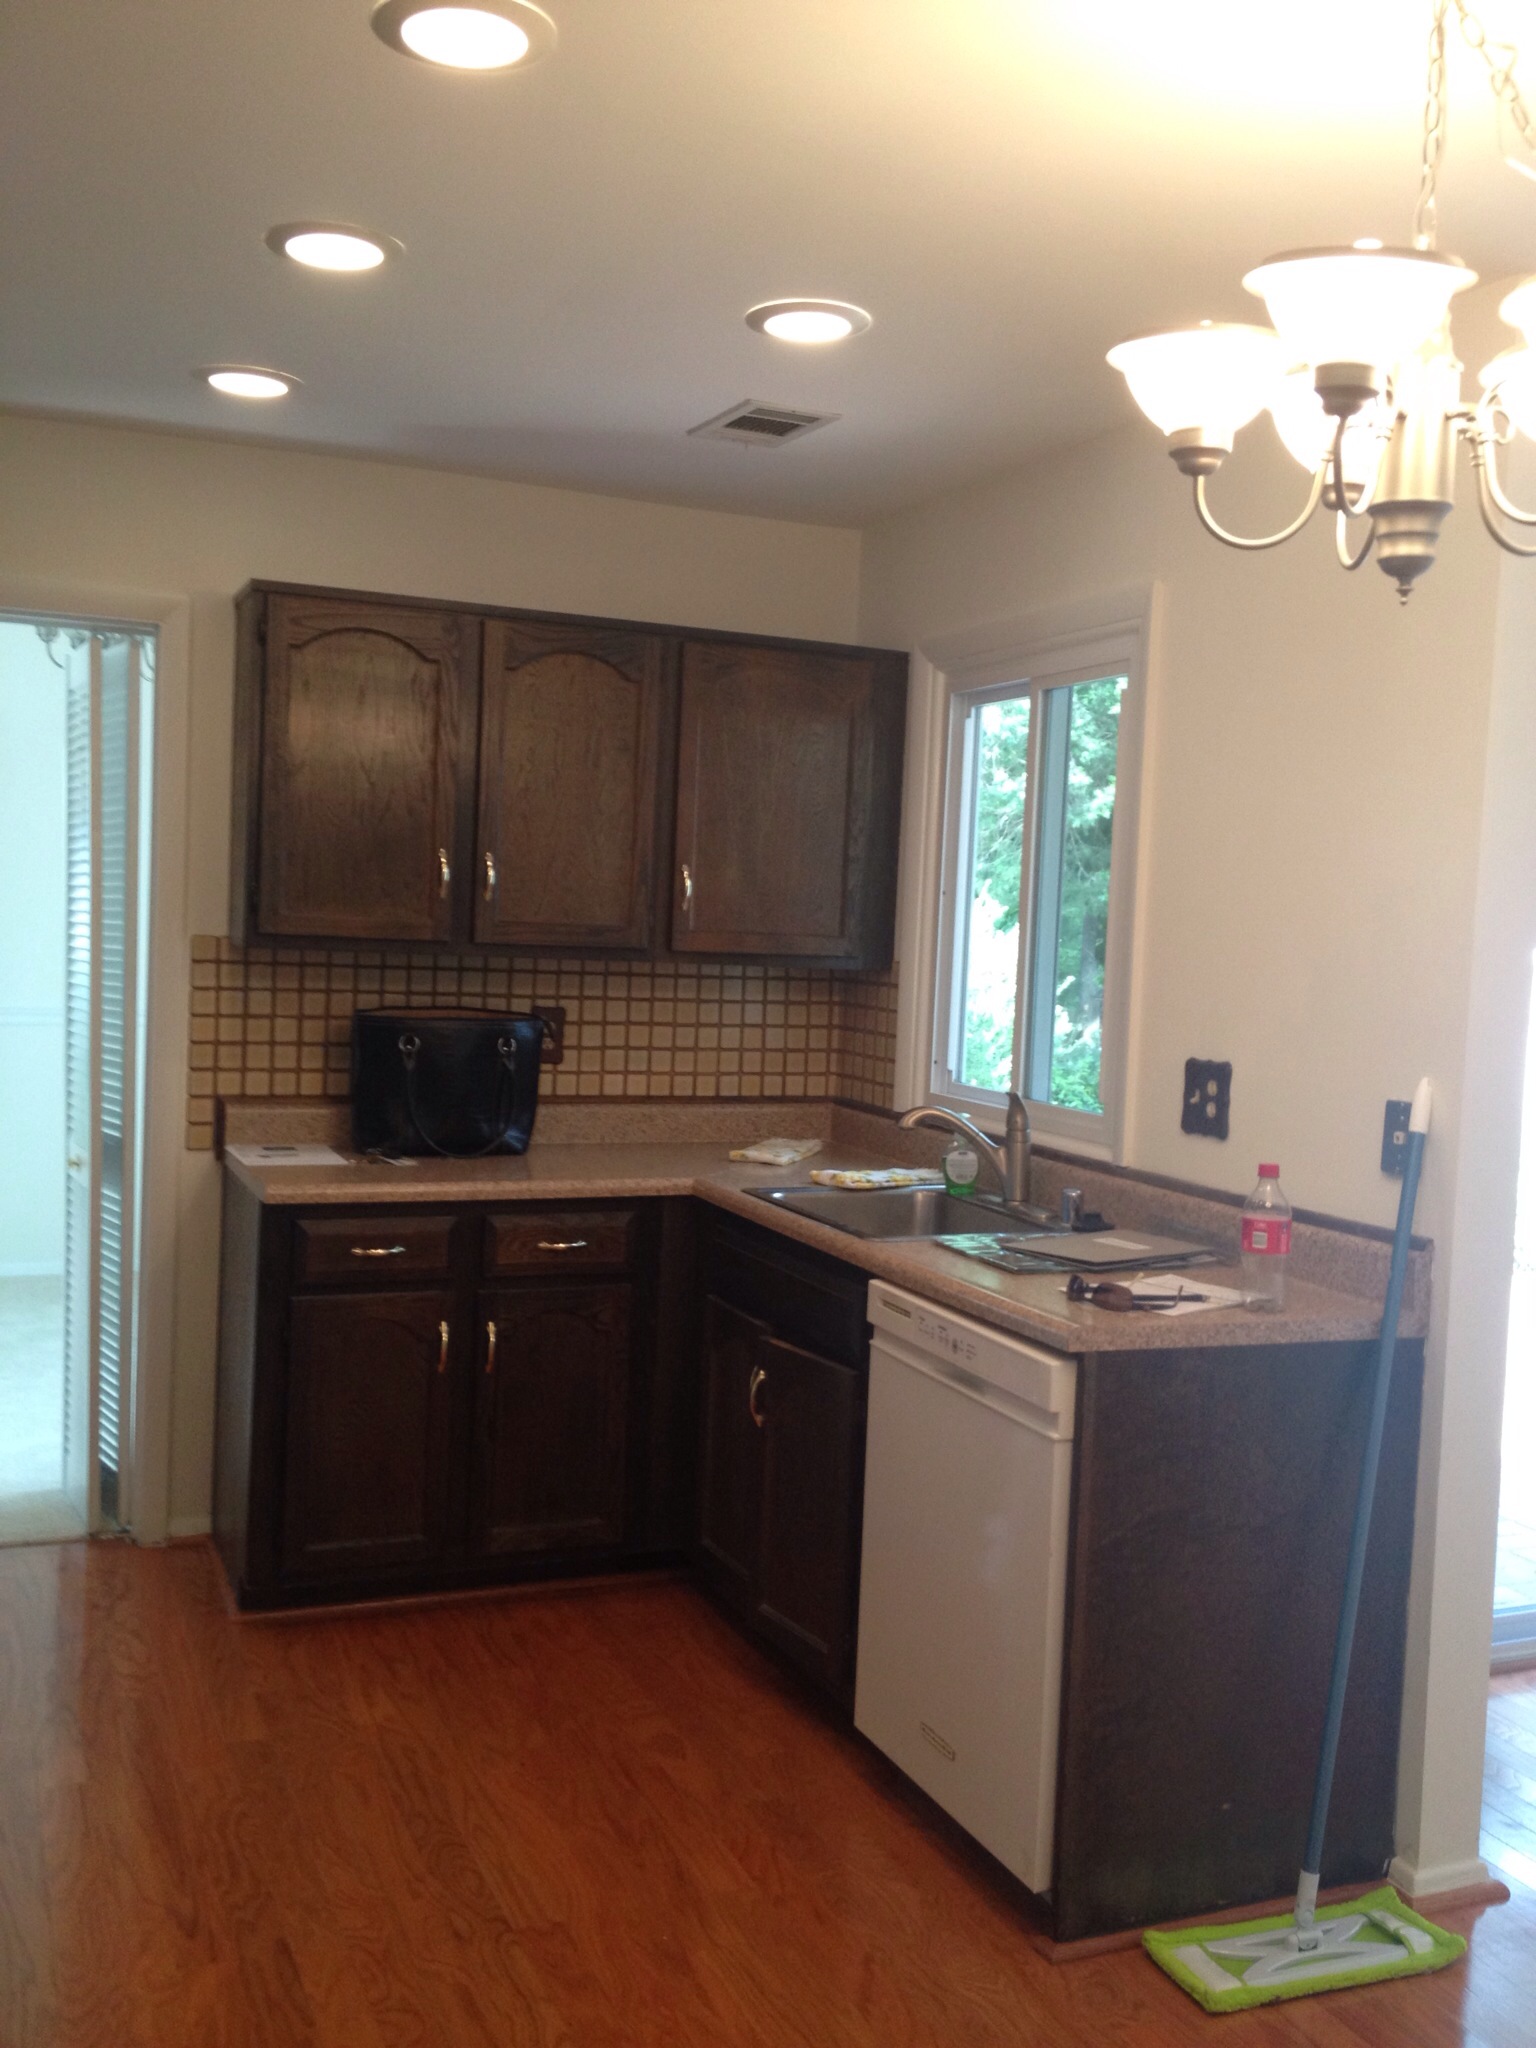
Here's what the kitchen looked like before:

Gotta love that 1970s backsplash!
You can see the pantry in this photo:

Another before shot:
We knew that we wanted to remodel the kitchen at some point, but we weren't quite ready to do it when we bought the new fridge. We measured the opening for the old fridge & decided it would fit. It didn't. It was ¾" too big. I wasn't about to send it back though. The existing countertop was Formica. Luckily, it hung over the edge of the cabinet by one inch. I got out my reciprocating saw and made that new fridge fit!
It didn't matter that the edge of the counter was rough & uneven. You couldn't see it because the fridge was up against it & we put bread in that corner.
Selecting a manufacturer
About 9 months later, we began the process of looking at kitchen cabinets & countertops we liked. We priced out cabinets from Home Depot & Lowe's. There were several really great options, but the affordable ones were not the style we wanted and the ones we liked were double what we wanted to pay.
Then we looked at local kitchen cabinet resellers. There were some potential candidates, but still nothing that really fit our budget that we really liked. Then we visited IKEA one day. I learned they have an online design tool that lets you play around with different sizes, shapes, styles and colors. It took a couple visits to the store to find a style & color we both liked, but the price couldn't be beat for the quality. While the cabinet part is still pressed wood like most IKEA furniture, the cabinet doors are a step above that. It's still a veneer, but they have a 25 year guarantee!
About IKEA
We paid $10k for all of the cabinets, a stove, cooktop, microwave and dishwasher. All of their appliances were made by Whirlpool and also came with a guarantee. Other places were at least $20k for just the cabinets. To sweeten the deal, we got $1,300 in IKEA gift cards because we spent so much money! I paid with a cash back rewards credit card, so I got 1% cash back on top of that.
I highly recommend you consider IKEA if you're looking at renovating your kitchen. Normally, you need to pay $50 for delivery. We didn't because it was during their annual kitchen sale. Everything was shipped in flat pack boxes, like you would expect. They have a very easy exchange policy if anything is missing or damaged. It's hard to get IKEA on the phone, but in person visits are painless.
Our two car garage was absolutely packed when everything was delivered. We had one row to walk:

Truth be told, everything that we ordered was delivered. The appliances were in perfect condition. IKEA's packaging is pretty robust (I was pleasantly surprised), but we did have a couple busted pieces. I drove them back to IKEA (a couple weeks part their "return deadline"). Customer Service didn't even mention the deadline. When I asked for a few extra screws, they were very willing to help me find the part number & get it for me at no charge. It's exactly the kind of treatment you would expect when you spend thousands of dollars, but probably not how Home Depot or Lowe's would treat you.
IKEA's system for hanging both upper & lower cabinets is super easy. You can even do it by yourself. You can't hang traditional cabinets by yourself. With IKEA, there is a bar mounted to the wall. The cabinets have a special bracket that hangs off that bar. IKEA cabinets are still quite heavy, but two people can easily do it. One person when you're in a pinch (and I'm not a burly guy).
IKEA also has an excellent leveling system for their lower cabinets. You simply twist each leg (one in each corner). That's a LOT easier than shims that you would use on traditional cabinets.
One thing that I wish IKEA would do is no use pressed board for the kitchen sink cabinet. We had a small leak after I connected everything & the bottom of the cabinet swelled slightly. That being said, almost every cabinet manufacturer uses plywood, so it's not much different. I suggest you put a vinyl liner down on the base of the sink cabinet.
Easy IKEA door hinge can be adjusted so the door can be adjusted up, down, left, right, in and out. Similarly, their drawers can be adjusted up, down, left & right. Their system makes it very easy to fine tune exactly how everything aligns, especially when your kitchen probably isn't level or plumb. They even have soft close doors & drawers. It's worth splurging!
Planning
We had some requirements for our new kitchen:
- The appliances had to match our fancy new fridge
- Our existing, barely functional pantry needed to be replaced with something that matched the cabinets & it had to have drawers.
- We needed more countertop space.
- More cabinet space.
- The cabinets had to go to the ceiling.
- We wanted a breakfast bar with pendant lighting instead of the chandelier you see in the pictures above. The bar needed to be big enough to seat four people.
- We needed more recessed lighting to make it feel like the kitchen was more connected with the surrounding areas.
- The tile in the foyer, carpet in the dining room & wood in the kitchen and hallway needed to be one material to give a continuous feeling.
- We wanted to go bold on a countertop, but didn't want to also spend a fortune on flooring.
- The baseboards needed to be replaced because there were so many layers of flooring, they didn't look like baseboards any more.
The flooring is "luxury vinyl planking." It looks like wood, but is actually waterproof vinyl.
I learned that safety code says that upper cabinets must be at least 17" above the countertop. It has something to do with making sure they don't catch on fire. Luckily, we could still get 42" cabinets and be 17" above the countertop.
Countertop & Sink
The countertop is undeniably my favorite part. We looked at hundreds of slabs of granite, quartz, marble, tile, you name it. We picked this granite and it really makes the kitchen an area you want to spend time in. Here it is with no backsplash yet.
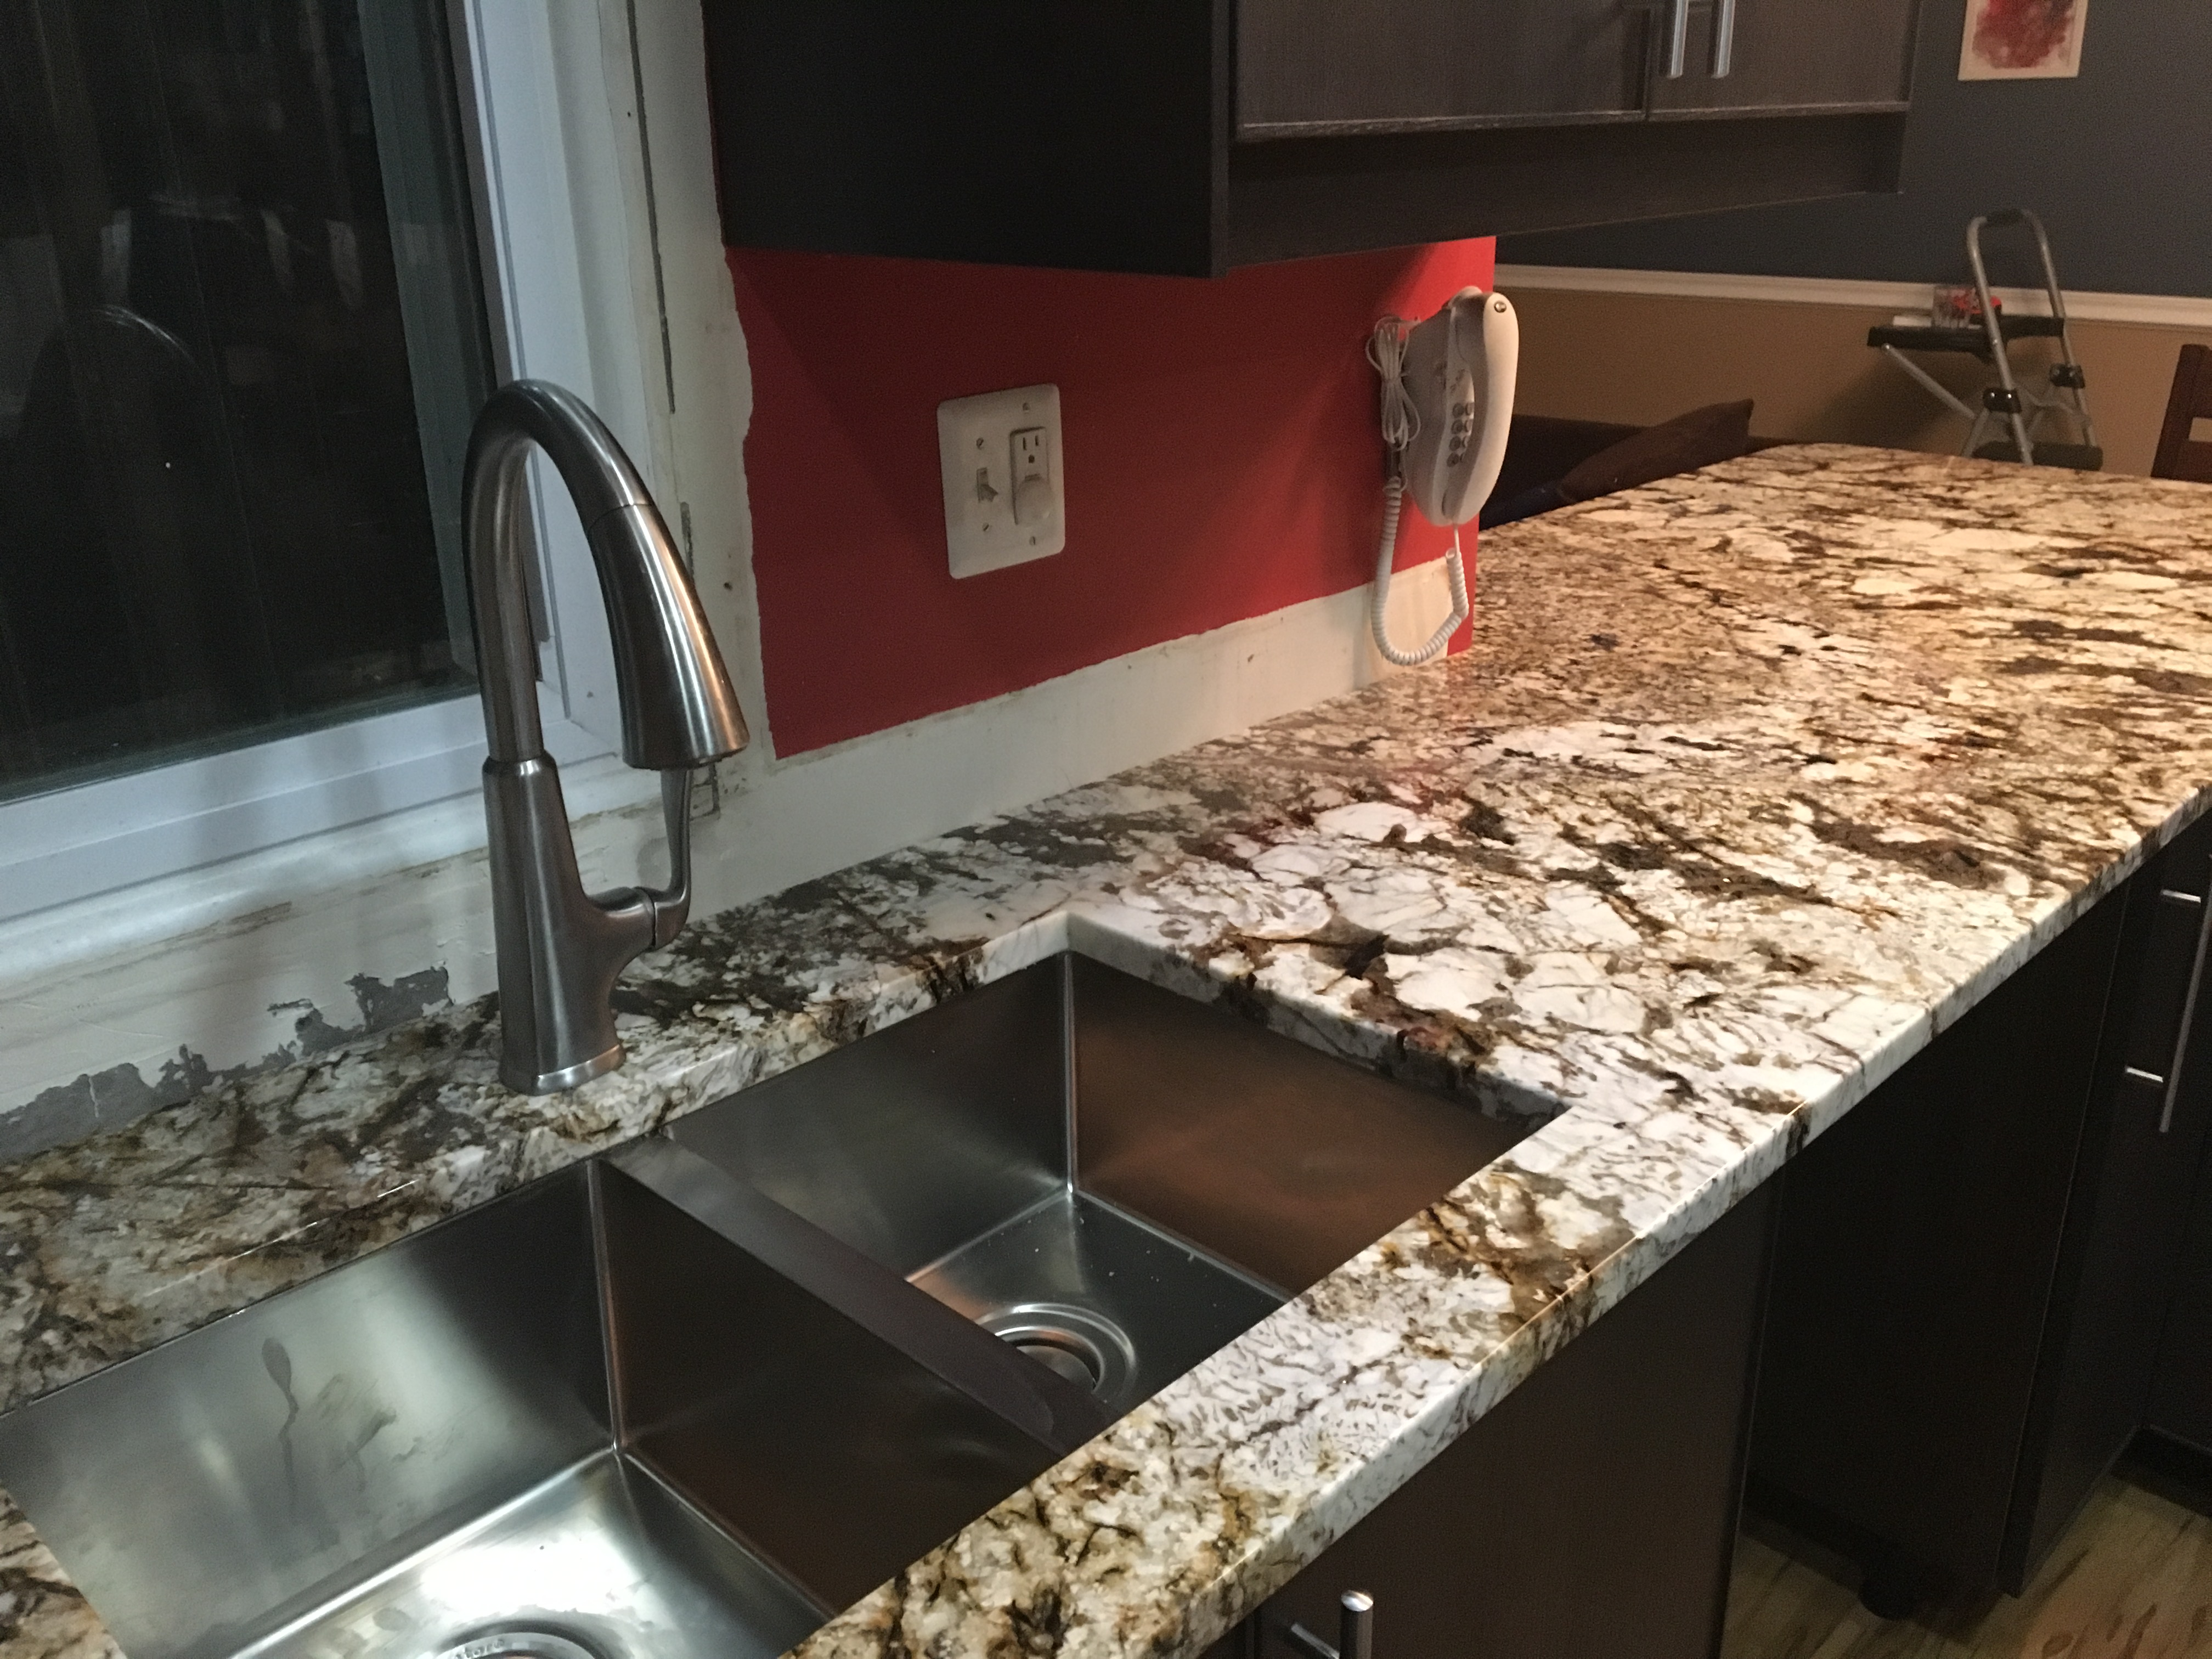
When you are picking your countertop be sure to ask about discounts on sinks. Some fabricators will throw in sinks heavily discounted. We found that we liked IKEA's sink better because it was bigger. I was willing to pay a little extra for that.
Upper Cabinets
We started with the upper cabinets. The kitchen originally didn't have any cabinet over the dishwasher. We added one:
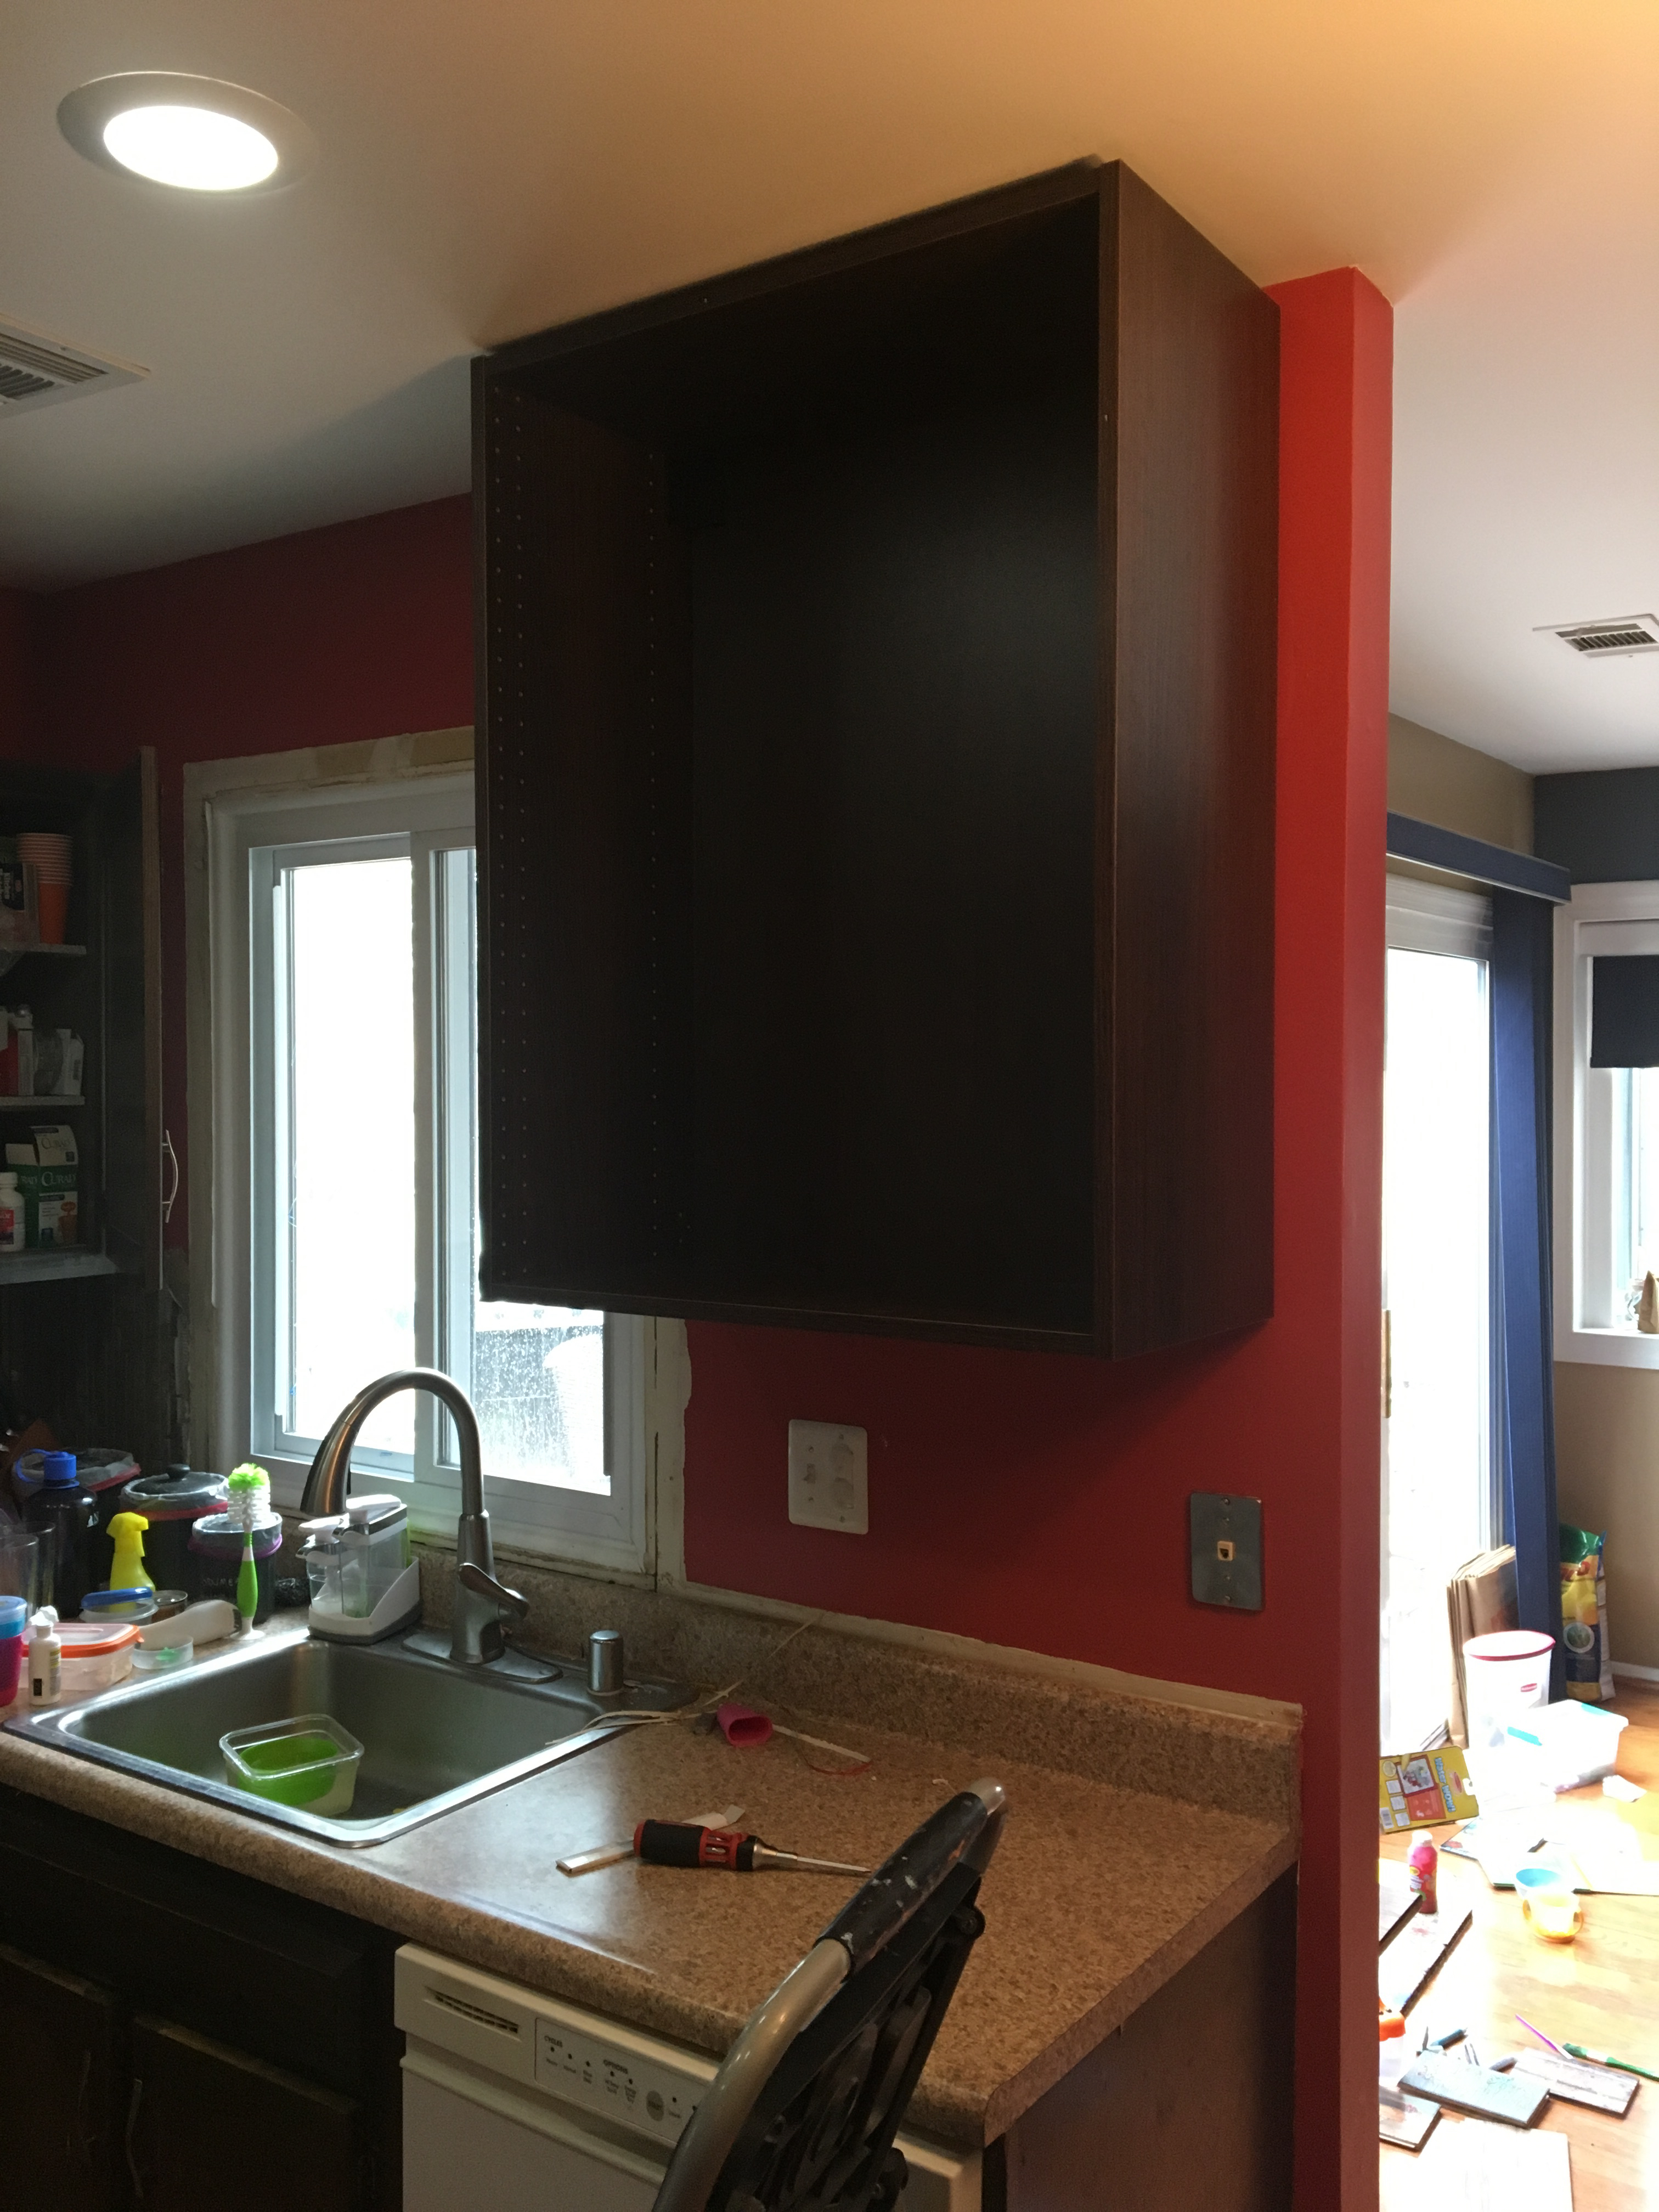
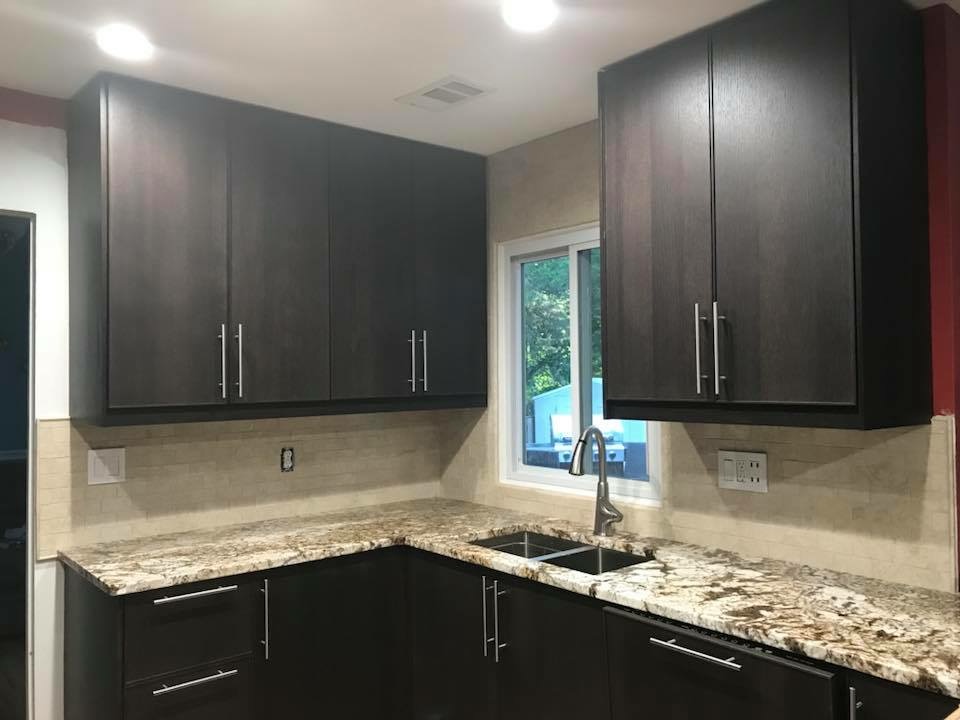
We moved to on replace the upper cabinets on the adjacent wall. During that process, we decided the rip out extra ¾" moulding that was around the kitchen window. We transferred everything that was in the two cabinets to the left of the sink into the new 42" cabinet. It's amazing how much we could fit in it.

In the picture above, you'll notice a different backsplash than the original photos. I started putting in that backsplash a few years after we moved in but before the kitchen renovation. I didn't end up liking it. It didn't last.
Here's one after the new cabinets were up:

Pantry & Fridge
Next we moved to replacing the pantry. The right wall of the pantry was getting removed and the bifold door removed:

You'll notice the yellow wire at the top of the pantry. I did that to literally cut a corner when I put in three way switches a year or so earlier. I fixed that up so it was routed properly through the studs.
While ripping out the pantry, I discovered exactly how many layers of flooring have been installed in this house:


Fake brick flooring? How was that a thing?
Installing the pantry was a challenge because it was so tall. But we did it. There's one shelf right in the middle for structural purposes that can't be moved or repositioned:
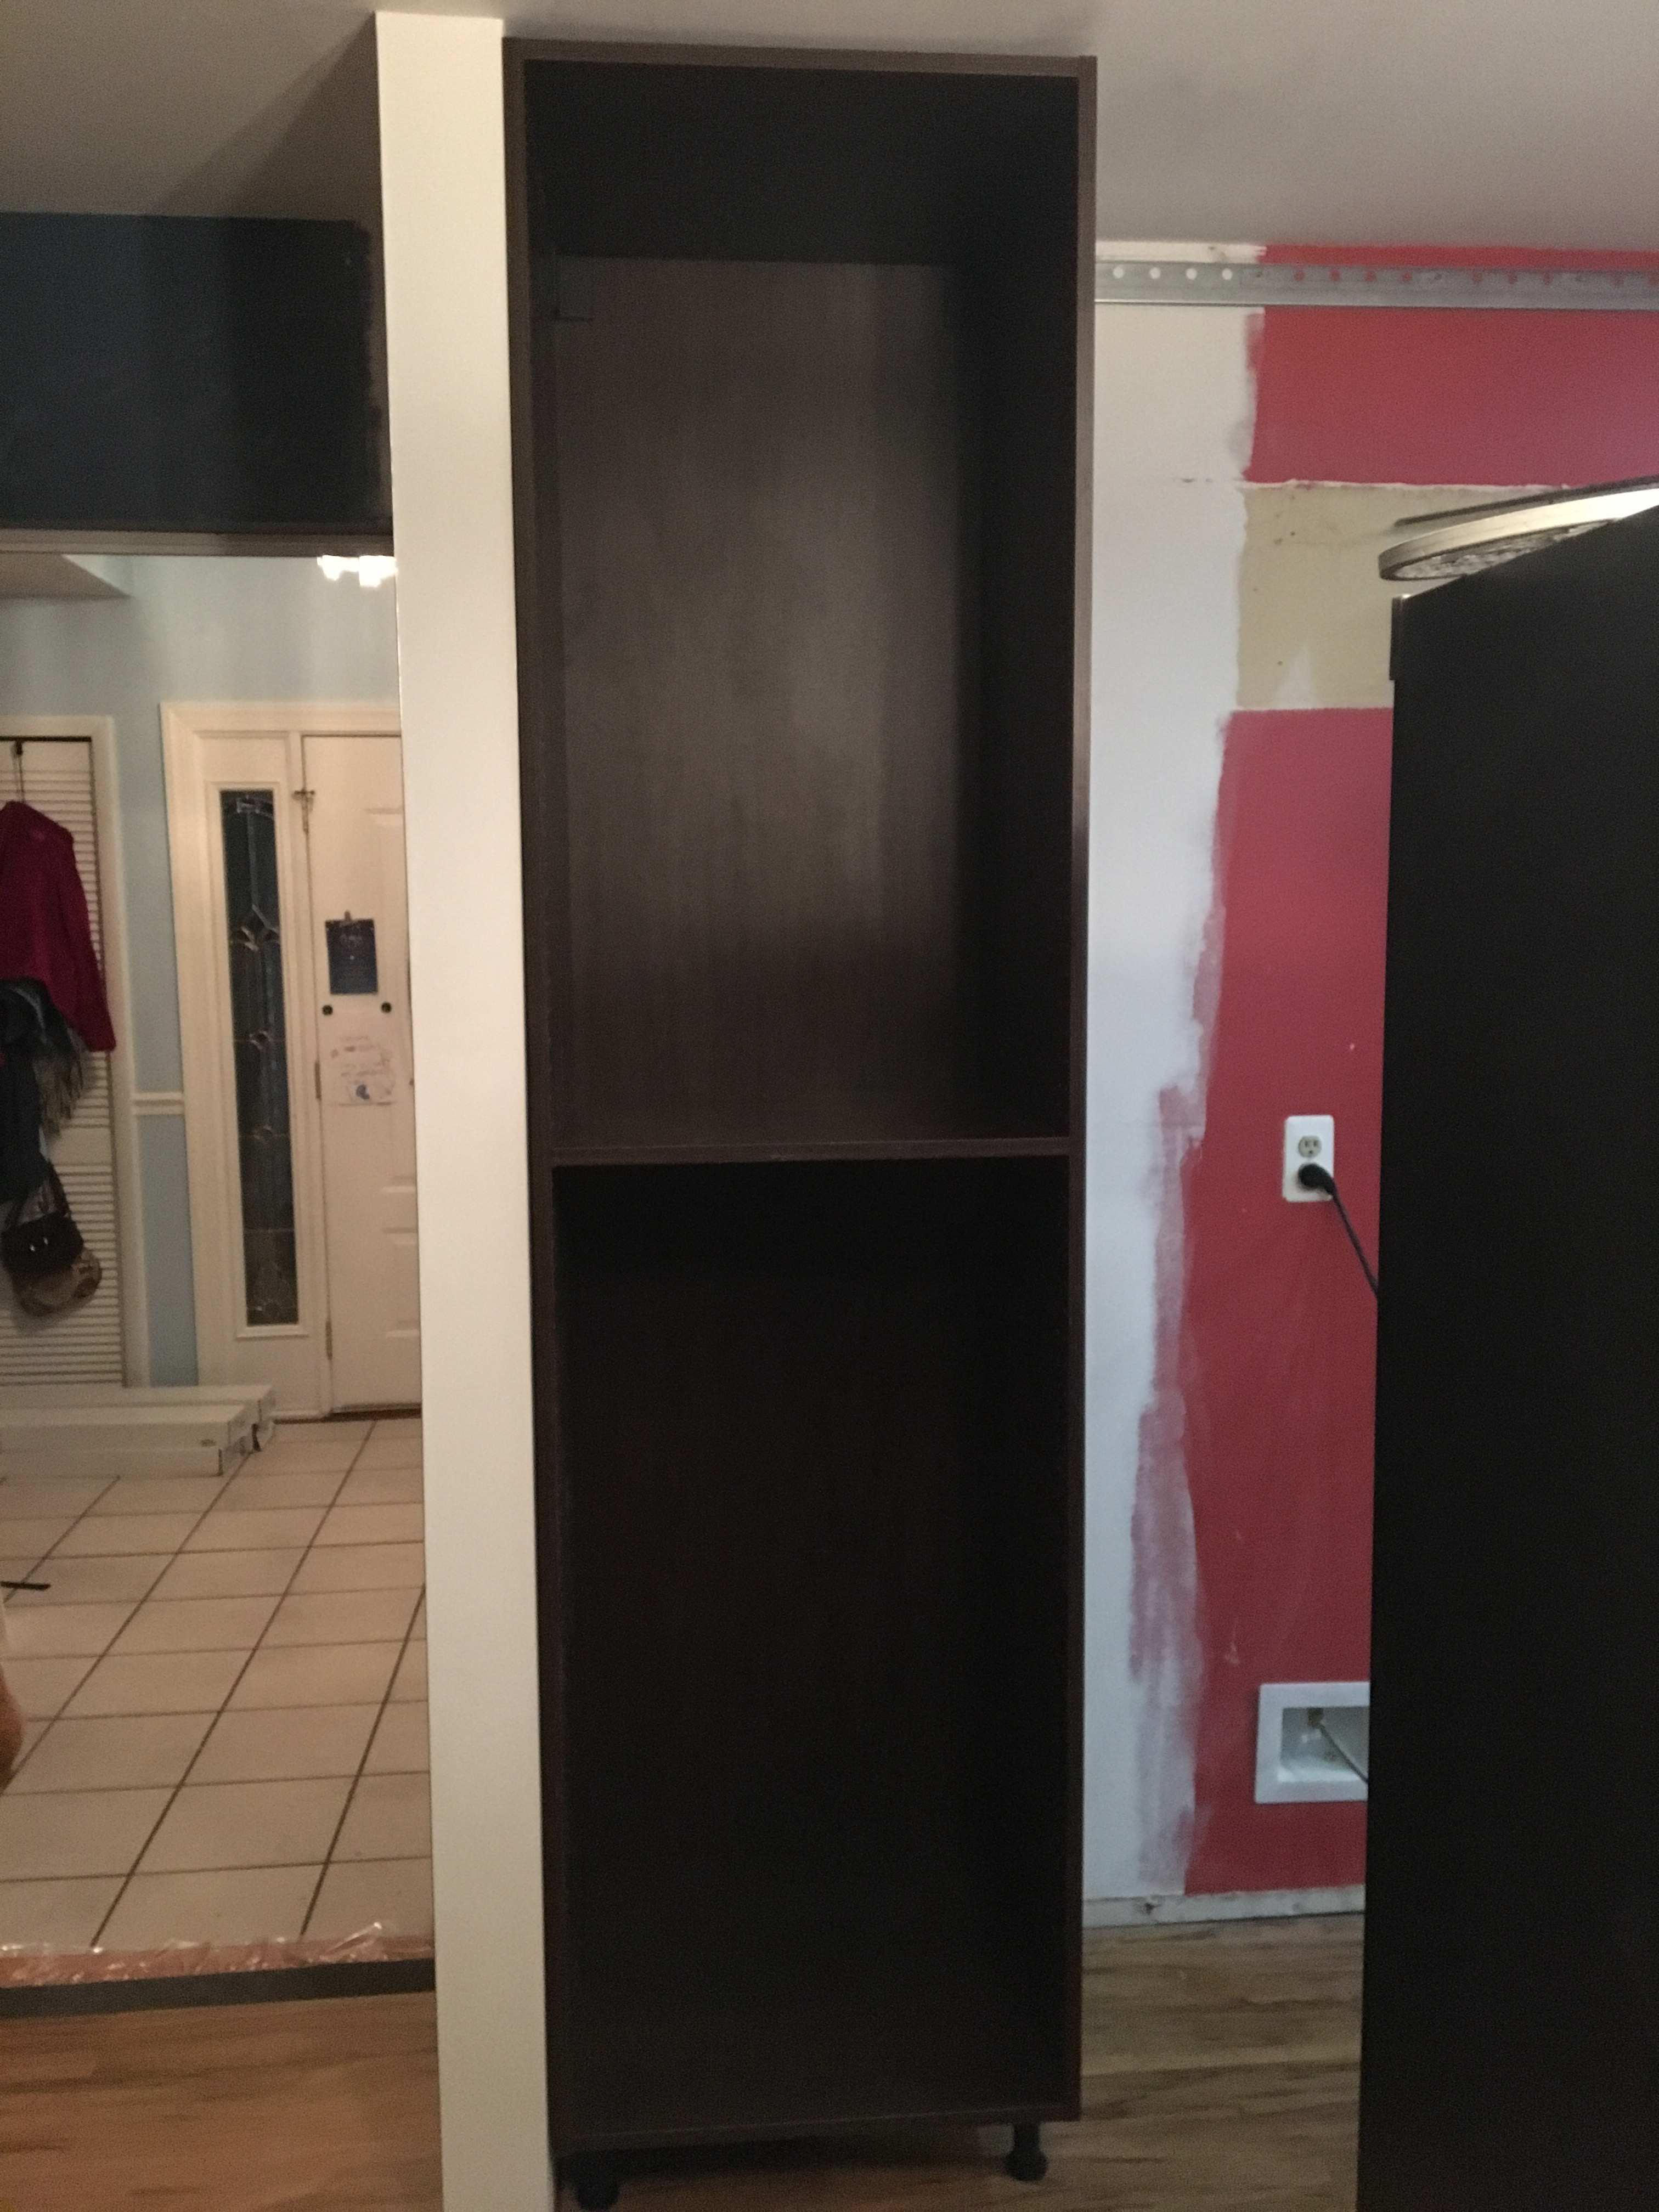
While replacing the pantry, we also shifted the left wall back 6" to align with the end of the new pantry cabinet. In the picture above, you can see the rail near the ceiling. That is the rail used to hang the cabinets. It's crucial to get that rail level. Having a four or eight foot level is best. We did it with a foot foot level.
After installing the pantry cabinet, we slid the fridge into place and moved our way to the right installing cabinets. We could have installed a full depth cabinet above the fridge, but they are so heavy that IKEA requires a full height panel be installed going to the floor on either side of the fridge. The spacing was tight for us, so we opted for a standard depth cabinet (24" deep) above the fridge. It looks fine.
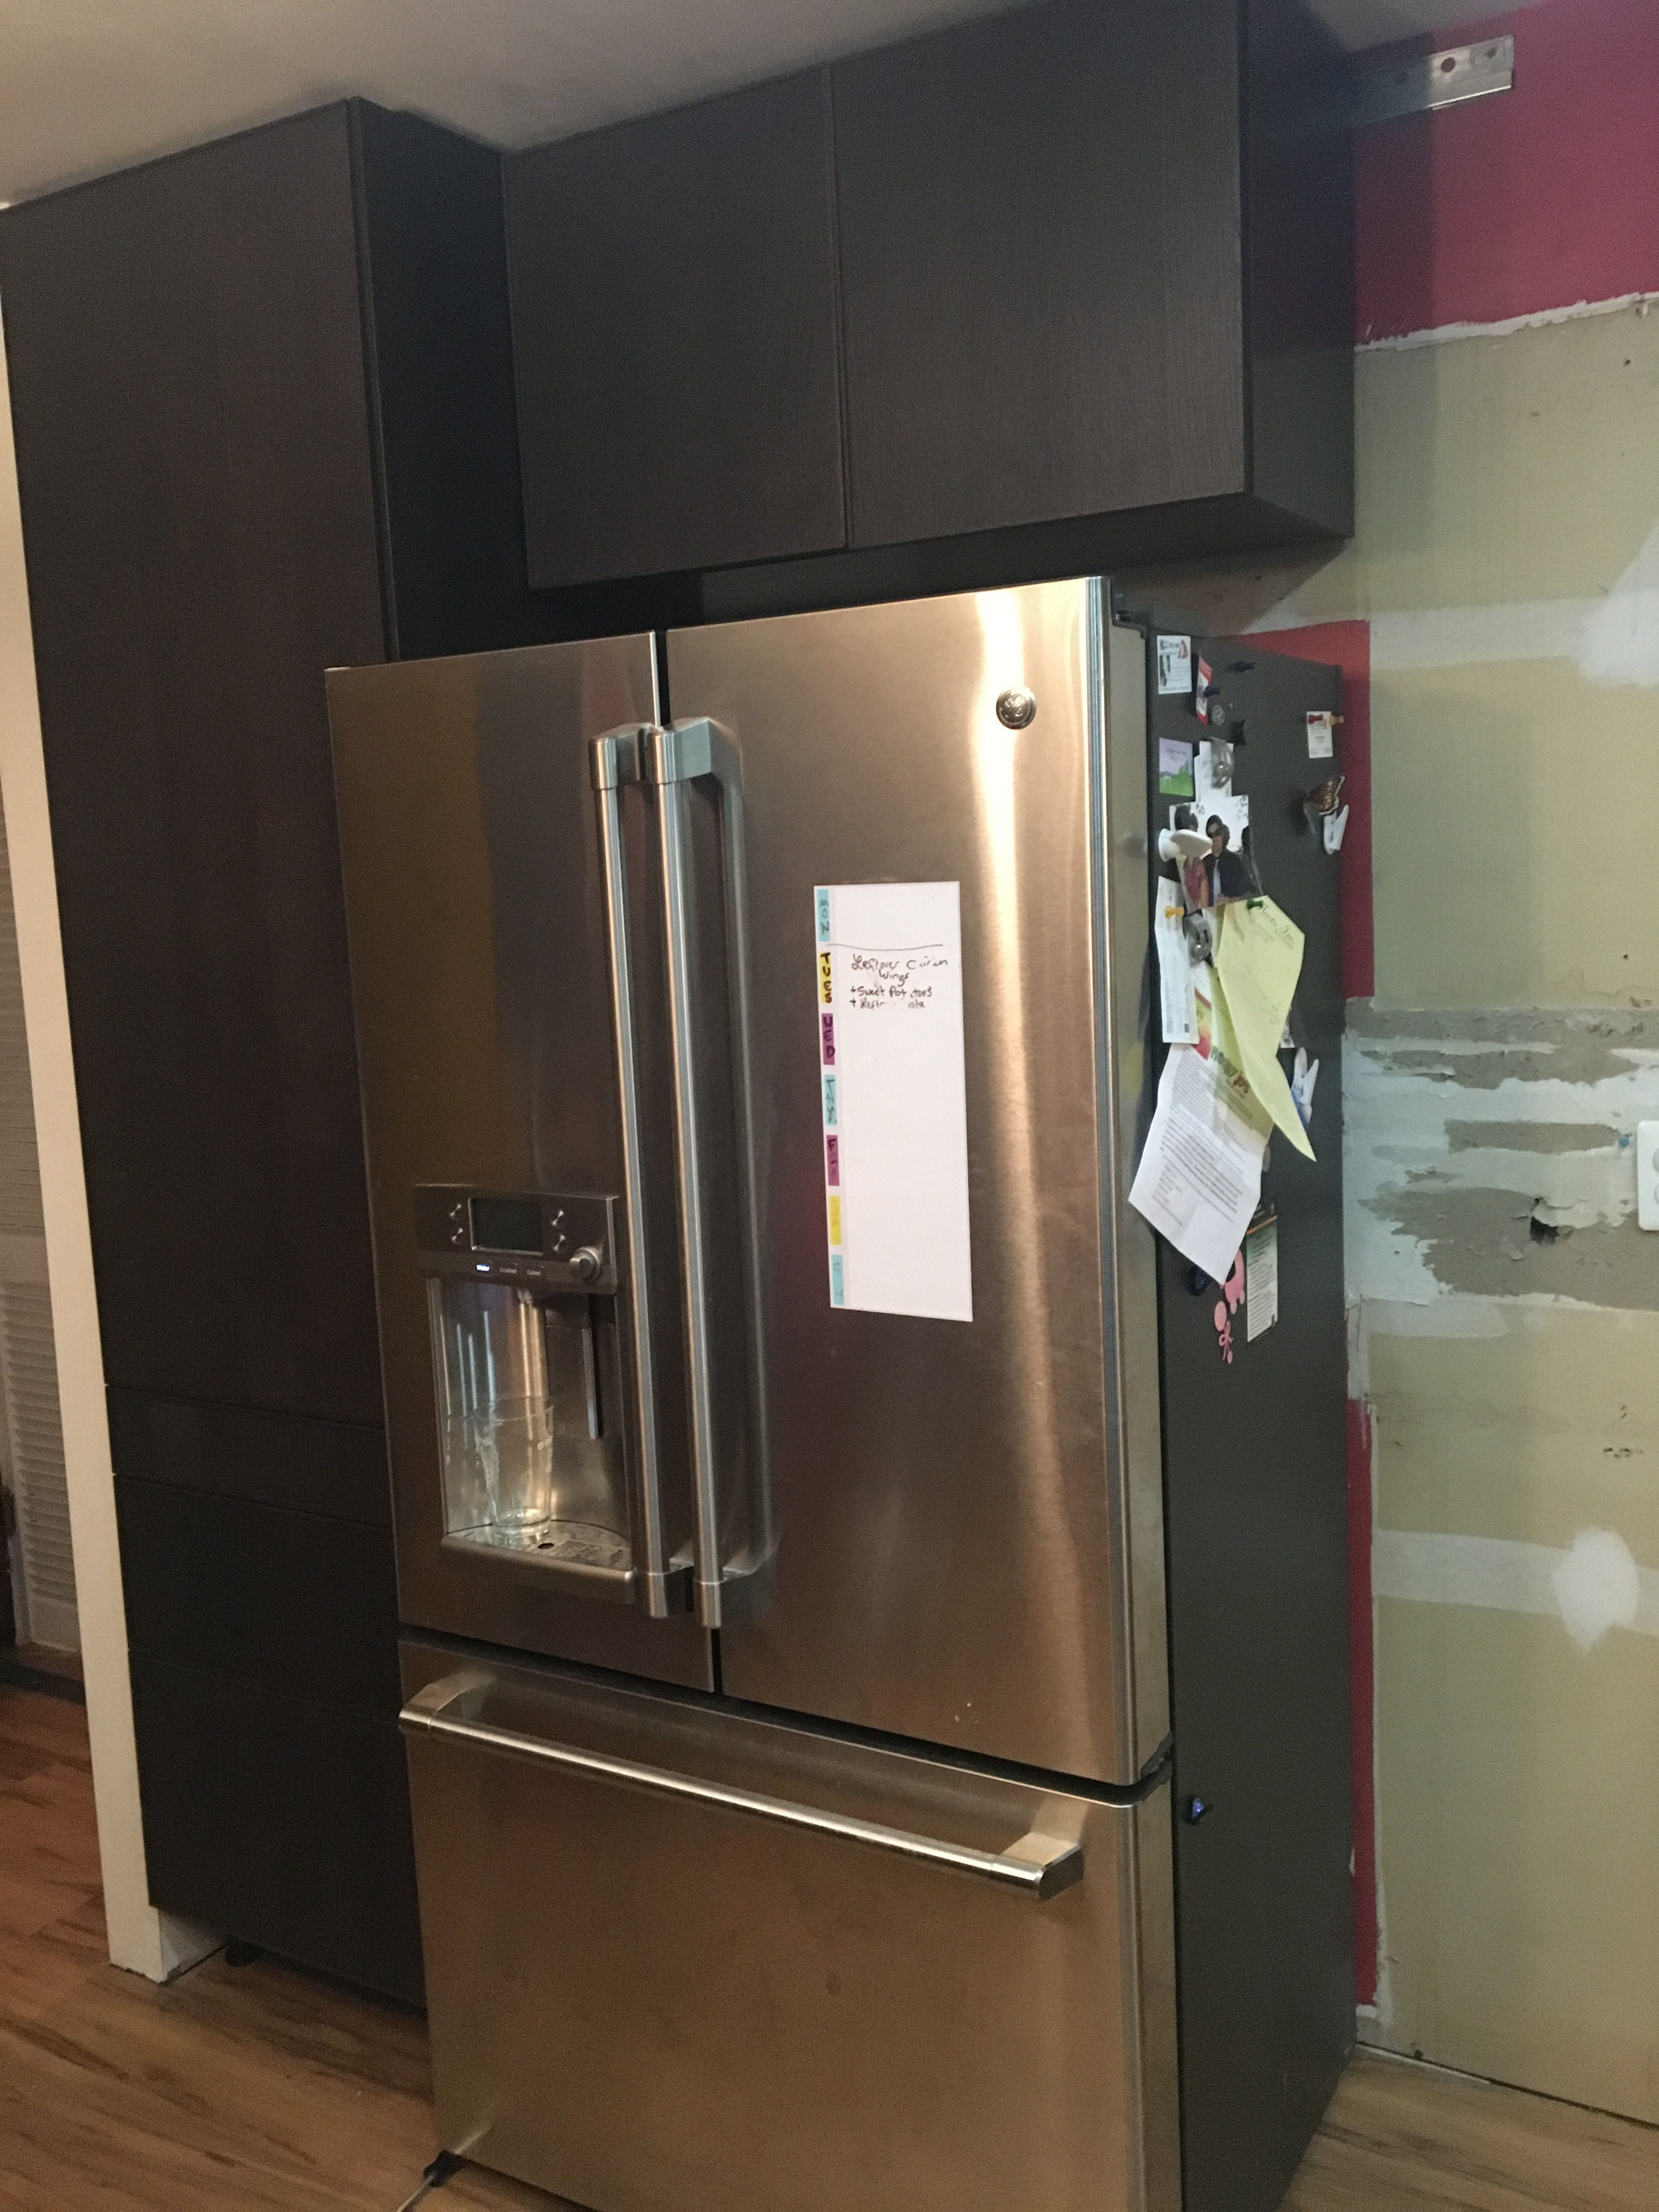
To fit the fridge in, I had to remove the cabinets to the right of the fridge. We moved everything from those cabinets into the pantry. The picture above shows the cabinets with the doors on but no handles. Already looking more modern. The new flooring is also installed.
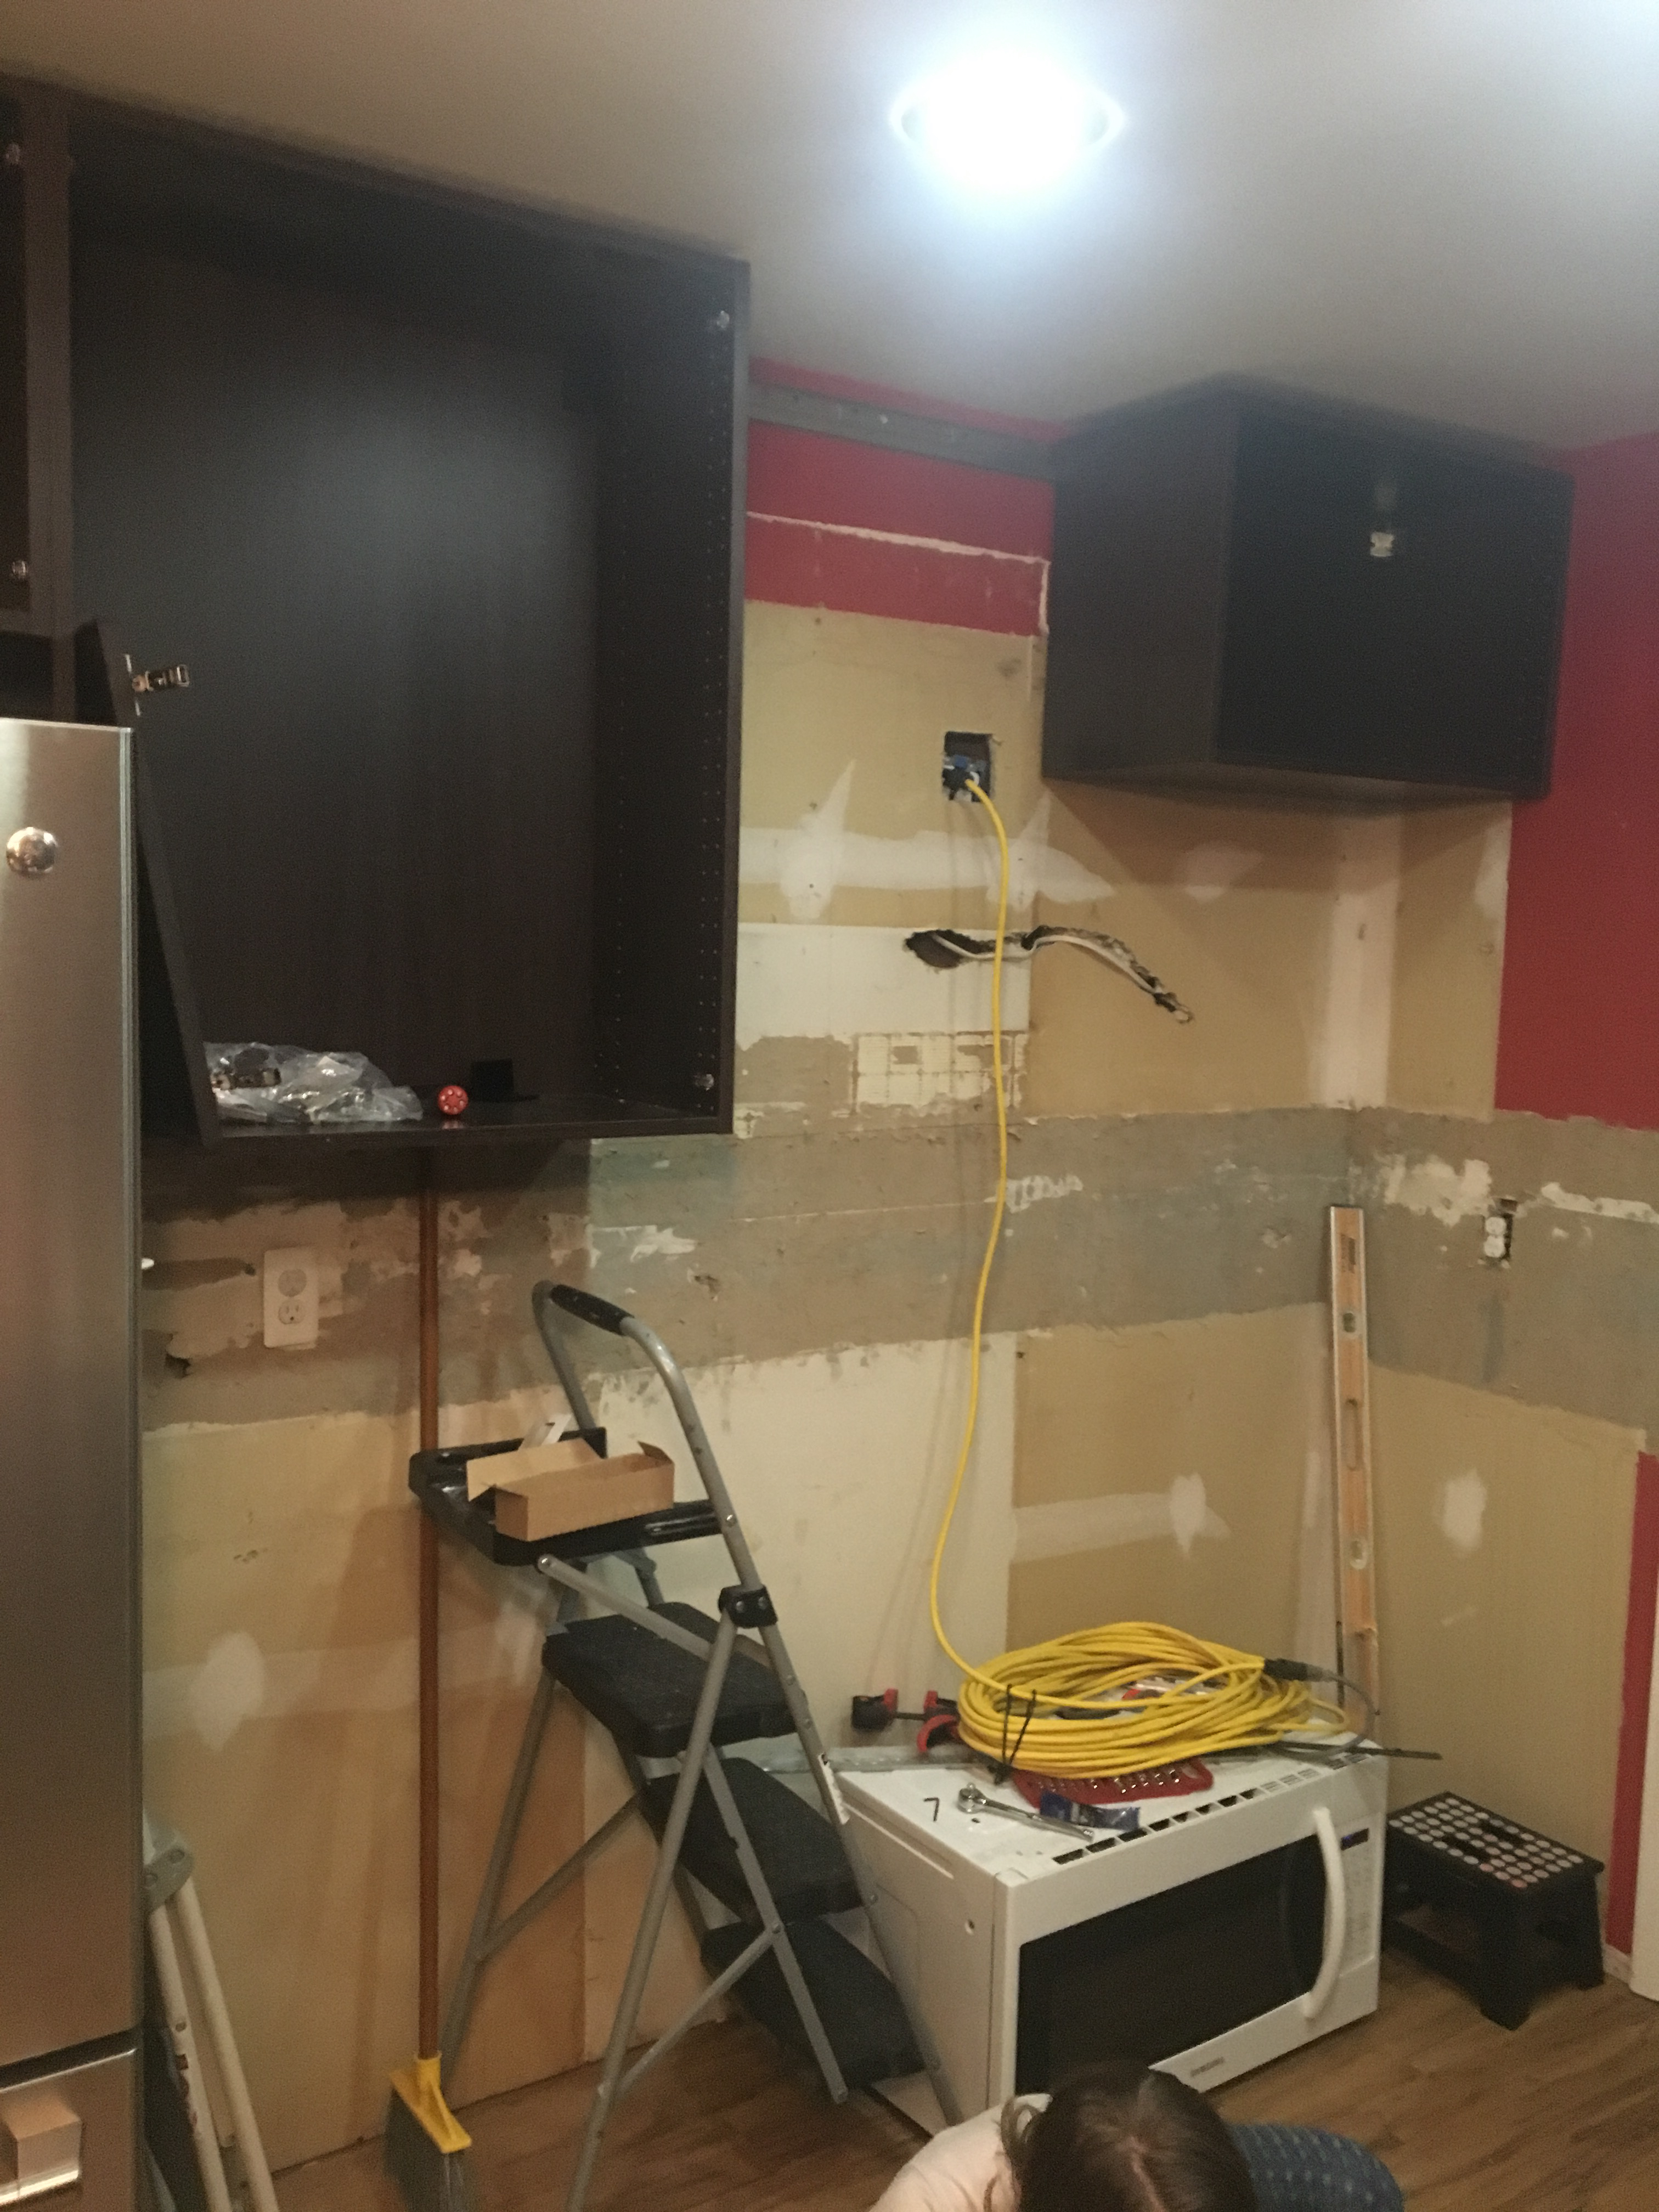
When I took down the cabinet to the right of the stove, I discovered the previous owner had cut out part of the drywall for a power wire so he didn't have to drill through the stud to get power for a microwave. Since I had run a 20 amp circuit when I installed the 3-way switches a year earlier, I simply pulled that wire down so there was a new (much needed) outlet to the right of the stove.
The short cabinet here is pushed to the right so I could work on the electrical part:
Plumbing
Before ripping out your kitchen sink, prepare yourself for washing dishes in the bathroom for a while. We washed our dishes in the bathroom sink for several months because I didn't take vacation to work on the kitchen. It was all at night and on the weekend.
There had always been a draft under our kitchen sink. I assumed it was poor insulation. I was right. Not only had it broken down in the past 40 years, but there was a gaping hole where there was zero insulation. We had a professional rerun the drain line through the wall instead of through the cabinets, then I ripped out the old insulation and put new stuff in. No more drafts!

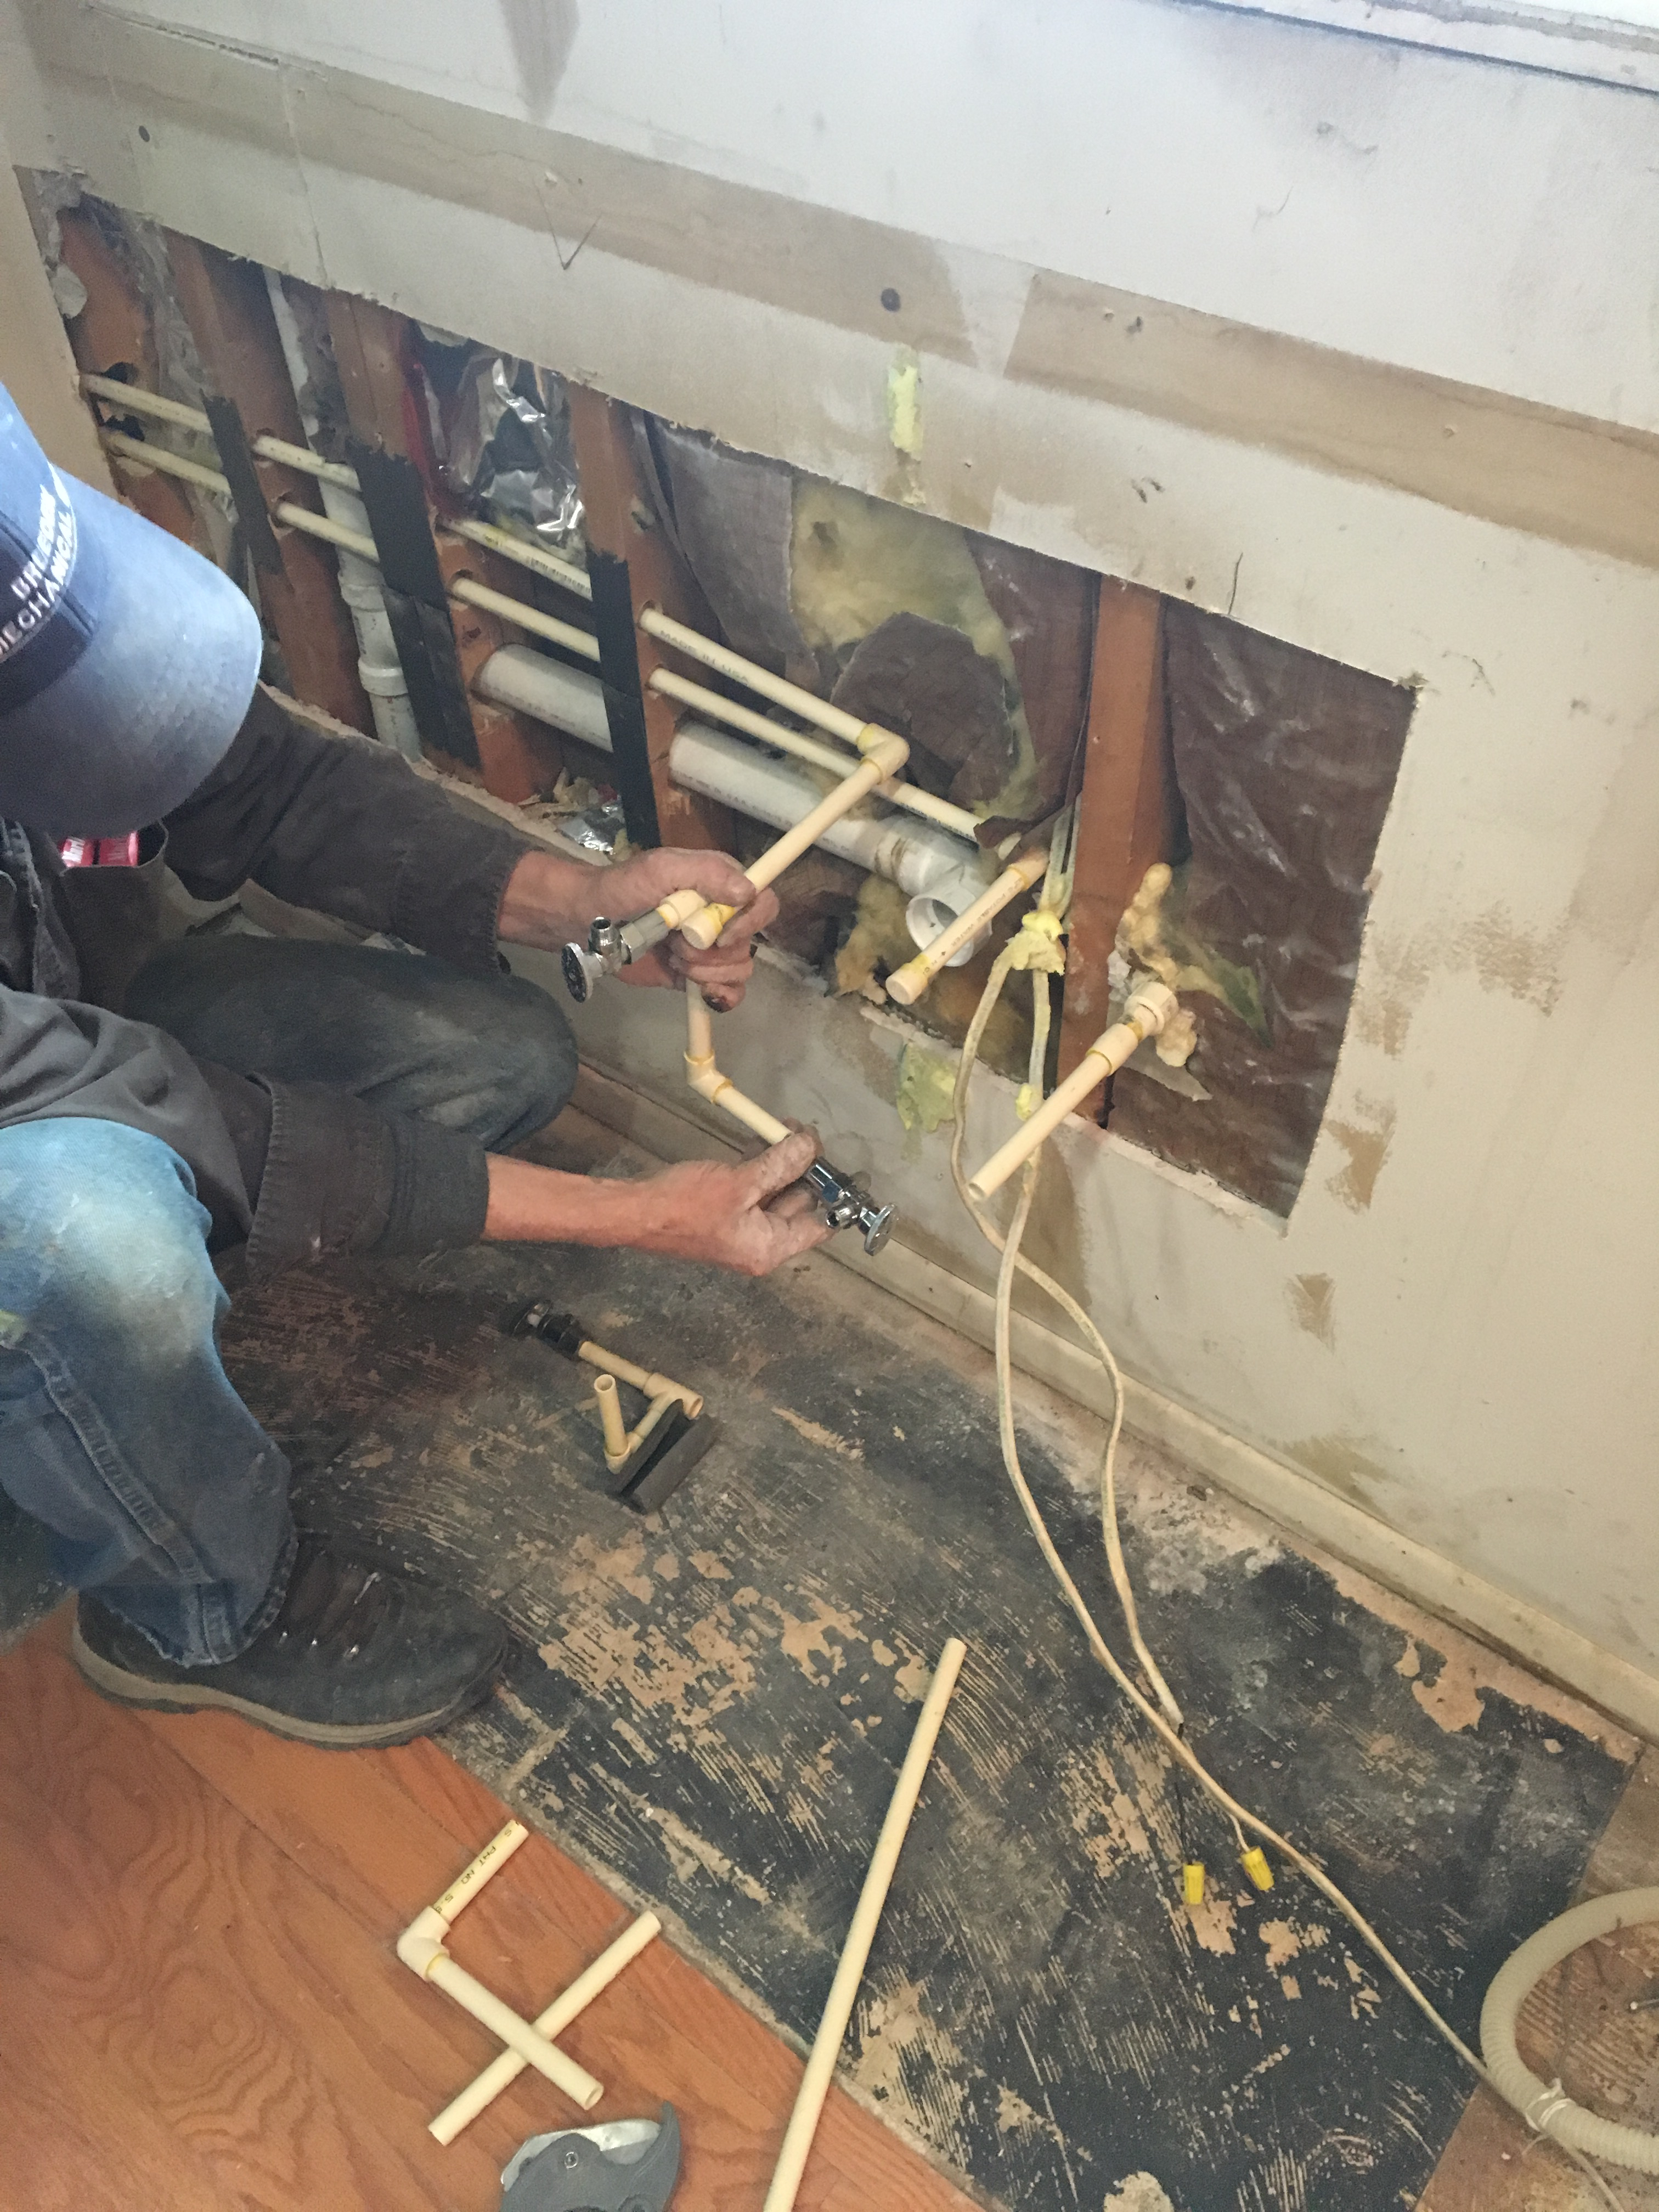
I ripped out all the old insulation and stuffed it. No more drafts! I probably put too much insulation, but I didn't want any more drafts.
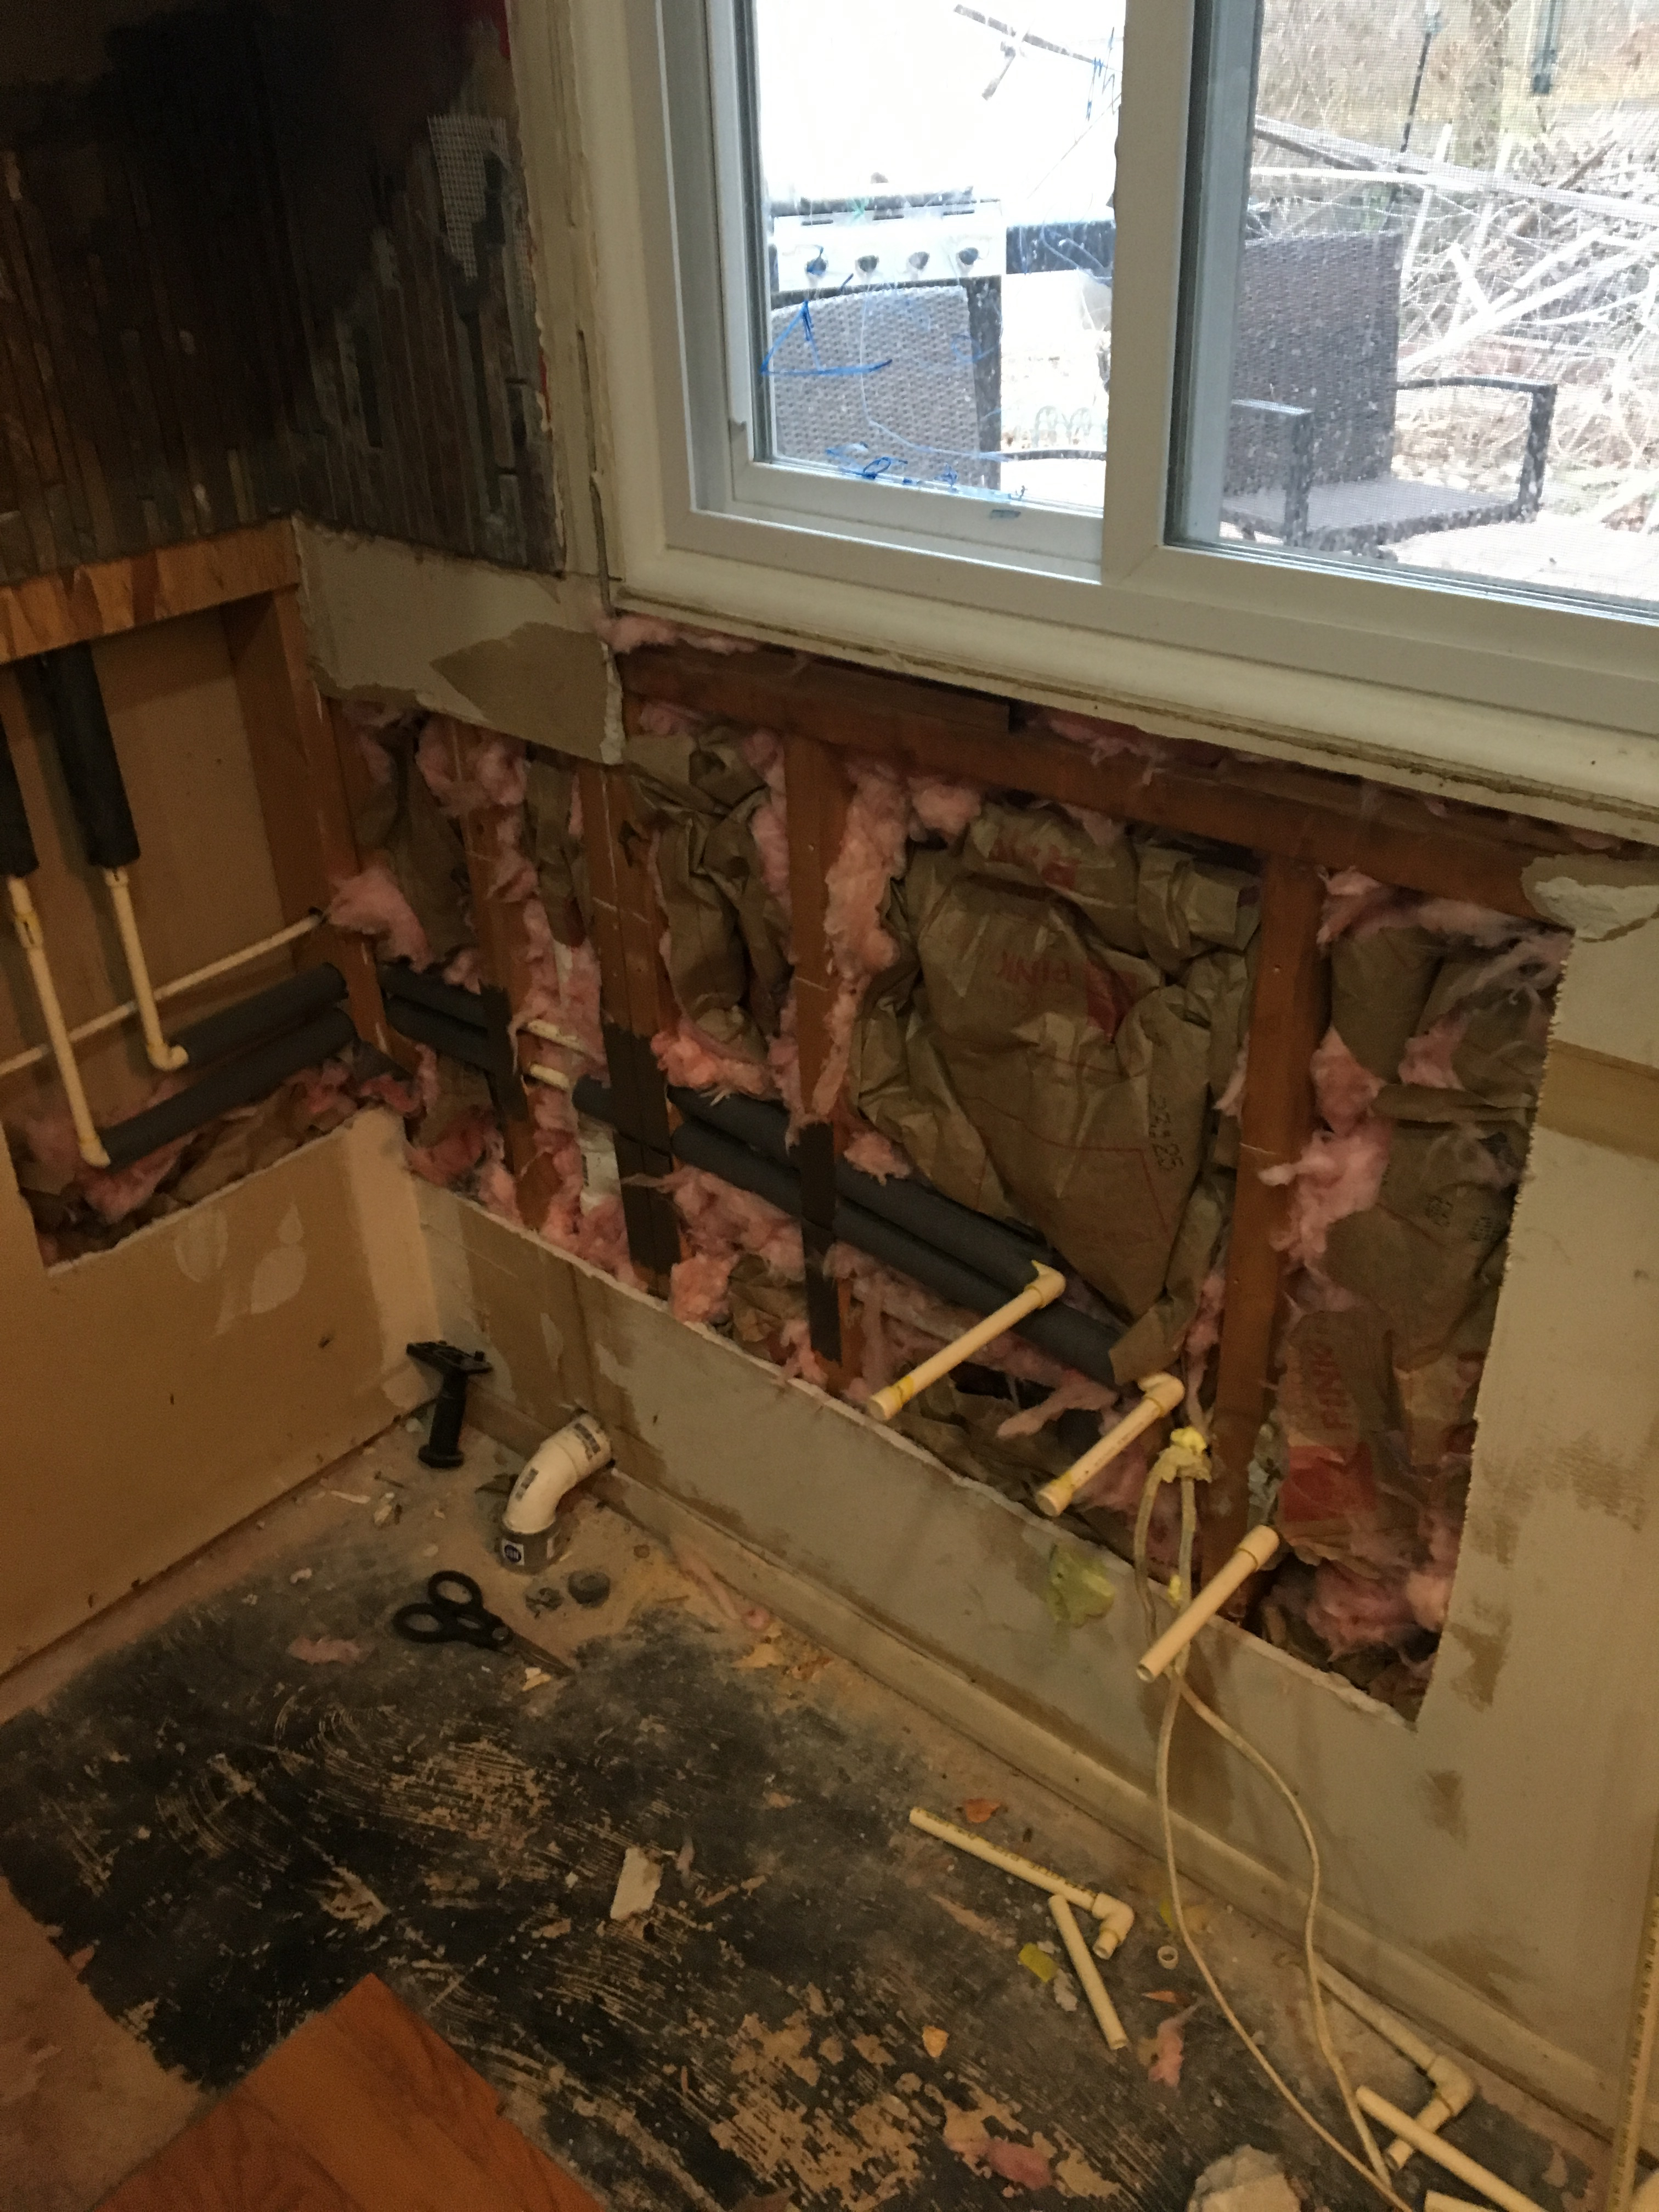
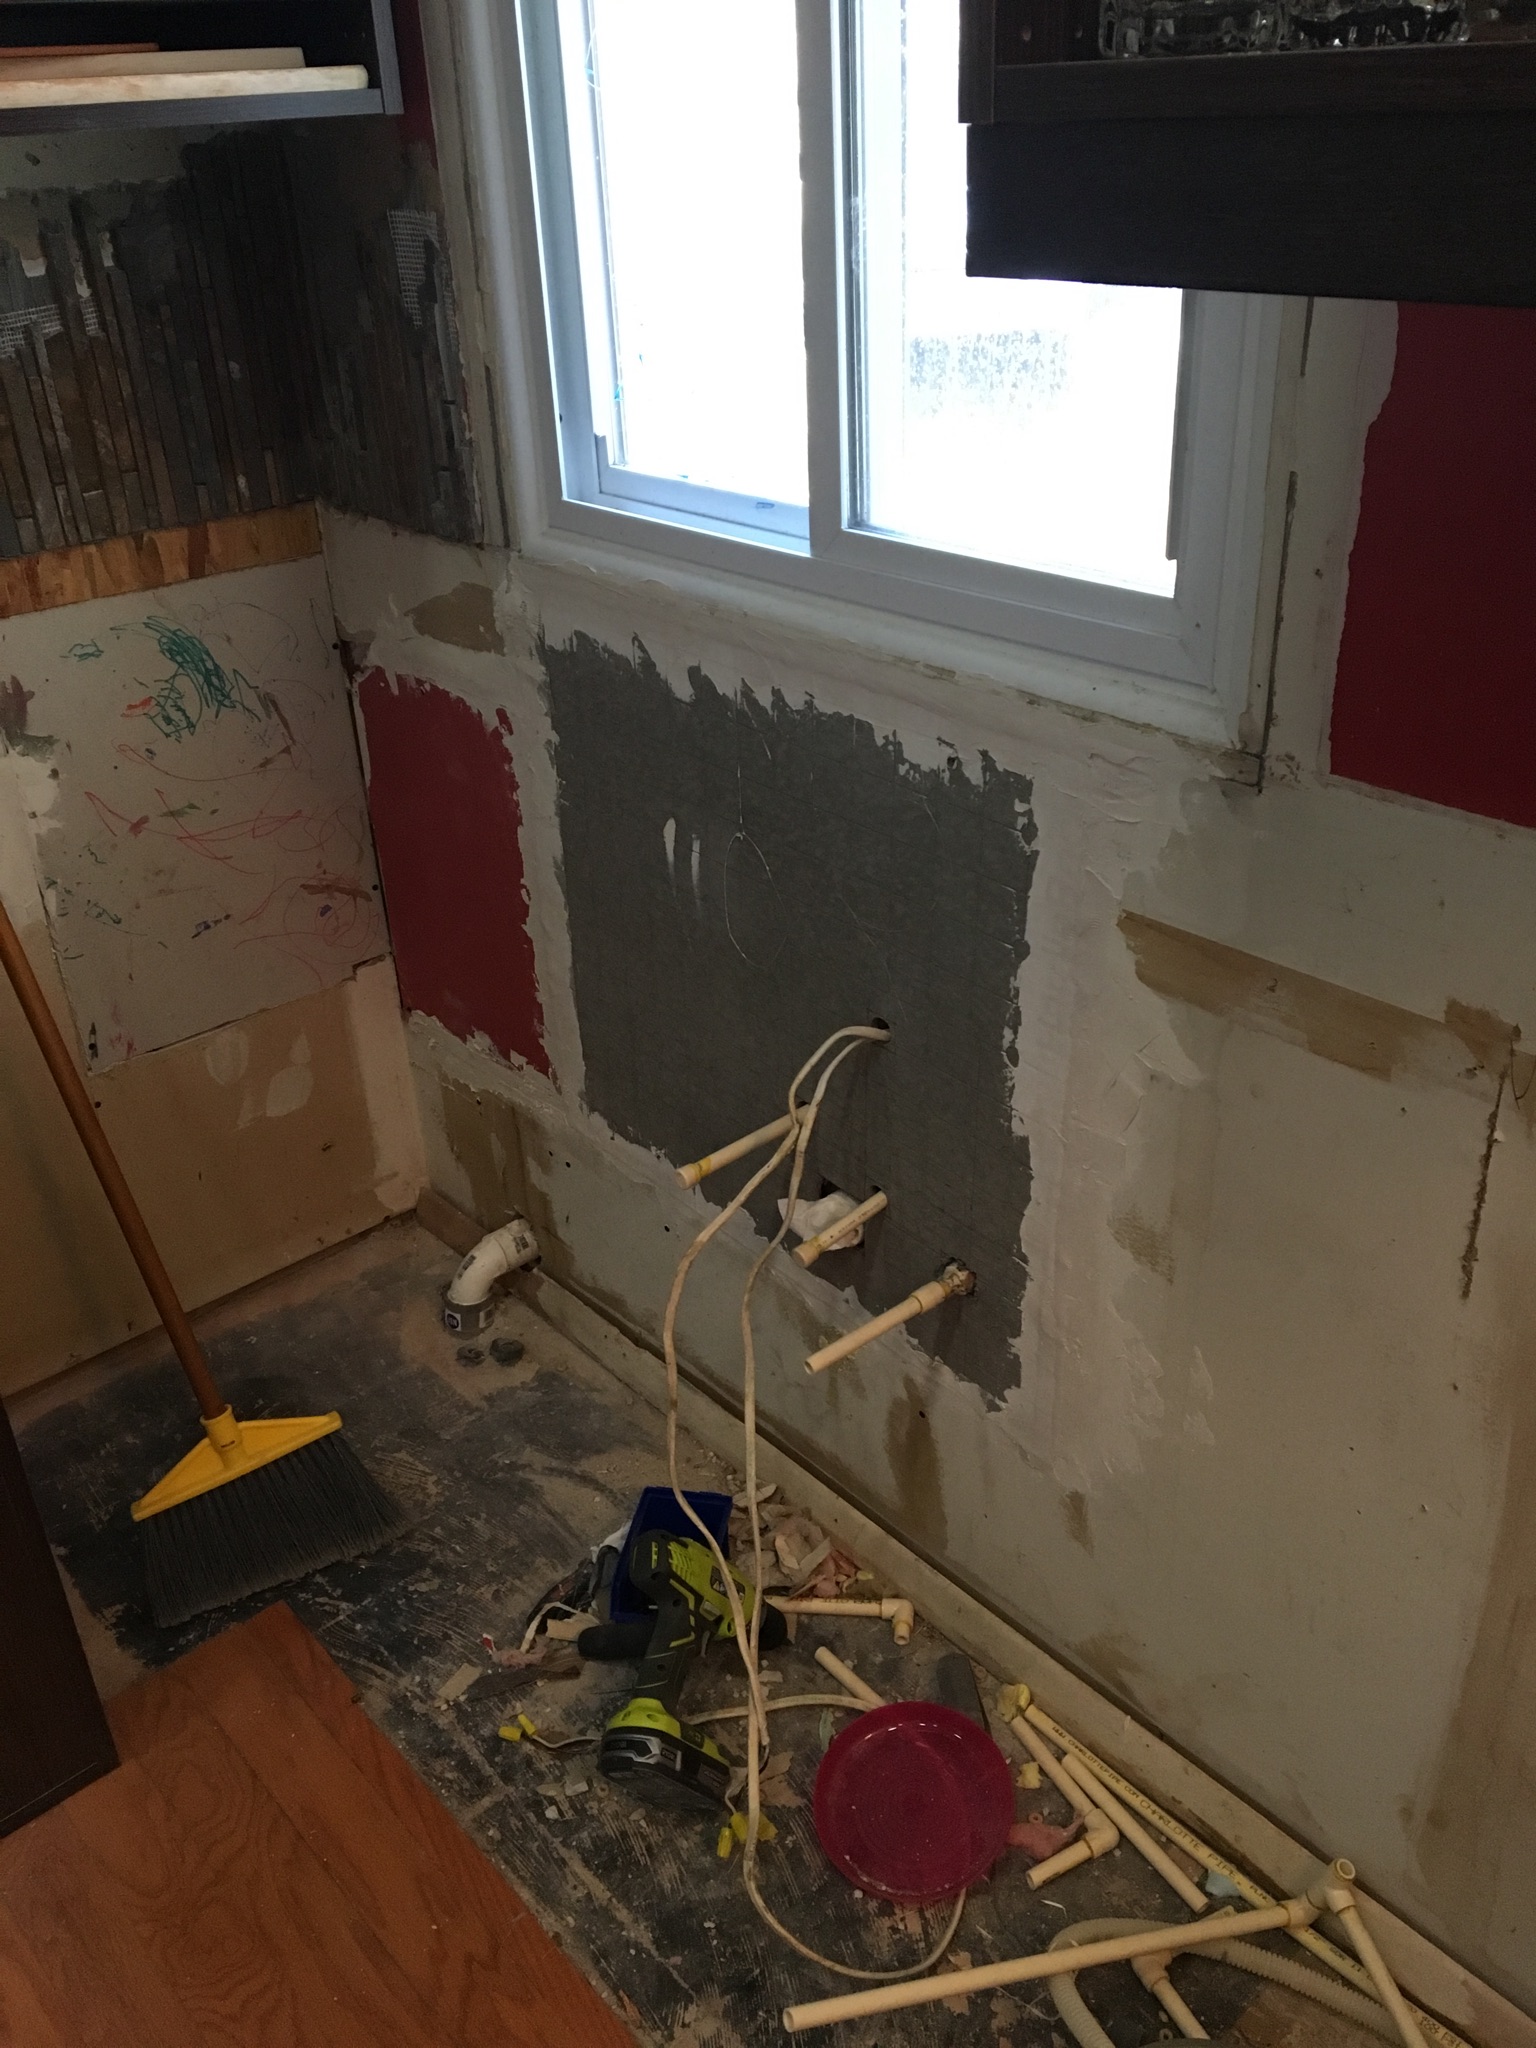
In the picture above, you can see the drain pipe going into the foundation. It used to come directly out of the ground, up one foot, and then over to the sink. We made it go through the wall so we could use that space for cabinets. Since the cabinets sit 6" off the ground, the pipe totally cleared touching the cabinet.
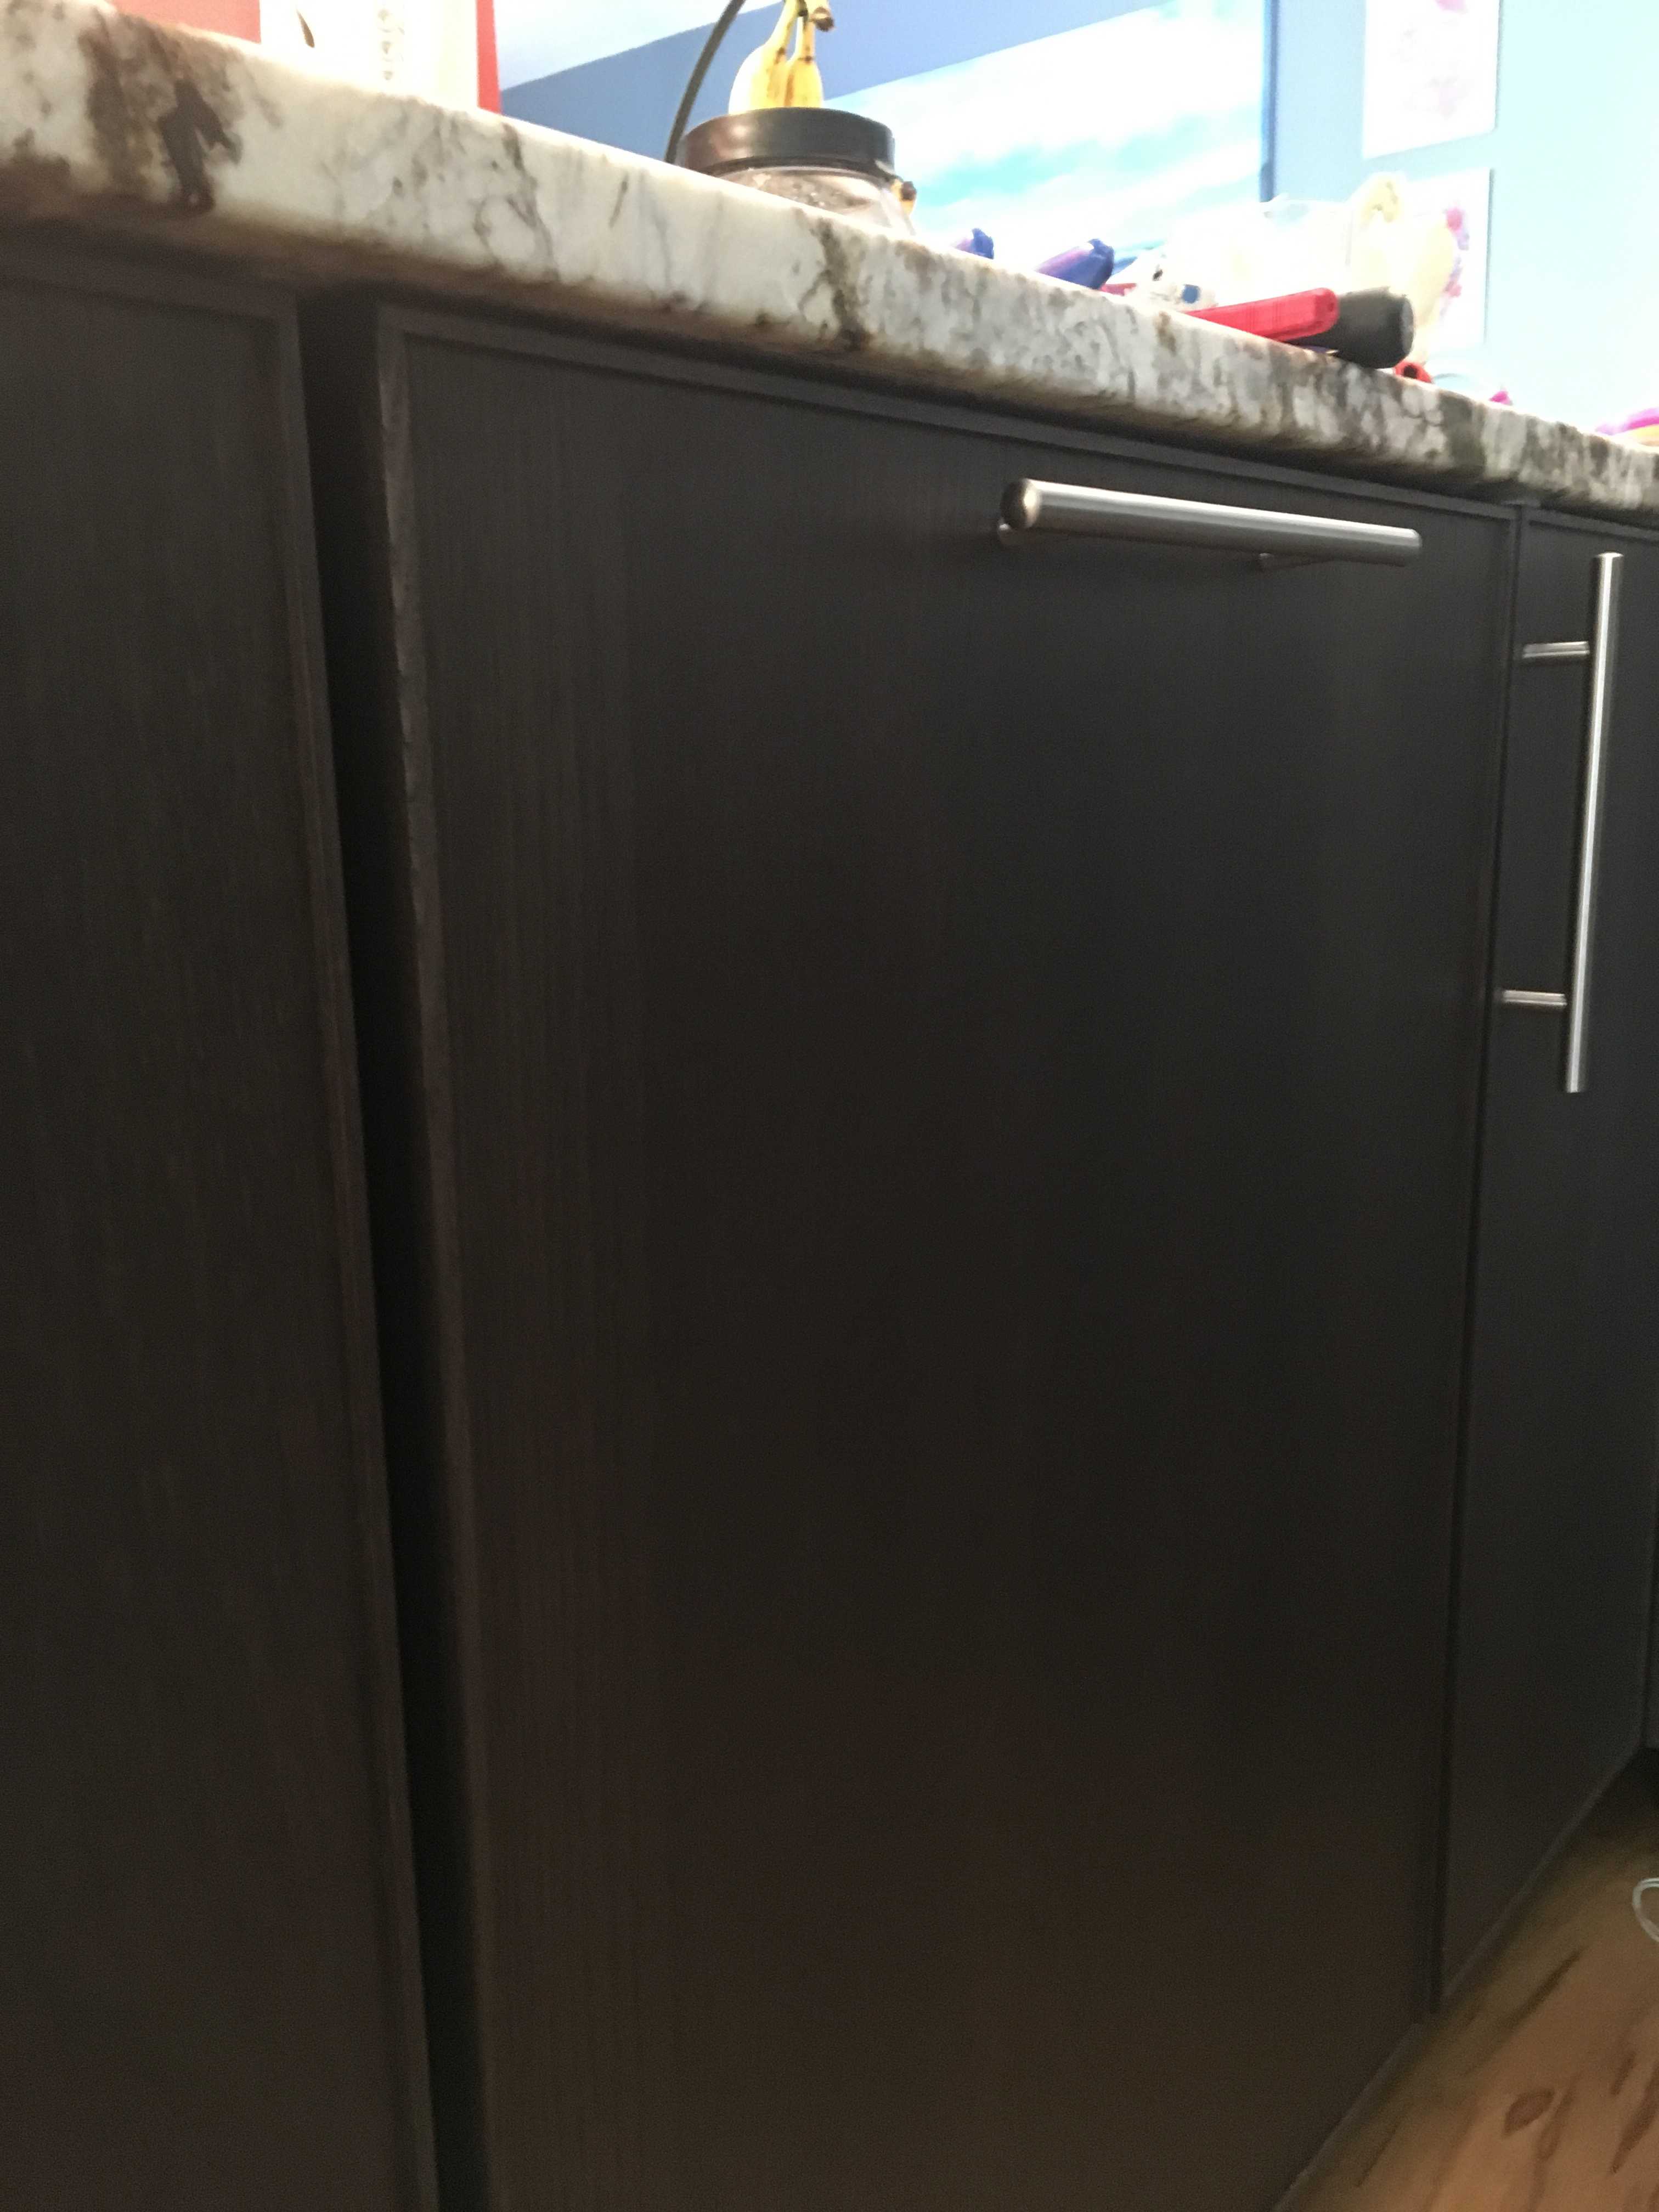
Lower Cabinets
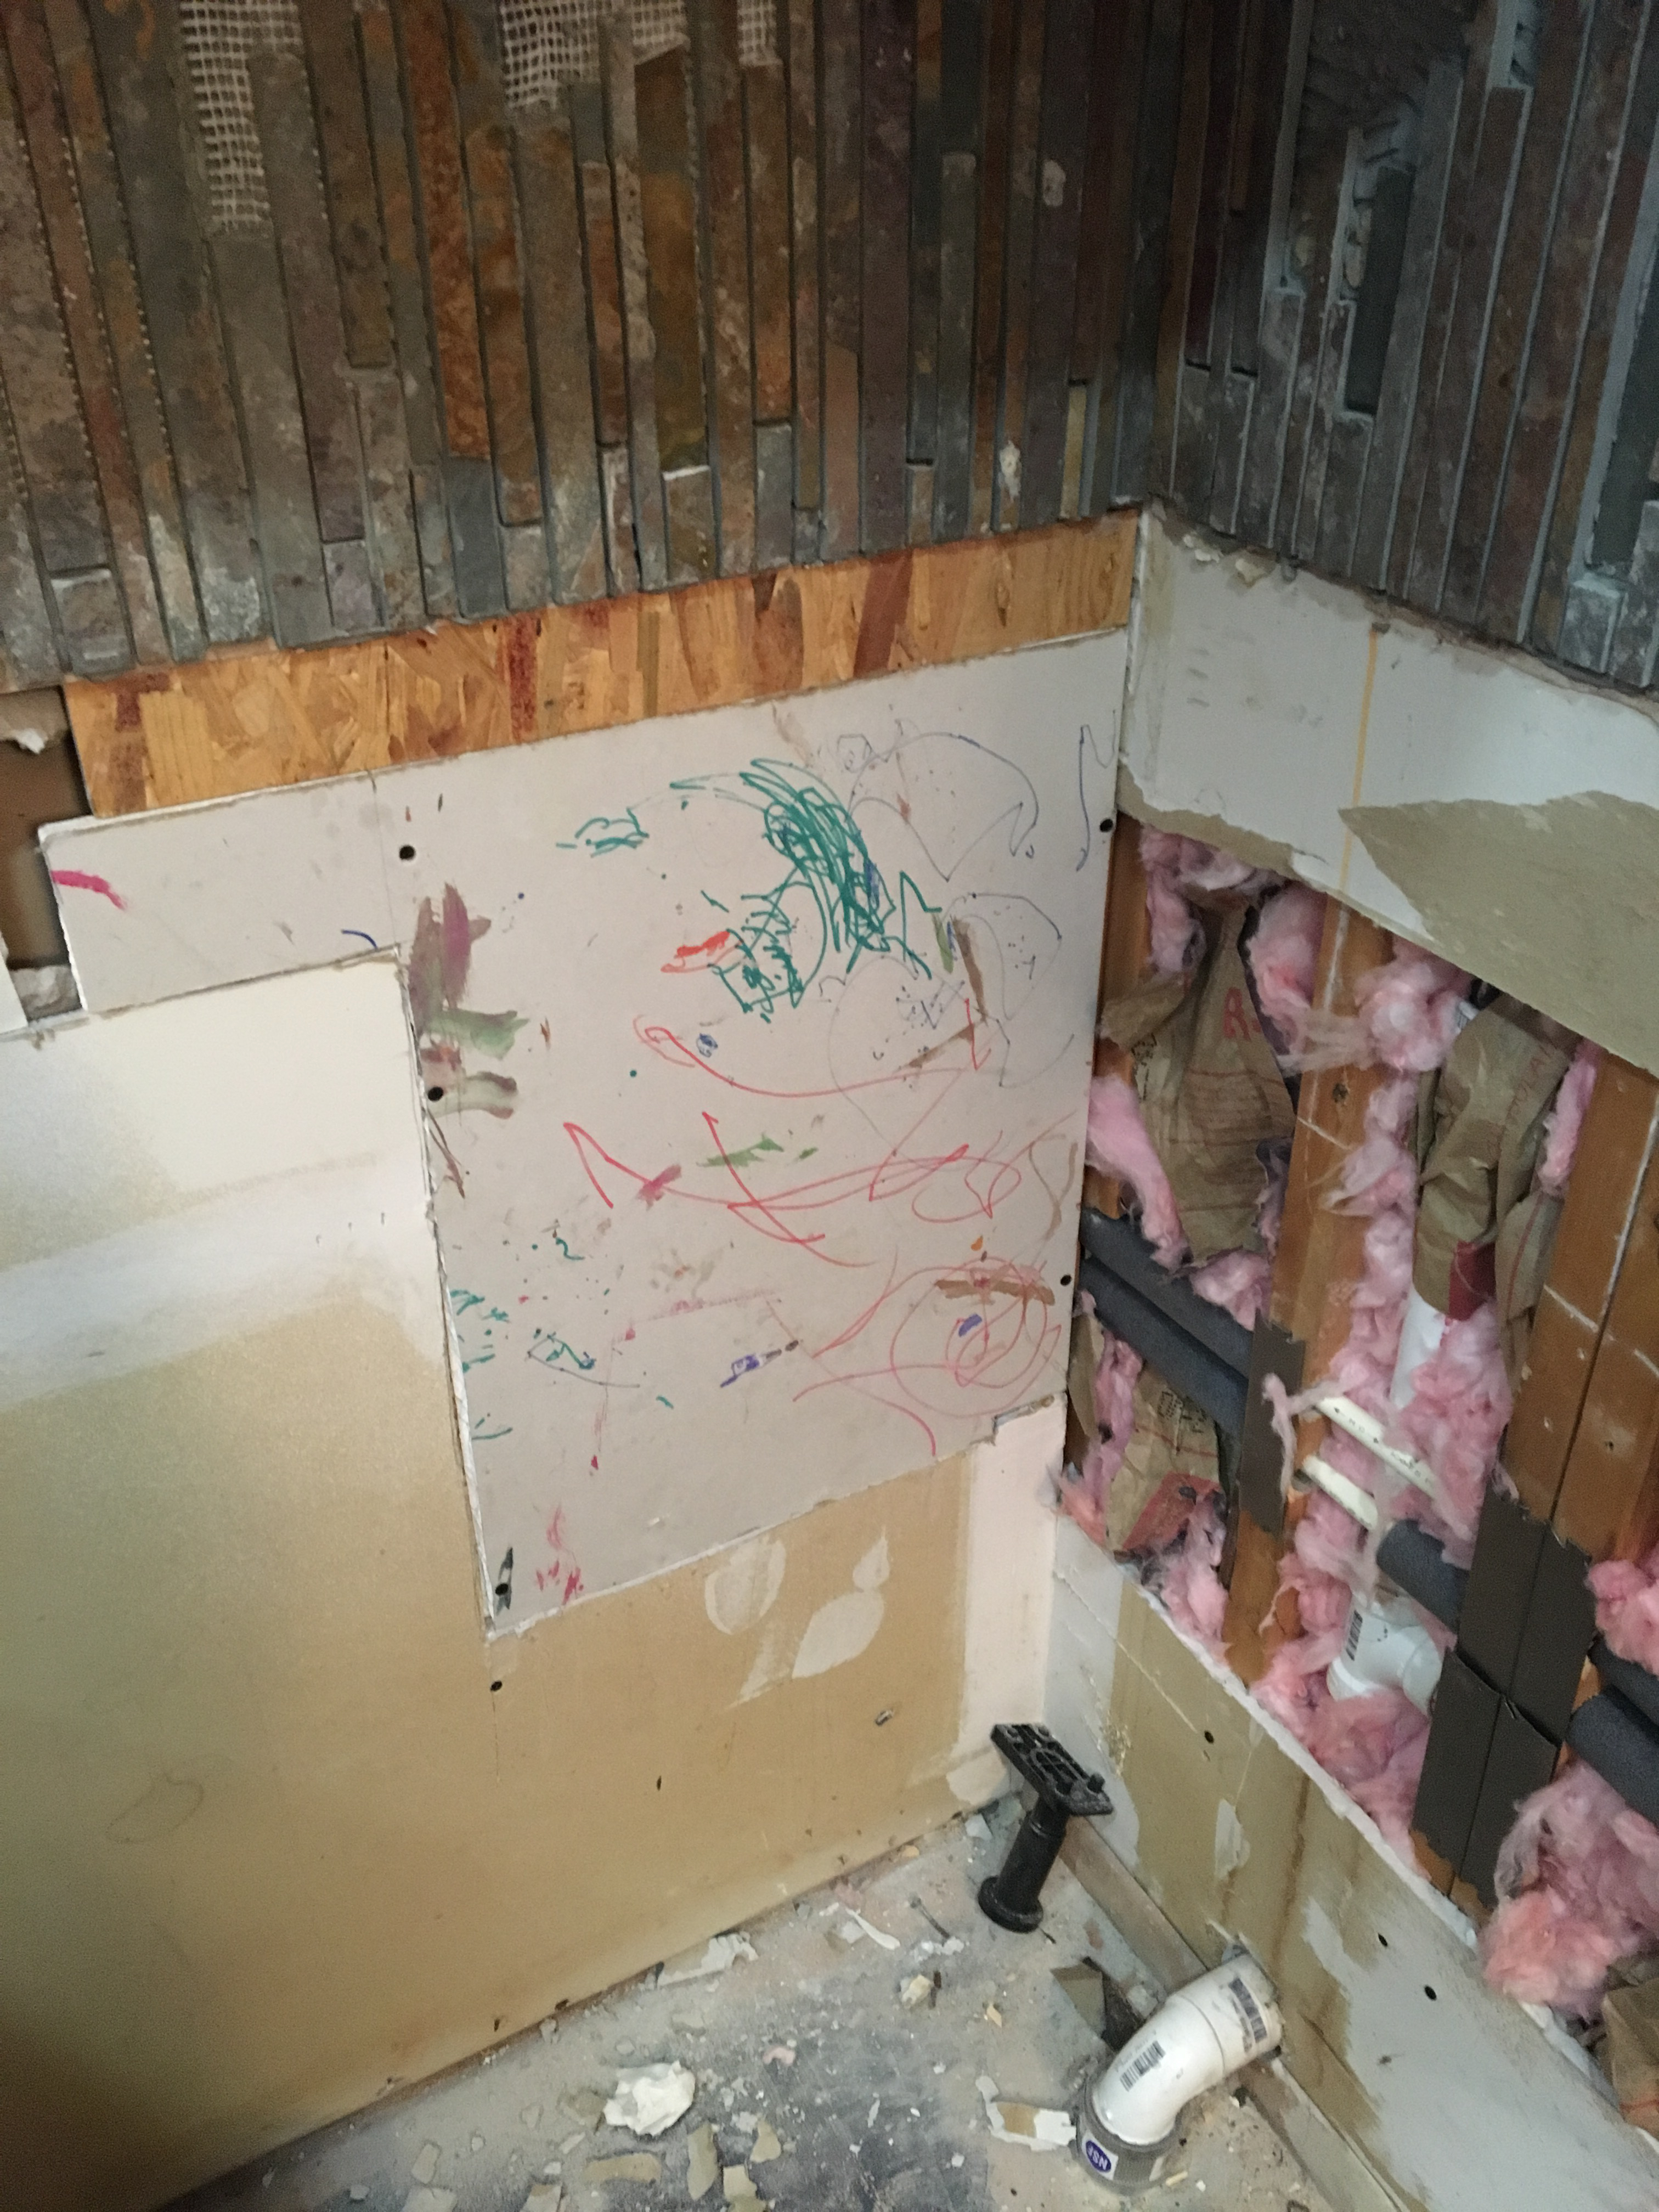
The lower cabinets are considerably easier to install than the upper cabinets. The method is exactly the same, but not screwing into studs over your head is considerably easier. With the plumbing done, we moved on to drywall repair. This would all be behind cabinets, so we let the kids add some artwork.
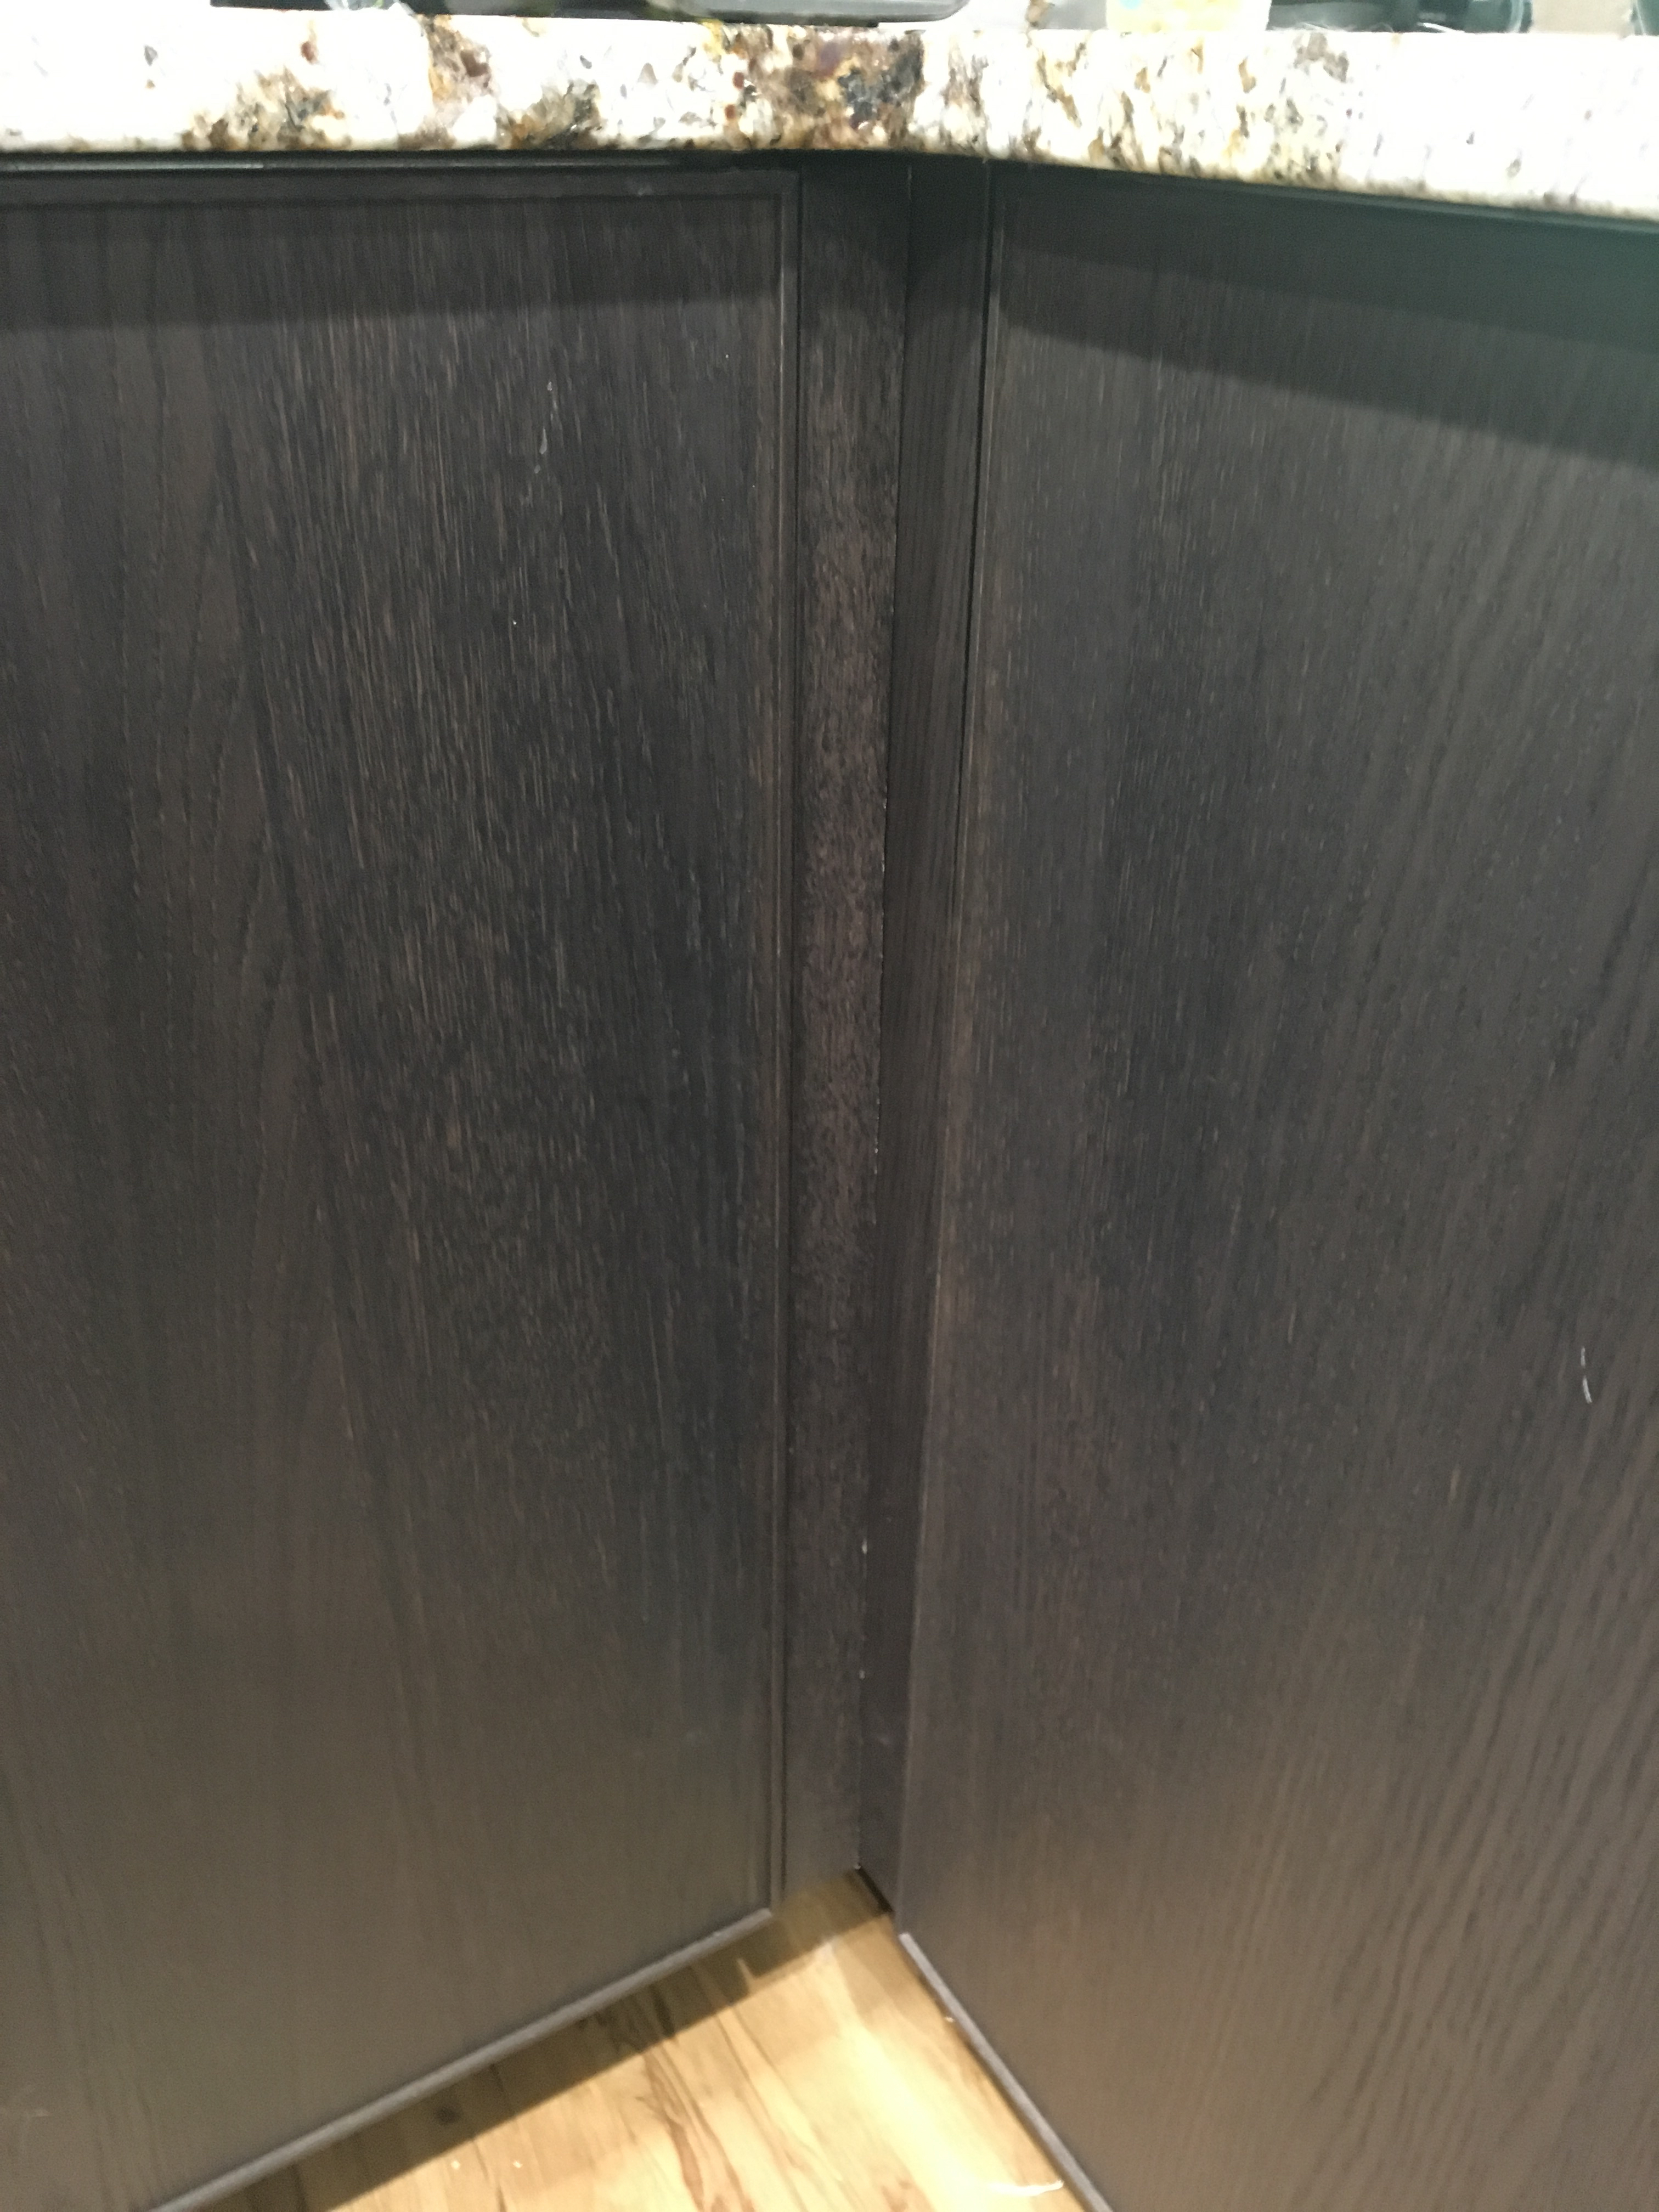
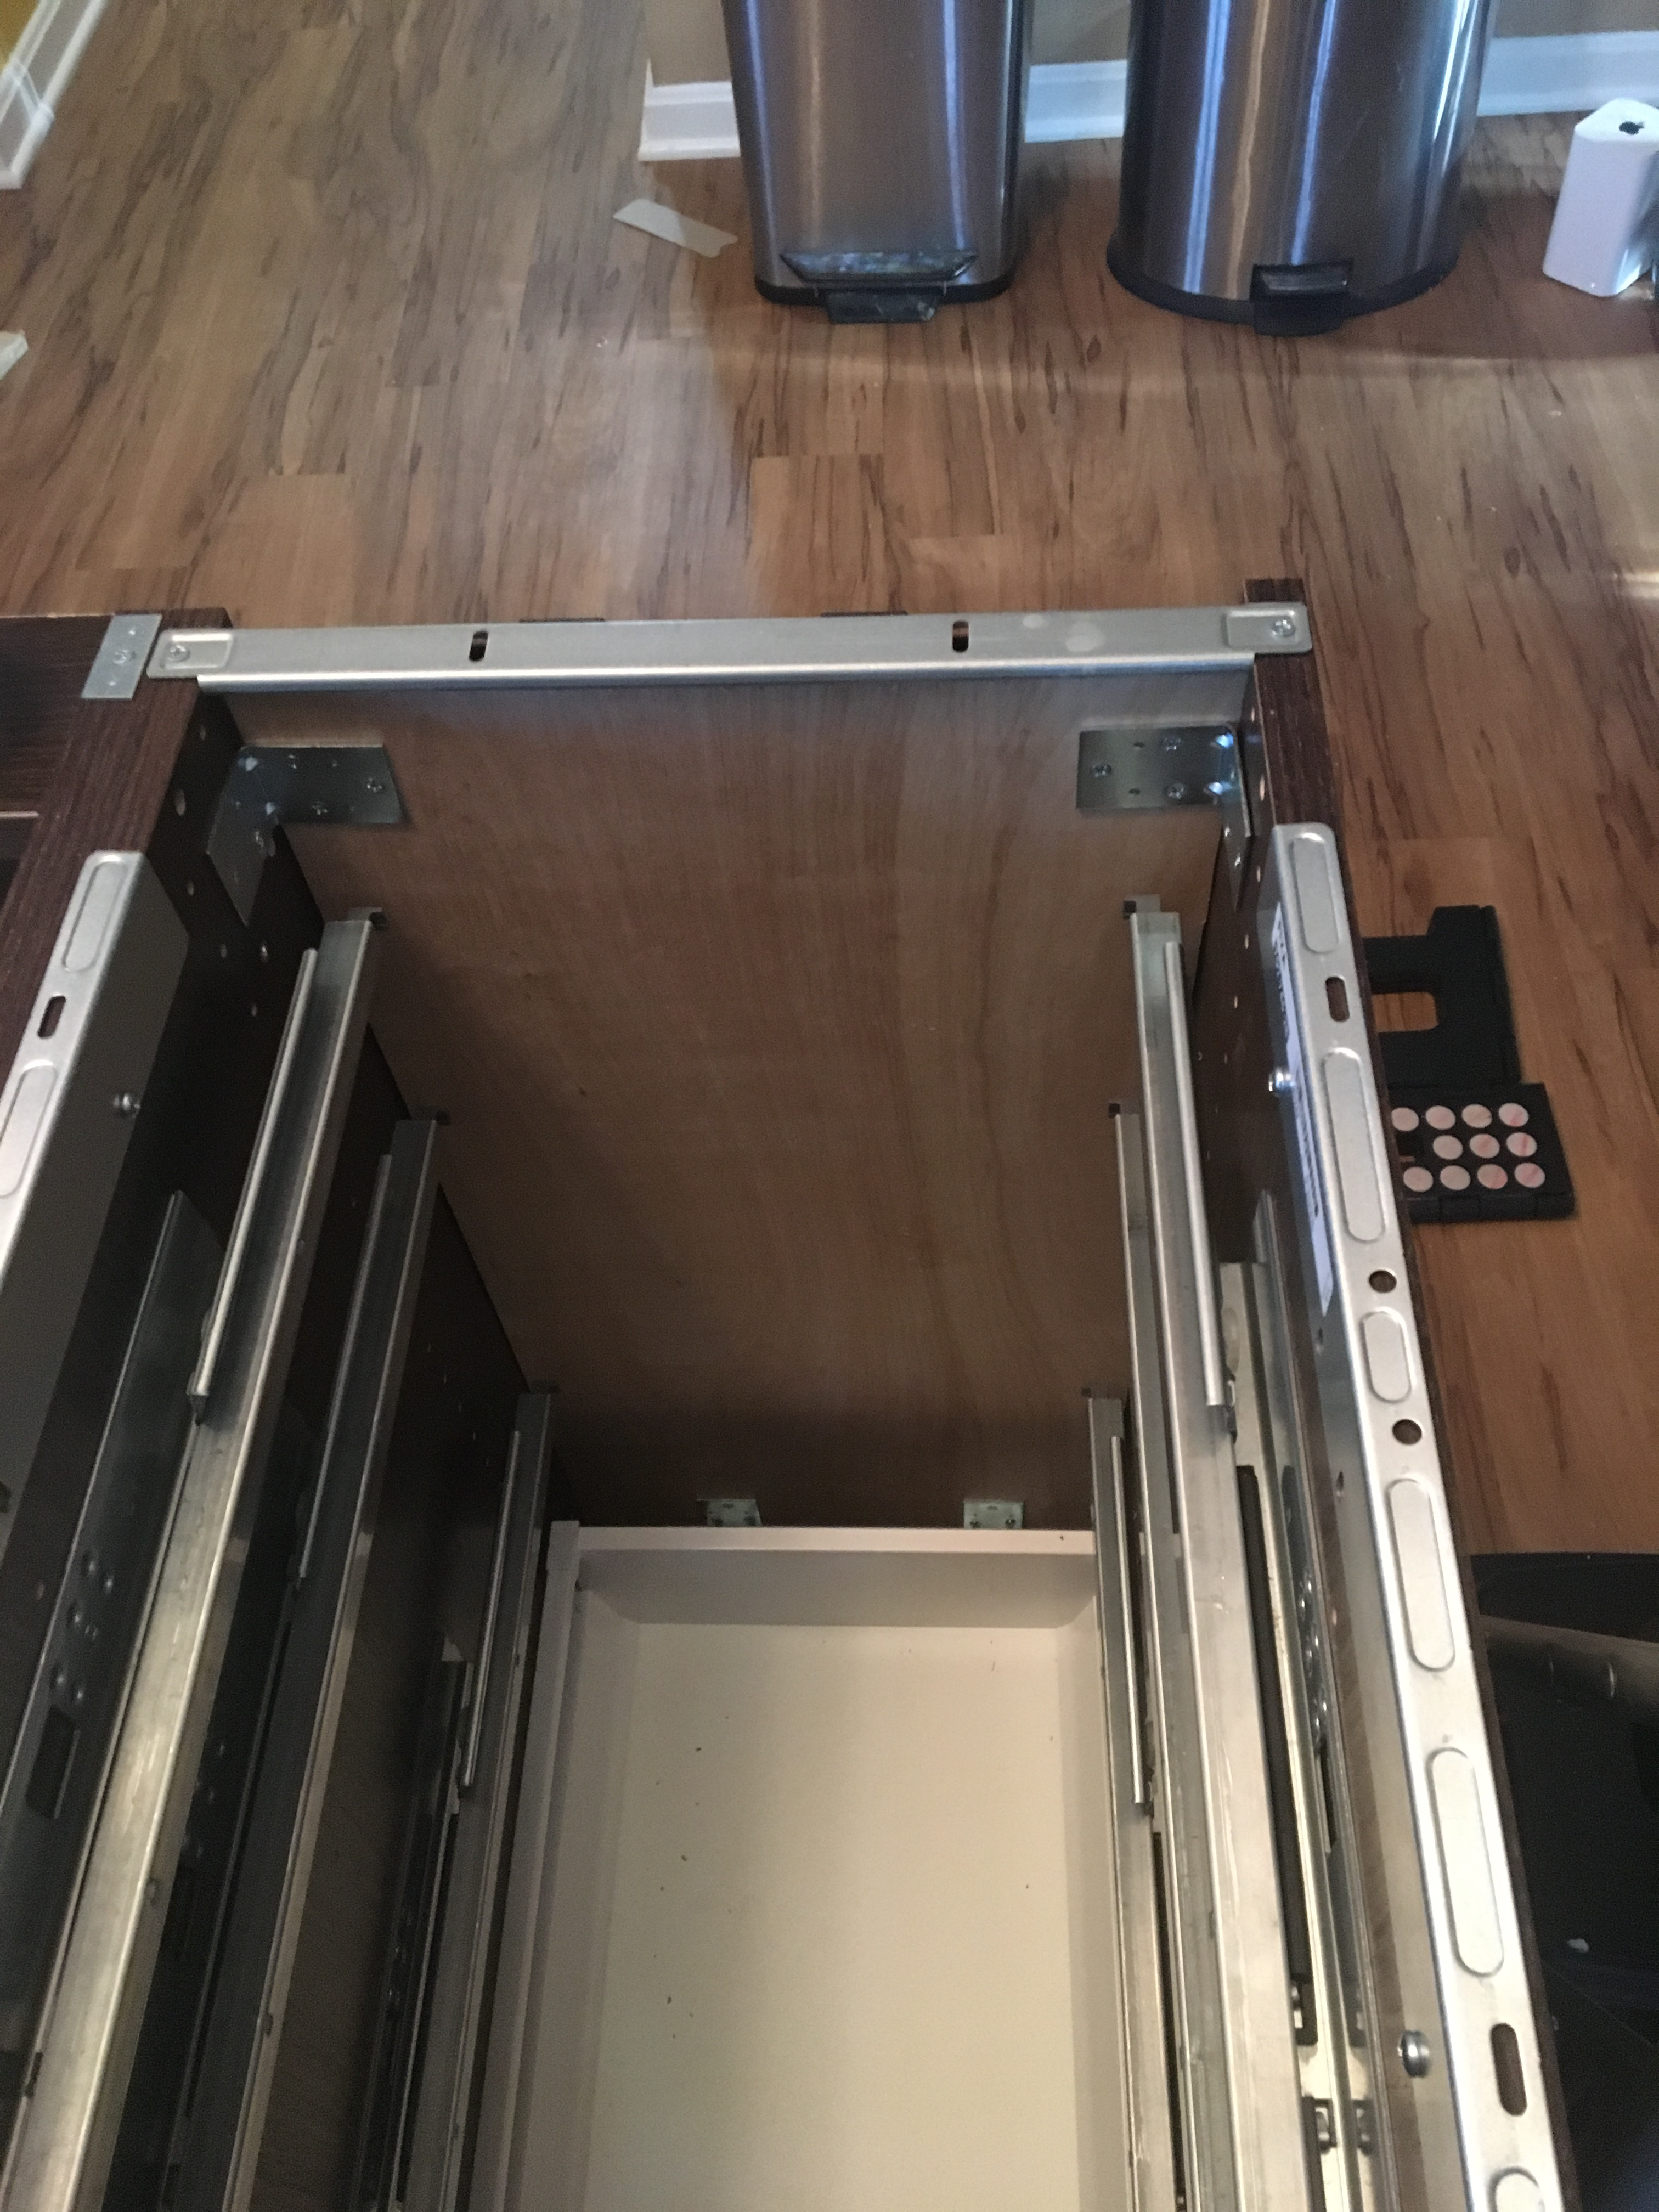
Here is the sink cabinet. To the right is the dishwasher. To the left is what we called a Swivel Susan. The Swivel Susan tables turn at a 90 degree angle and then pulls out. To make this possible, there is a small filler that connects to the left of the sink cabinet in the photo below. Getting that filler properly aligned was a bit of a challenge. Everything has to be level from front to back and side to side.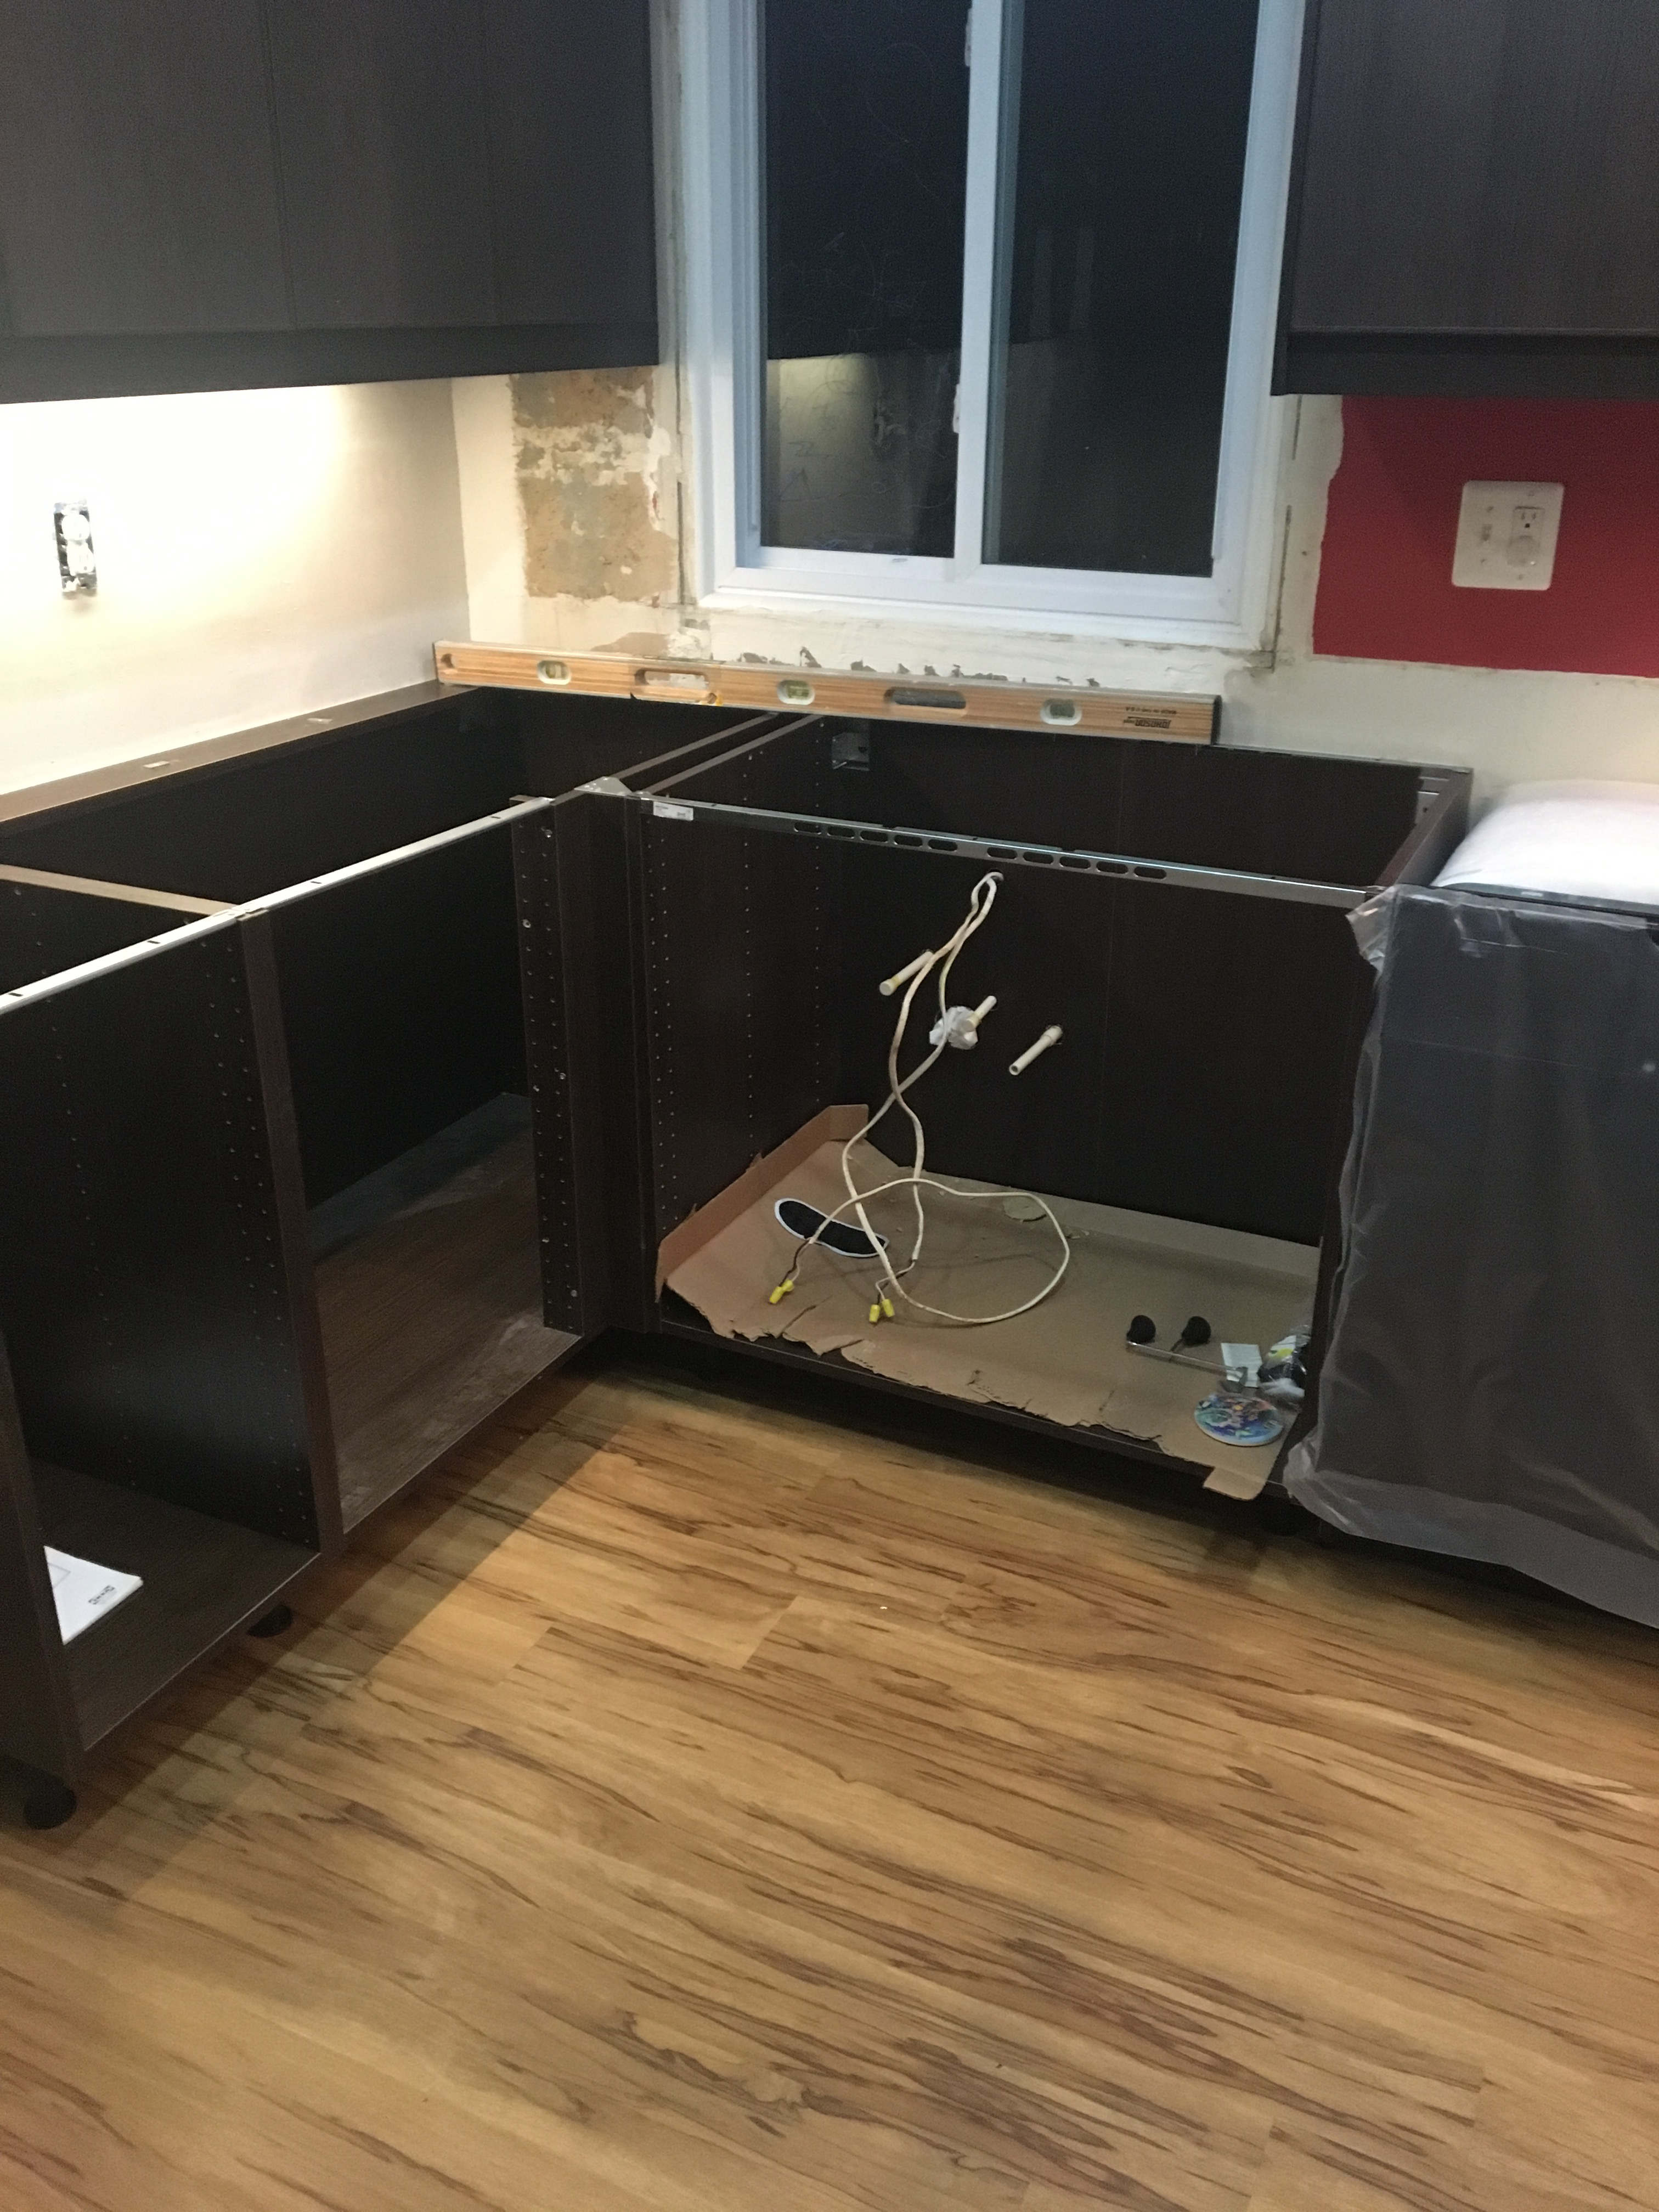
To make the corner between the Swivel Susan and the sink cabinet match the doors, I trimmed an extra panel and used a nail gun to attach the panels:
Peninsula
One of the most gratifying parts of this remodel was that I had to do research & improvise. Next to the sink is the dishwasher. Next to the dishwasher, we planned on putting a peninsula. Normally a peninsula would be attached to a wall on one side, but we didn't have a wall because the wall ended were the dishwasher ended. I built a way to anchor the peninsula to the foundation using 2x4s with L-brackets drilled directly into the concrete. 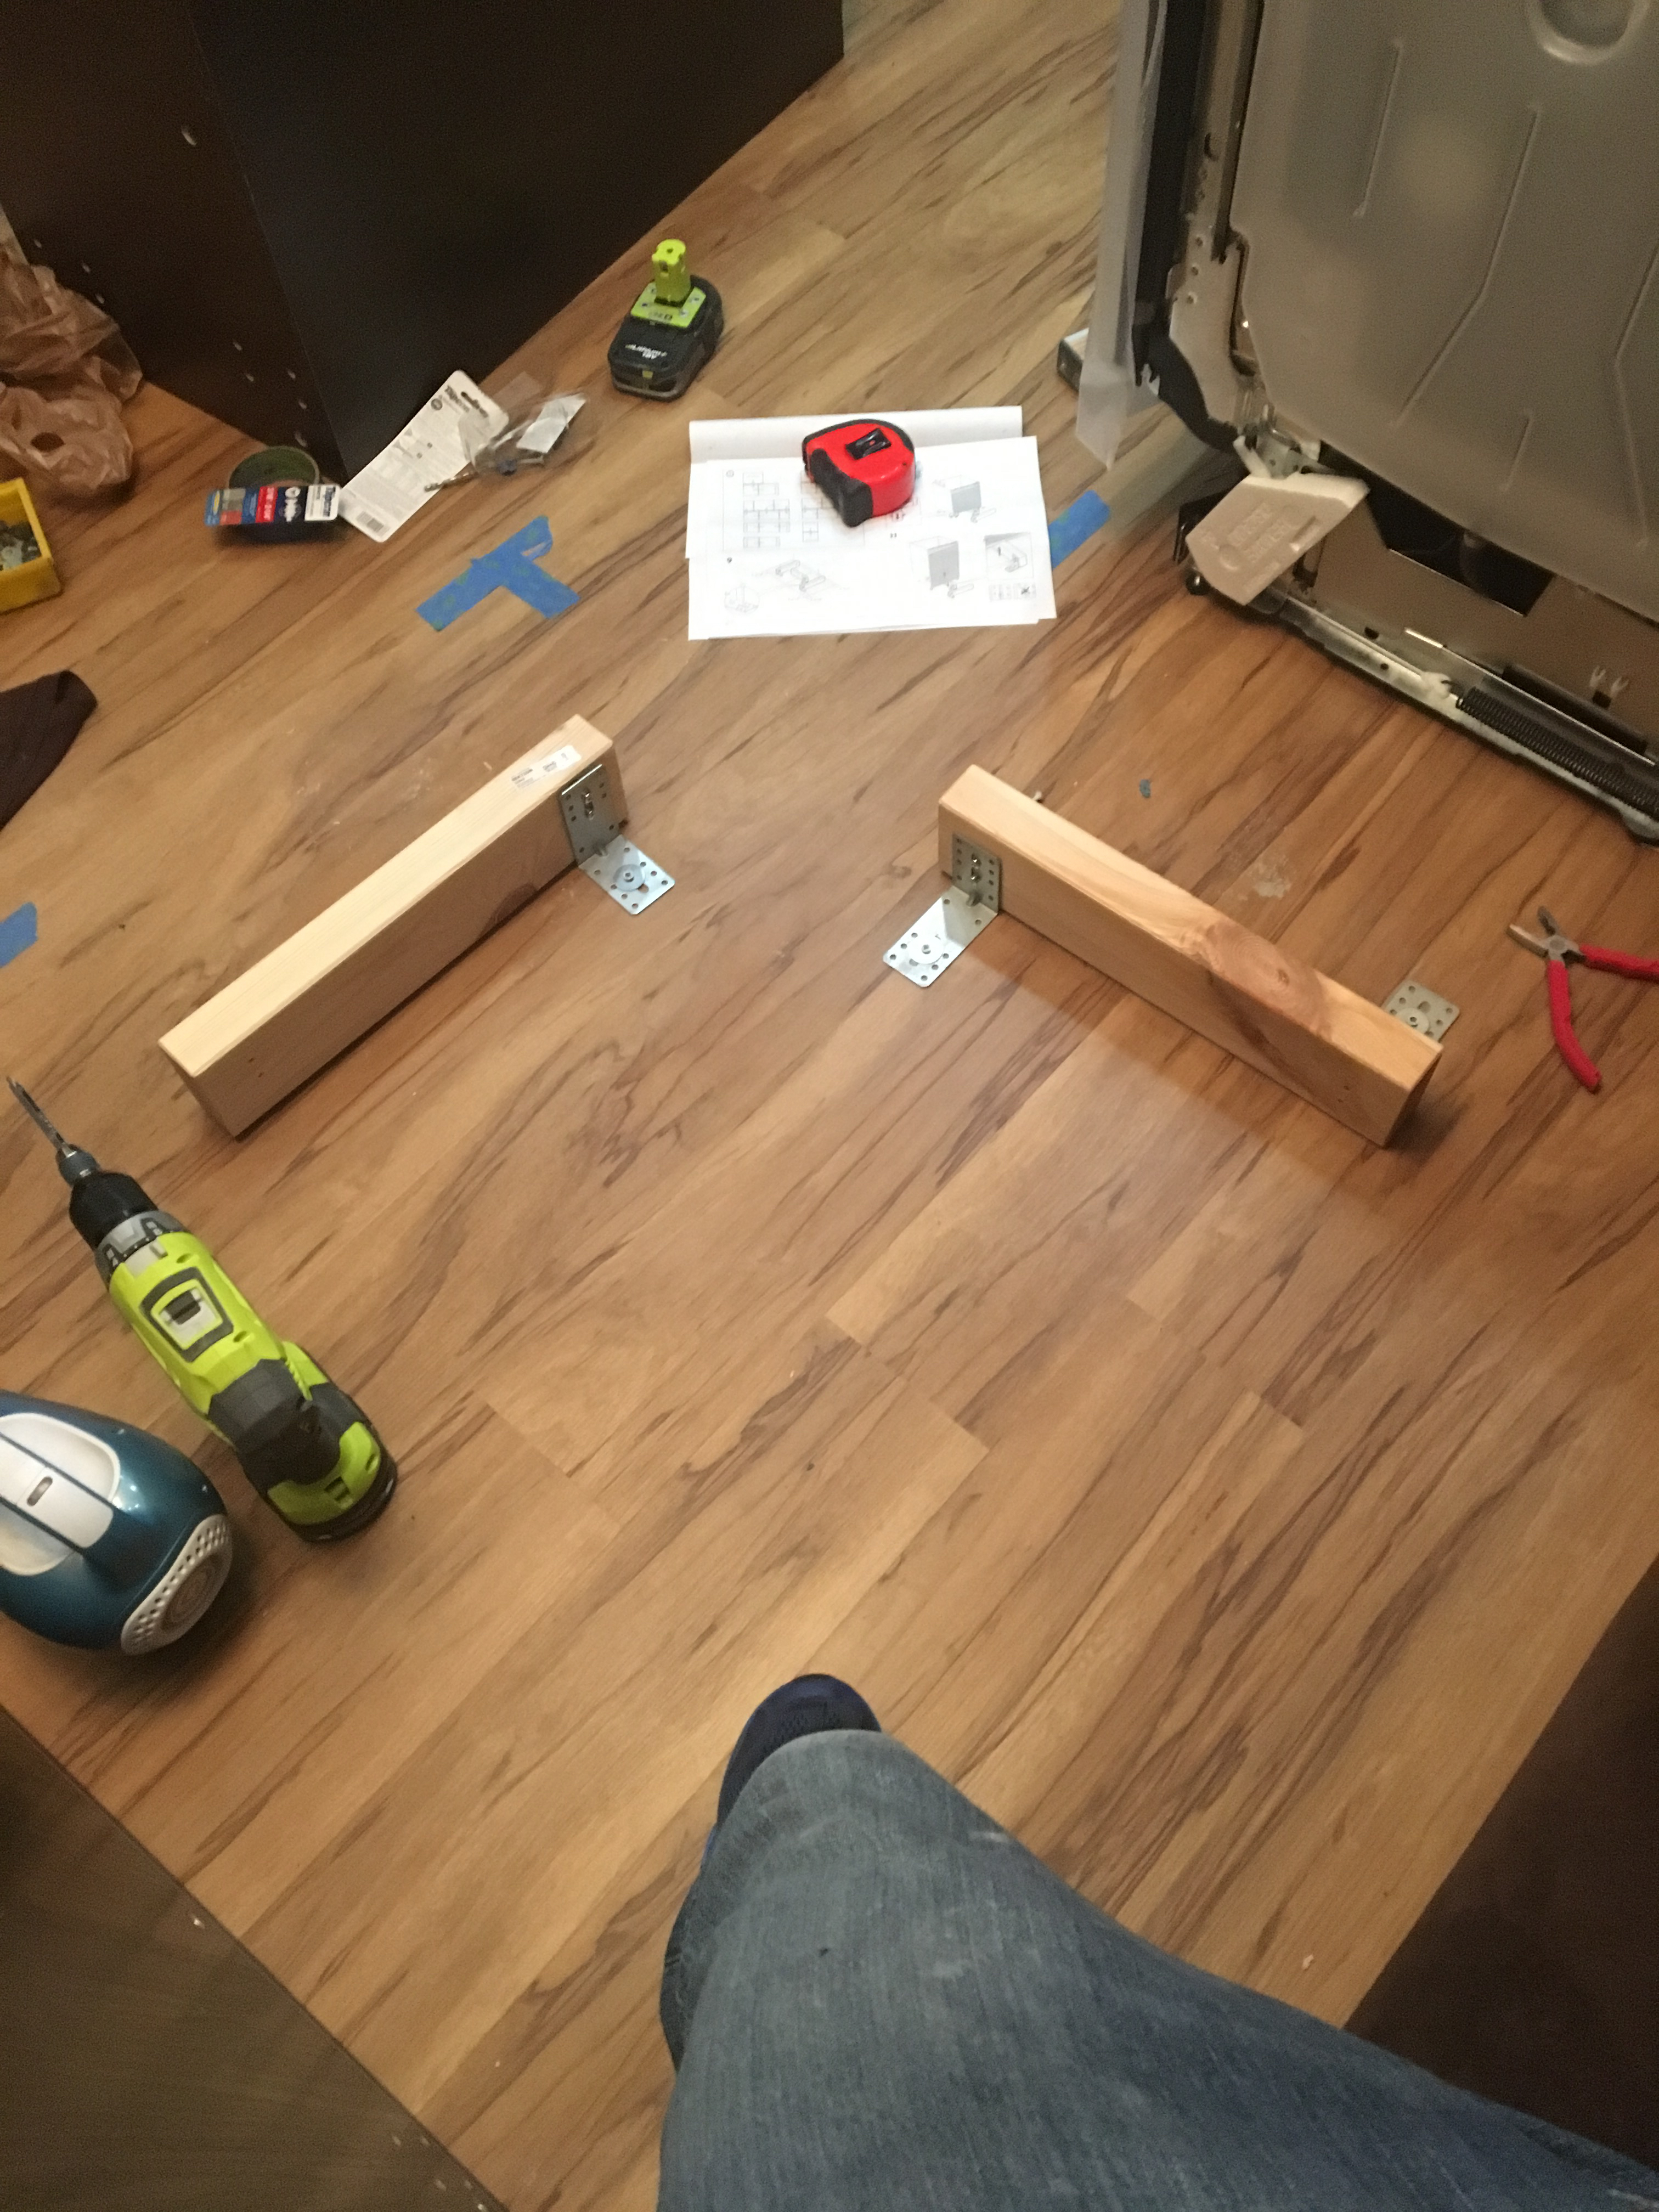
Since IKEA cabinets sit off the ground, the base of the cabinet drilled directly into the 2x4s. The brackets used to anchor the 2x4s to the foundation allowed for the 2x4 to be adjusted vertically & then secured with an additional screw. Drilling into the foundation was surprisingly easy. It was harder reaching under the cabinet, contorting myself into weird positions to tighten everything.
I am very pleased that I got the anchors & cabinets in the right positions. It took a lot of quadruple checking my work, but it felt good when it came together.
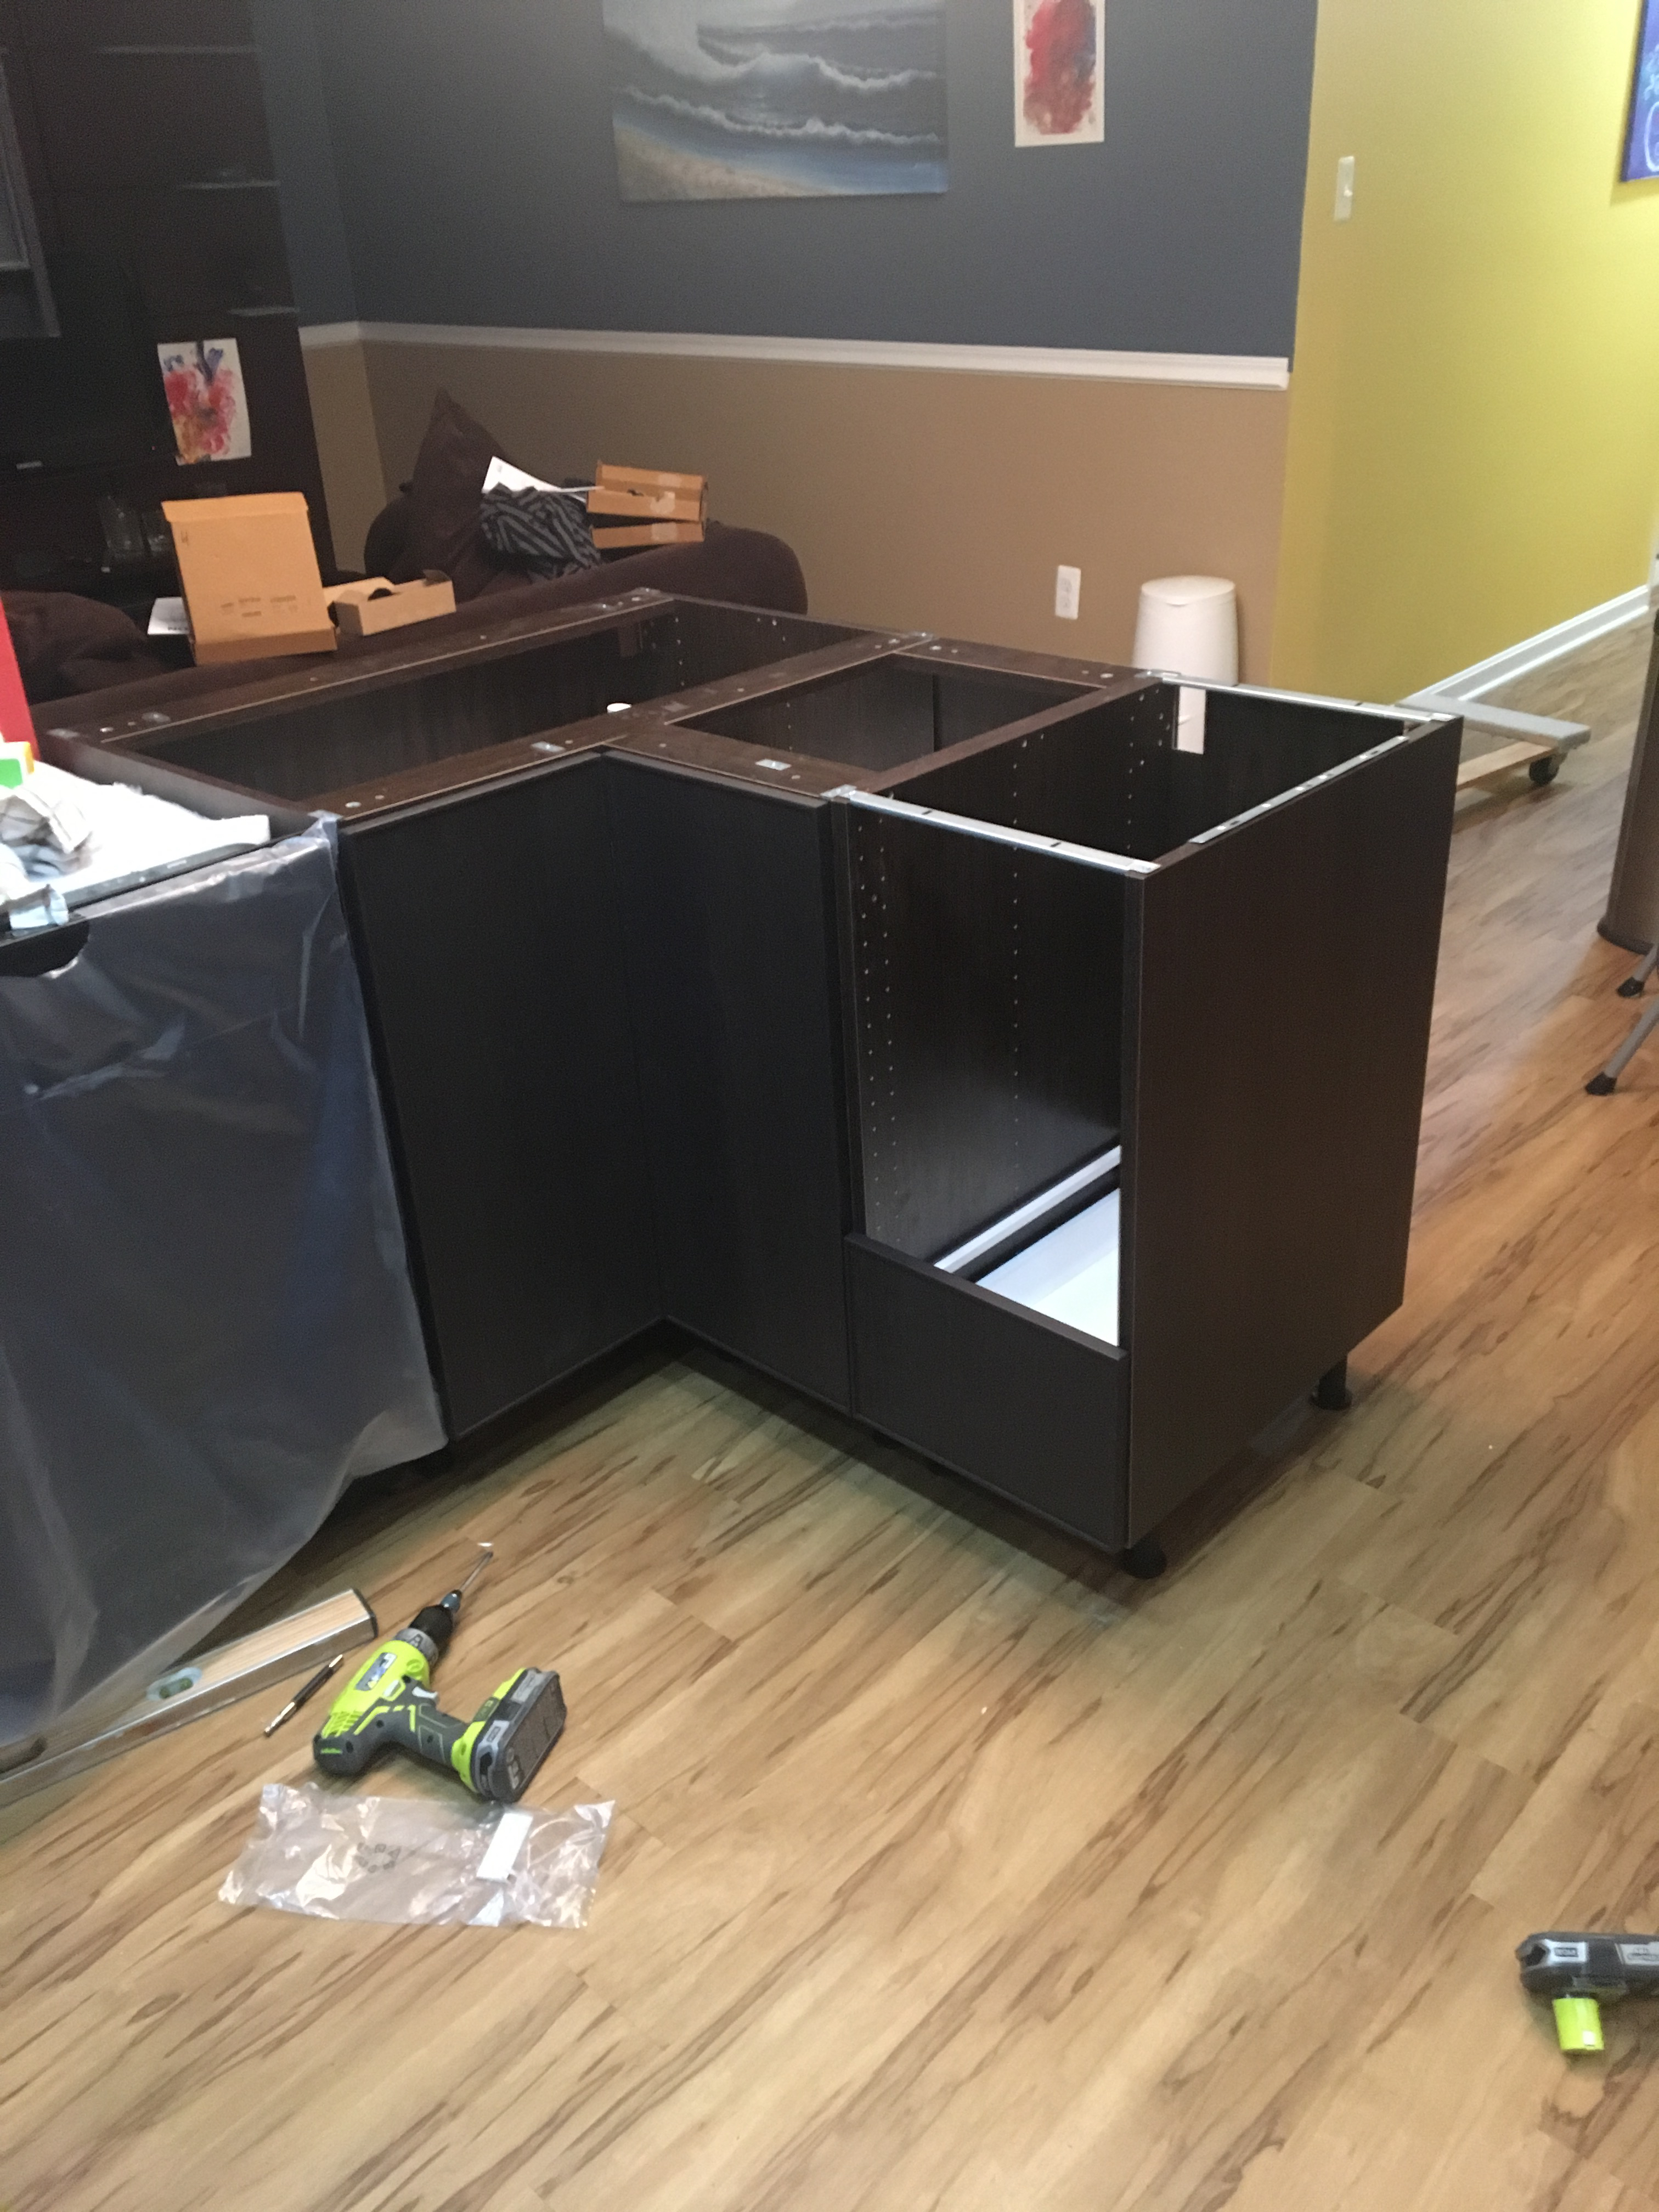
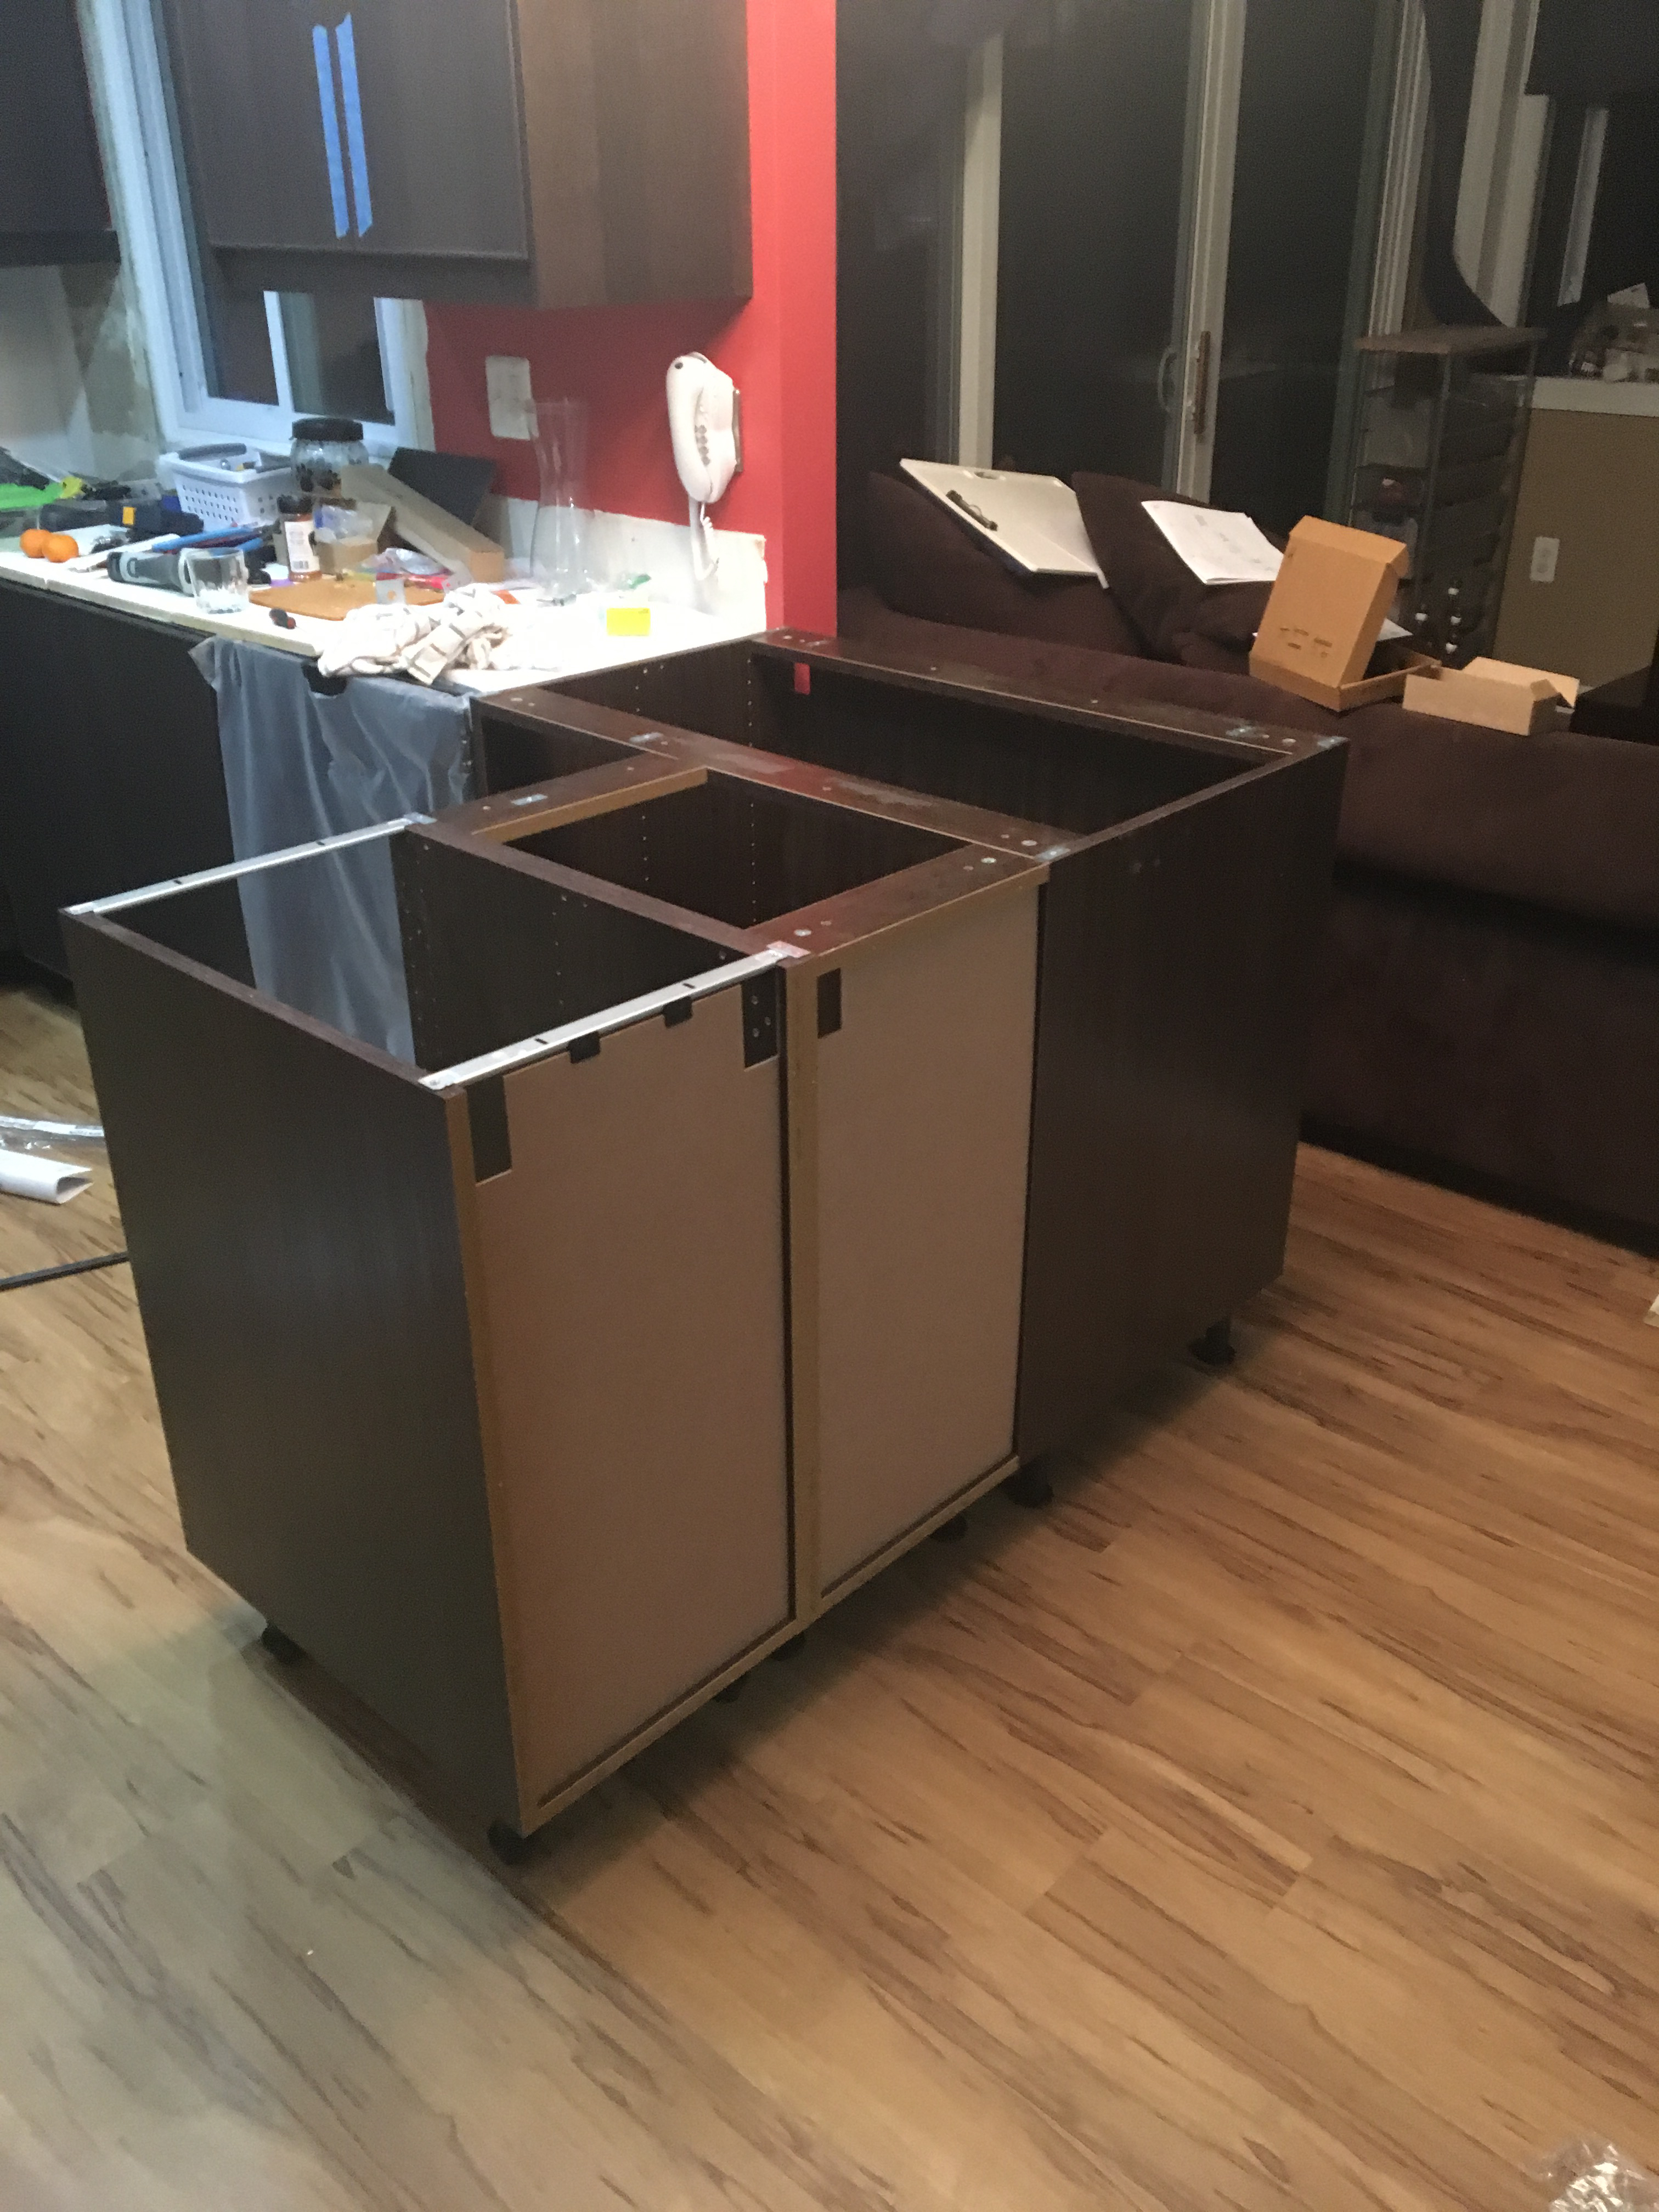
With the peninsula anchors in place, the Lazy Susan cabinet and narrow cabinet are in place.
Here it is from the back:
IKEA makes their cabinets with a thin pressed board back that has a veneer on the inside so it looks nice. This doesn't work very well if you plan on having an overhang for a bar. I needed to install some wood that would support the L brackets that would support the granite overhang. I used ¾" plywood secured to the cabinet with L brackets. This picture doesn't show it, but I also stained the plywood with Espresso stain to match the cabinets.
After the plywood backing was installed, I attached the pressed board finished board so the back of the cabinets matched the other cabinets. You can also see the L brackets supporting the granite in the photo below. I had to trim notches out of the top of the cabinets so the brackets would be flush with the rest of the cabinet.

In the picture above, you get an up close shot of the "luxury vinyl" flooring.
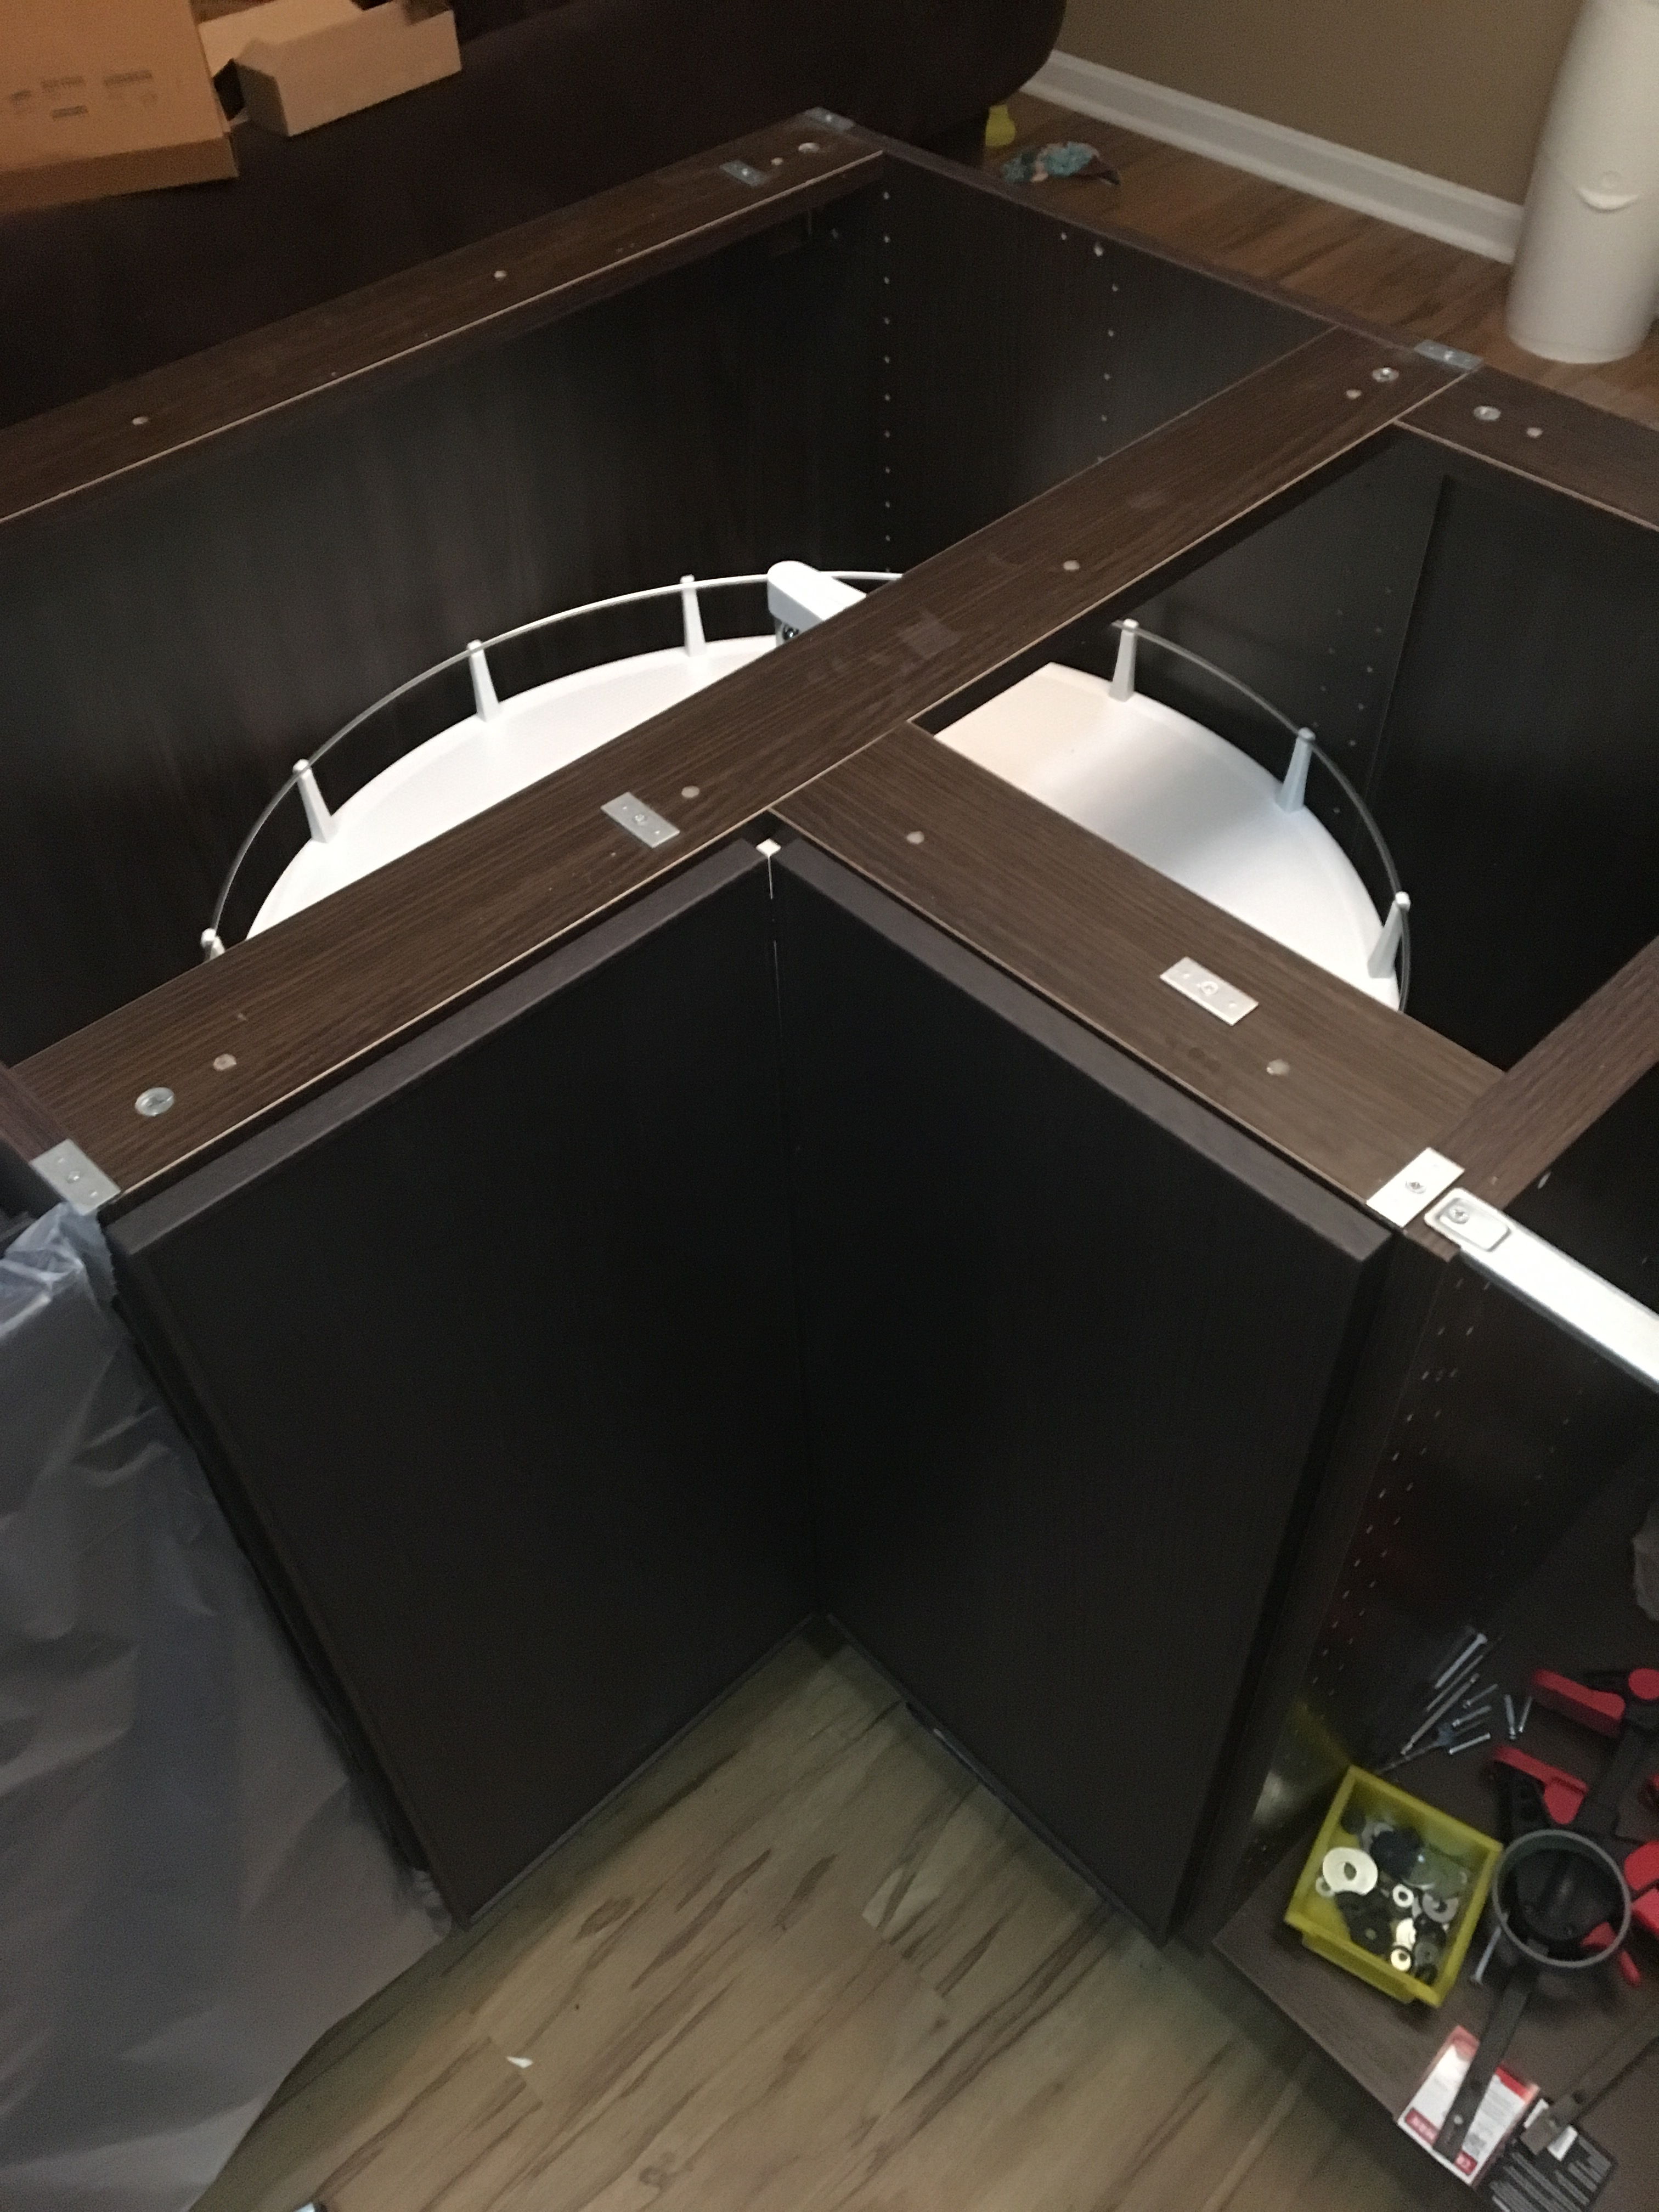
Lazy Susan
The Lazy Susan was an interesting installation challenge. Truth be told, I really like how IKEA designed it. The turning action is smooth, and has a slightly acceleration to it so the table always naturally returns to the original location. The doors on the Lazy Susan took some time to adjust to make flush with equal reveals on all sides, but it works just like the other doors.
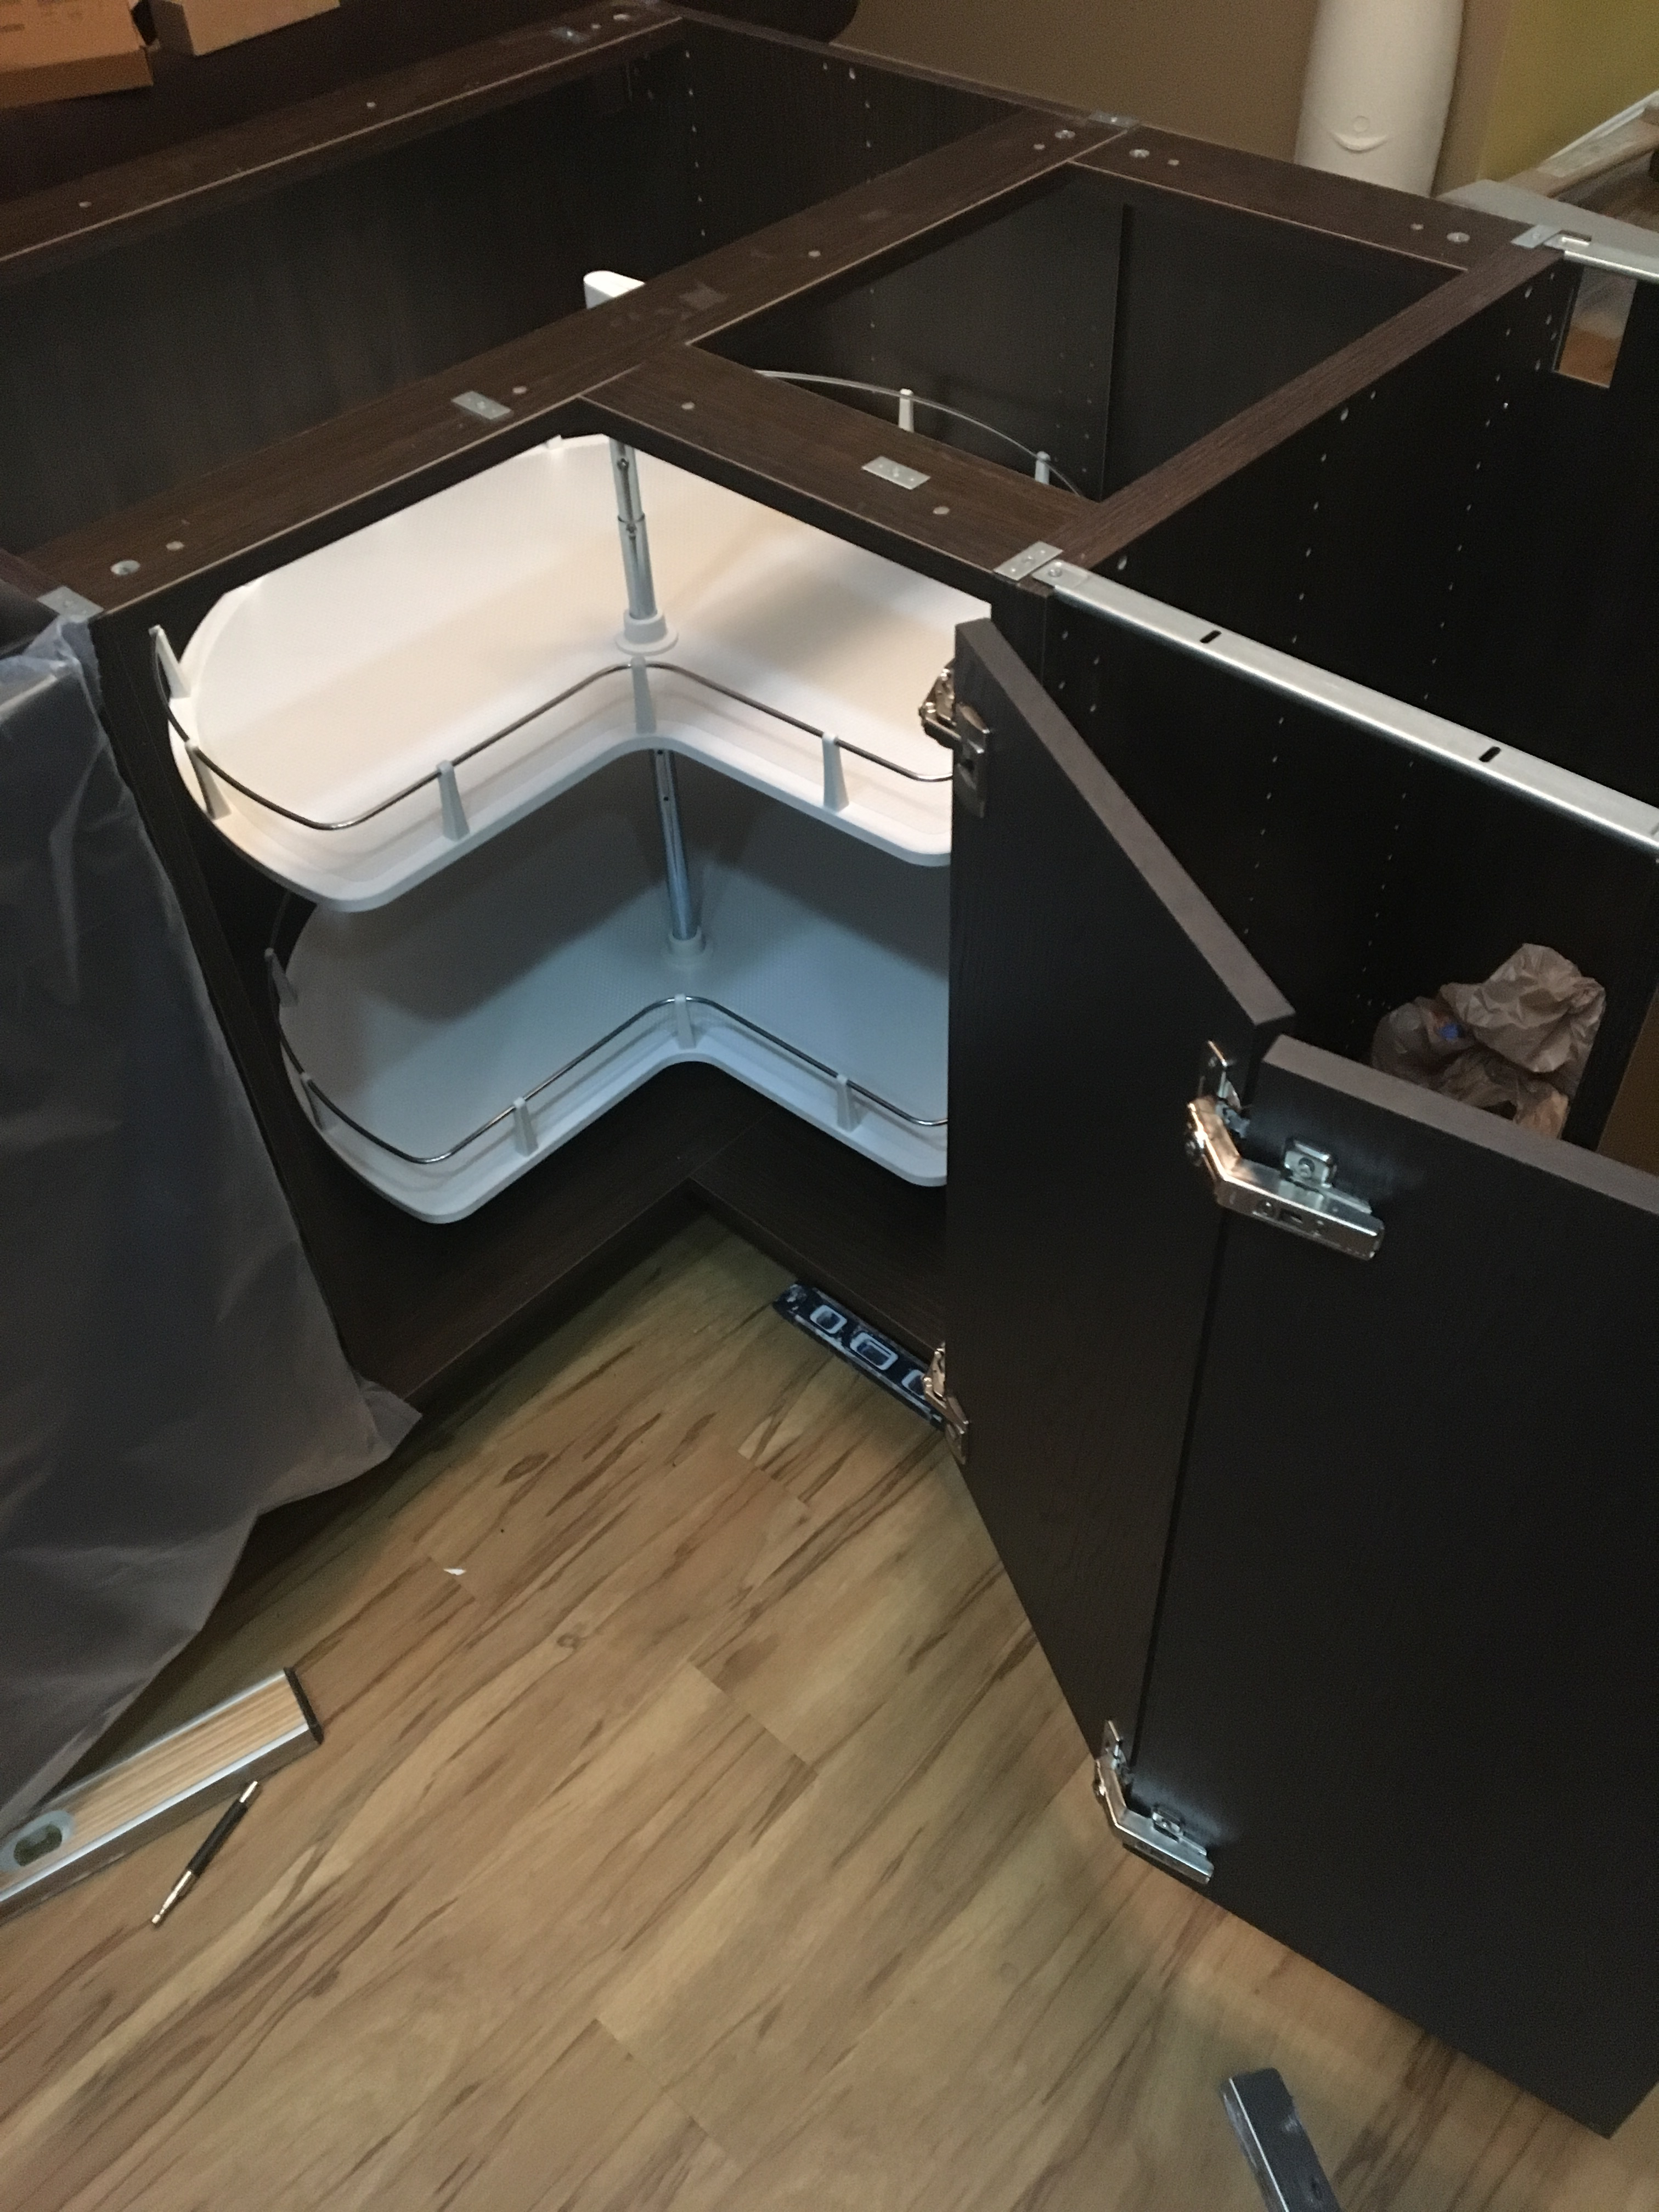
The installation was challenging for the Lazy Susan because you really need to be in the cabinet to screw things in, but the tables also need to be in there at the same time. The designers clearly thought of this because they make it possible to lower the upper table by removing a pin from the support underneath. It's gratifying when you finally get it in place.
Here are the doors attached, but no handles yet:
Dishwasher
You can buy a dishwasher from IKEA with a matching front door panel. This is great for an integrated appearance, but the instructions are lacking. You need to remove some screws from the inside of the dishwasher door, attach your panel using clamps, then predrill the holes into the panel through the screw holes you just took the screws out of. Careful not to go too far or you will drill through your wood panel.
Also, the screws for the handles are tricky. The screws don't go through the back of the dishwasher. You need to drill the back of the wood panel so the head of the handle screws are slightly recessed. If the screw head isn't recessed into the panel, the panel won't sit flush against the dishwasher. To make things even more tricky, the depth of the recess depends on how far the screw goes into your handle. If you don't make the recess deep enough, the screw won't travel far enough into your handle and it will be wobbly. If you drill too far, the panel will be too thin and the screws may rip out, or the screws will be too long and you'll need to trim them.
I didn't plan very well and had to take the panel off the dishwasher three times before I found the right depth. My recommendation is attach the panel to the dishwasher. Then mark where the screws should go for the handle. Then take the panel off the dishwasher. Drill the hole for the screw through the panel. Then drill the recess for the screw head. Attach the handle and make sure it's snug. If not, drill a slightly deeper recess & repeat until you get it snug. Once you have it totally snug, reattach the panel to the dishwasher.
I mentioned earlier that you can adjust IKEA's doors in every direction. The dishwasher door works a little differently. You don't actually adjust the door panel here, you adjust the entire dishwasher using screws underneath. You still get the same flexibility, just in a different way.
Power!
We brought the kitchen into the 20th century by upgrading the outlet from a standard outlet to one with GFIC protection, and USB outlets next to it. Removing the old box was hard. The box was nailed into the stud but the hole was offset from the stud so I couldn't take out the old box without ripping away some drywall.

While putting in a new kitchen, you might as well put in under-cabinet lighting. I attached the lights to the cabinet, then routed the wire to the back of the cabinet, into the wall, and down to the outlet. IKEA has a cool wireless communication system. You sync each light with a puck switch. So every light is hard-wired, but switched wirelessly. Adding this lighting really had a significant impact on the ability to use the countertop for preparing food.

Stove, Cooktop & Microwave
We purchased the convection stove, a non-induction cooktop, and microwave. The stove & cooktop have a special cabinet configuration. The instructions are especially bad for this part because you can have so many combinations of different components. I understand why IKEA doesn't provide the instructions, but it makes for a difficult install.
The stove has white feet that need to be adjusted 90 degrees. The cooktop is about 6" tall to contain all of the electronics. However, it is also so wide that the sides of the cabinet need to be trimmed on each side so that the cooktop drops in place. You can't just trim the cabinet from front to back though, you need to cut it in the shape of a U. It also can't be too deep because the cooktop needs the cabinet for support.
The microwave also lacks a critical piece of instruction. IKEA sells an extra part that is serves as a filler to support the back of the lower part of the microwave. I didn't realize I bought one of these until I custom-made a block of wood to serve the same purpose. IKEA makes the microwave so that it can theoretically be installed by one person, but I got a friend because it was unwieldy.
This picture shows the stove, cooktop, microwave, counter & backsplash installed:
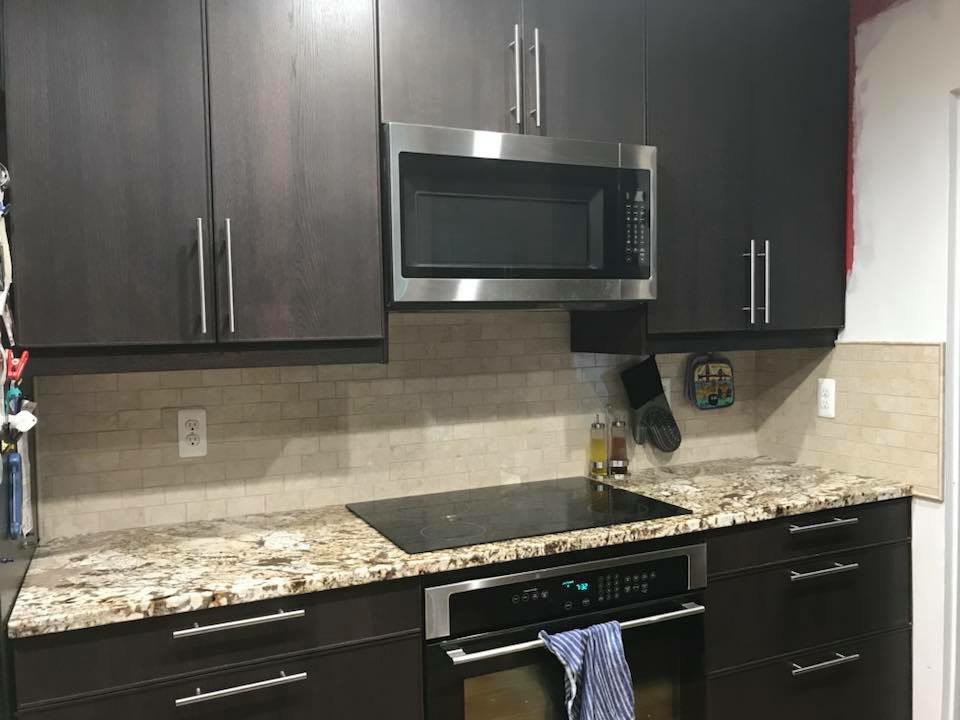
Backsplash
Here's the other side of the kitchen with the backsplash installed. We put the backsplash all the way up & around the window. We put bullnose tile around the window so there wasn't quarter round.
Custom Cabinet
While adding the peninsula & a pantry with drawers gave us a ton more cabinet space, we wanted a cabinet to keep small appliances like an air fryer, bread machine, etc. We also wanted a cabinet to keep a trash can & recycling bin. You can checkout my Trash & Recycling Cabinet article.
Lighting
We replaced the chandelier with pendant lighting, and added more recessed lighting to really brighten up the space.

Done!
We replaced the chandelier with two pendant lights. The bulbs are LEDs, but had decorative filaments.