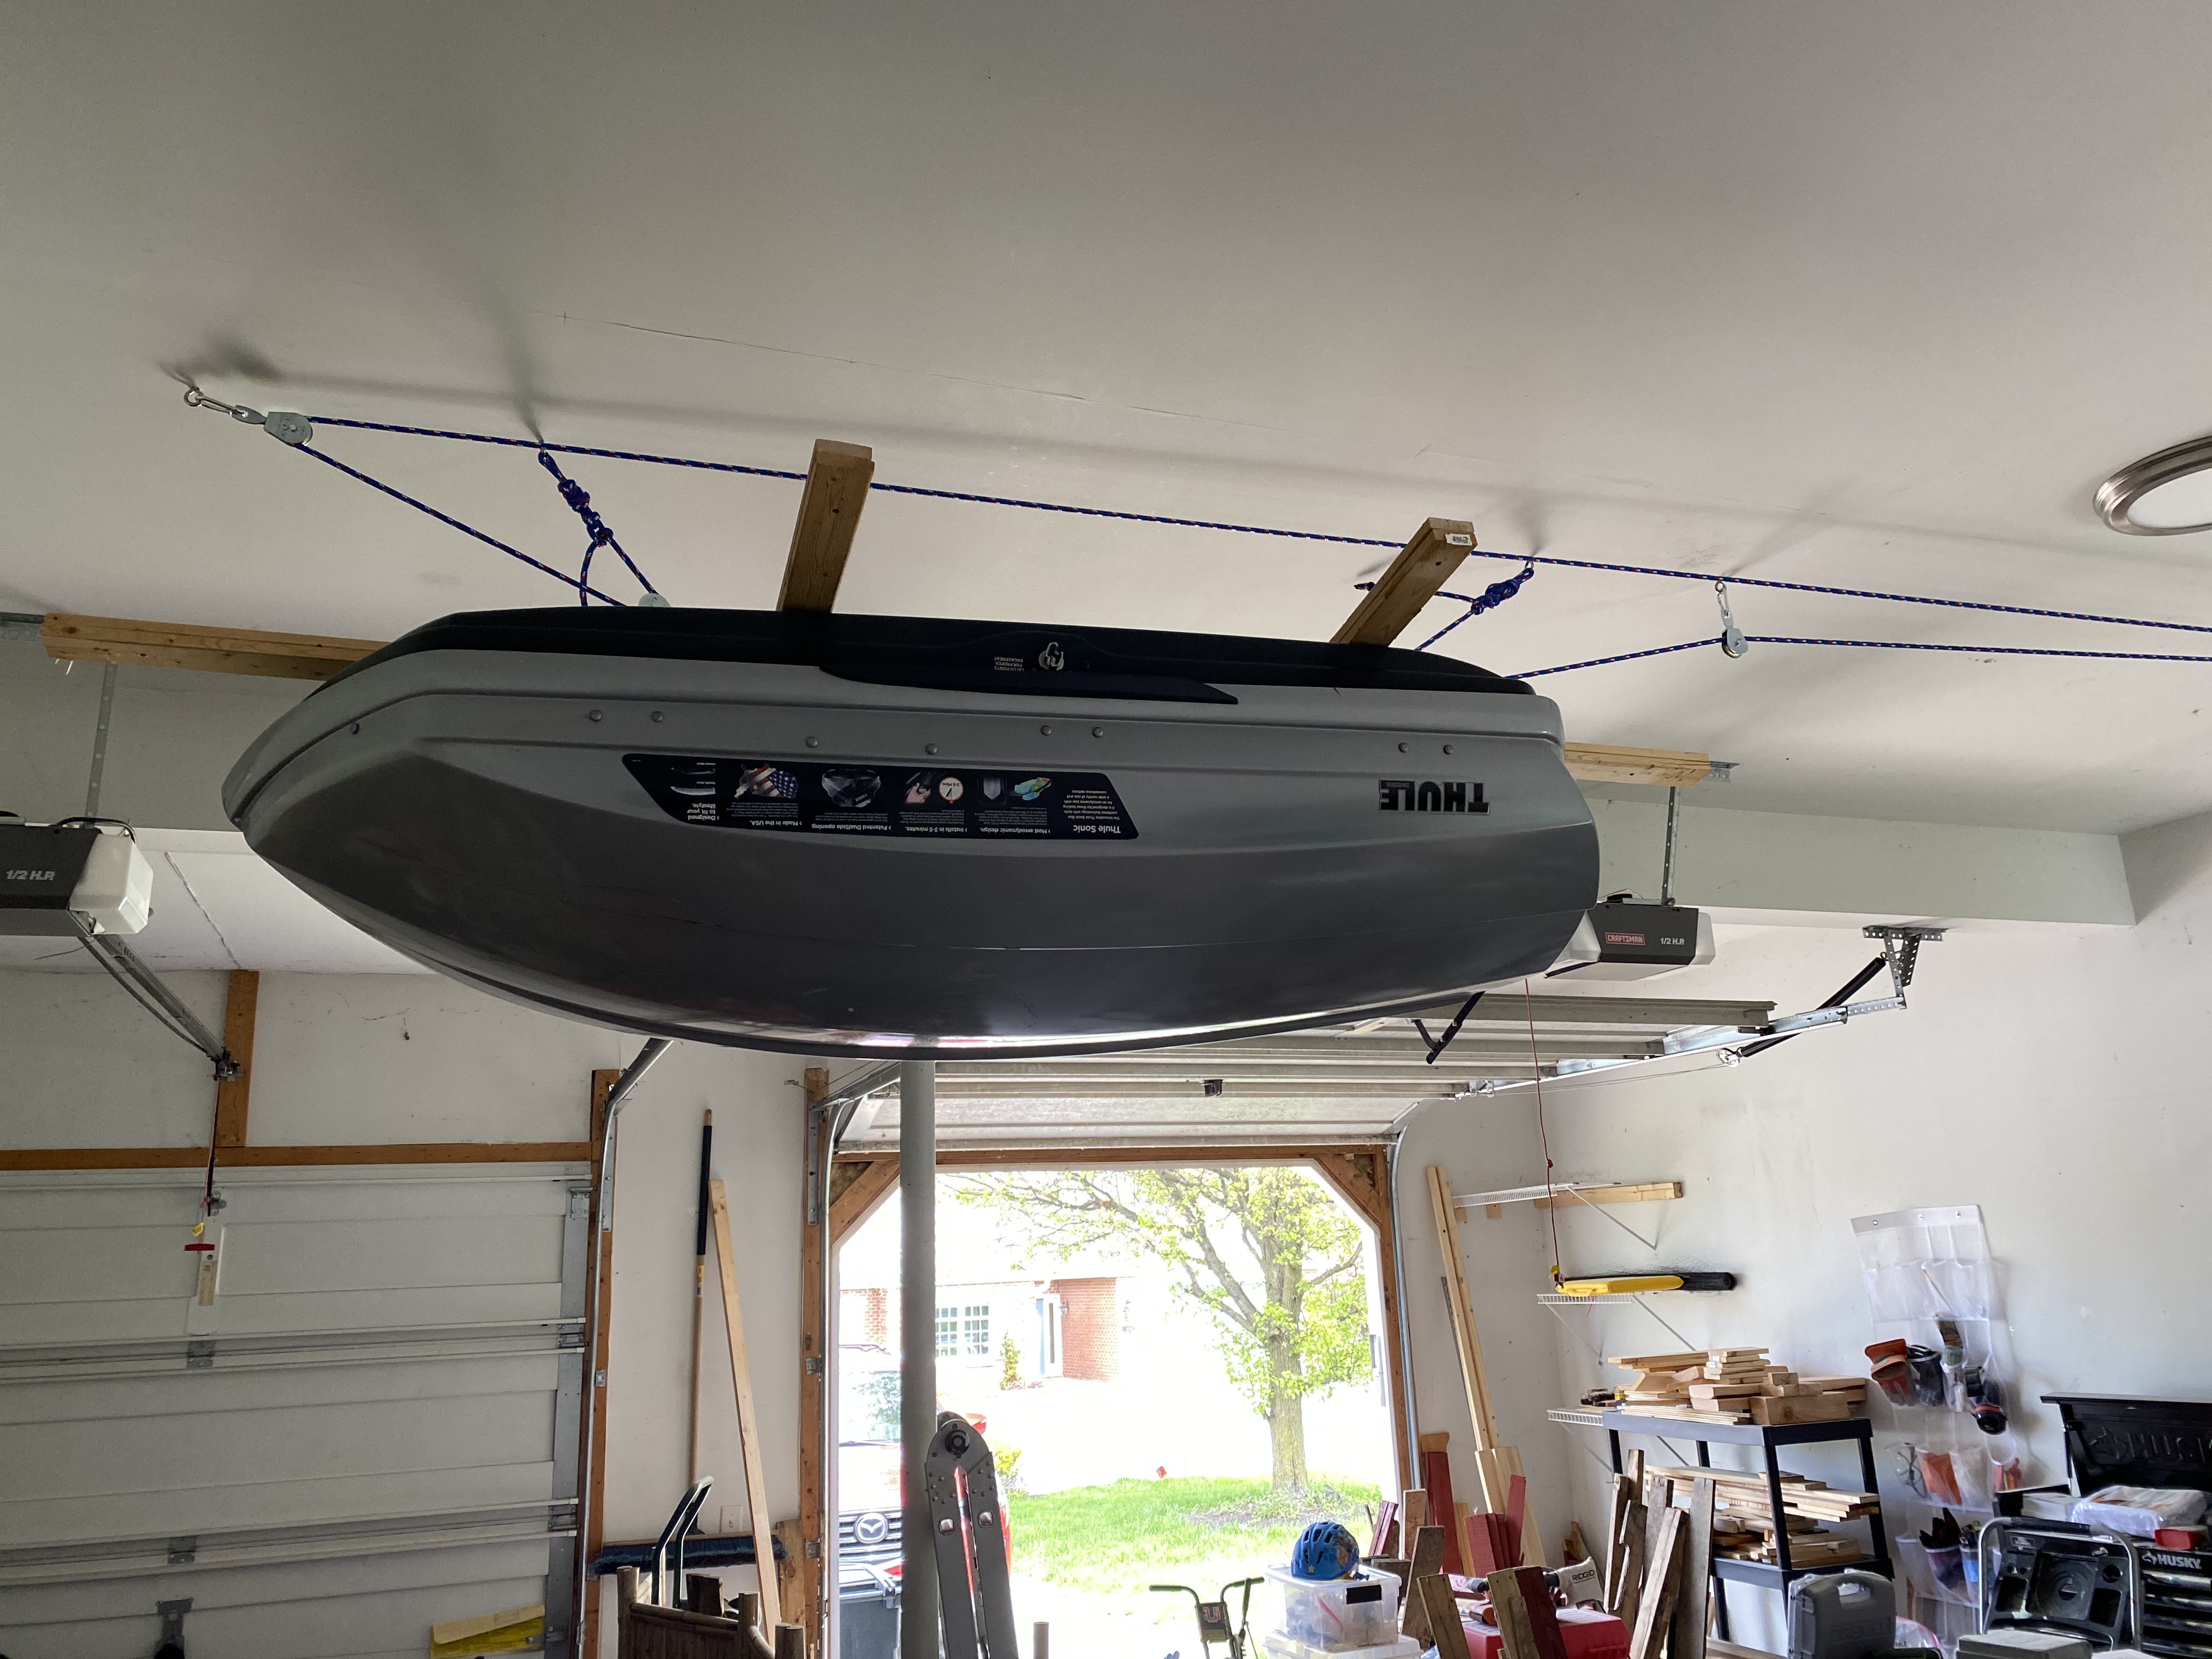
Several years ago, we bought a cargo carrier for the top of the car. It makes holiday trips much easier. The downside is it takes up a lot of room in the garage the rest of the year. I got tired of it being in the way while I was working in the garage. So I created a pulley system to hoist it off the floor.
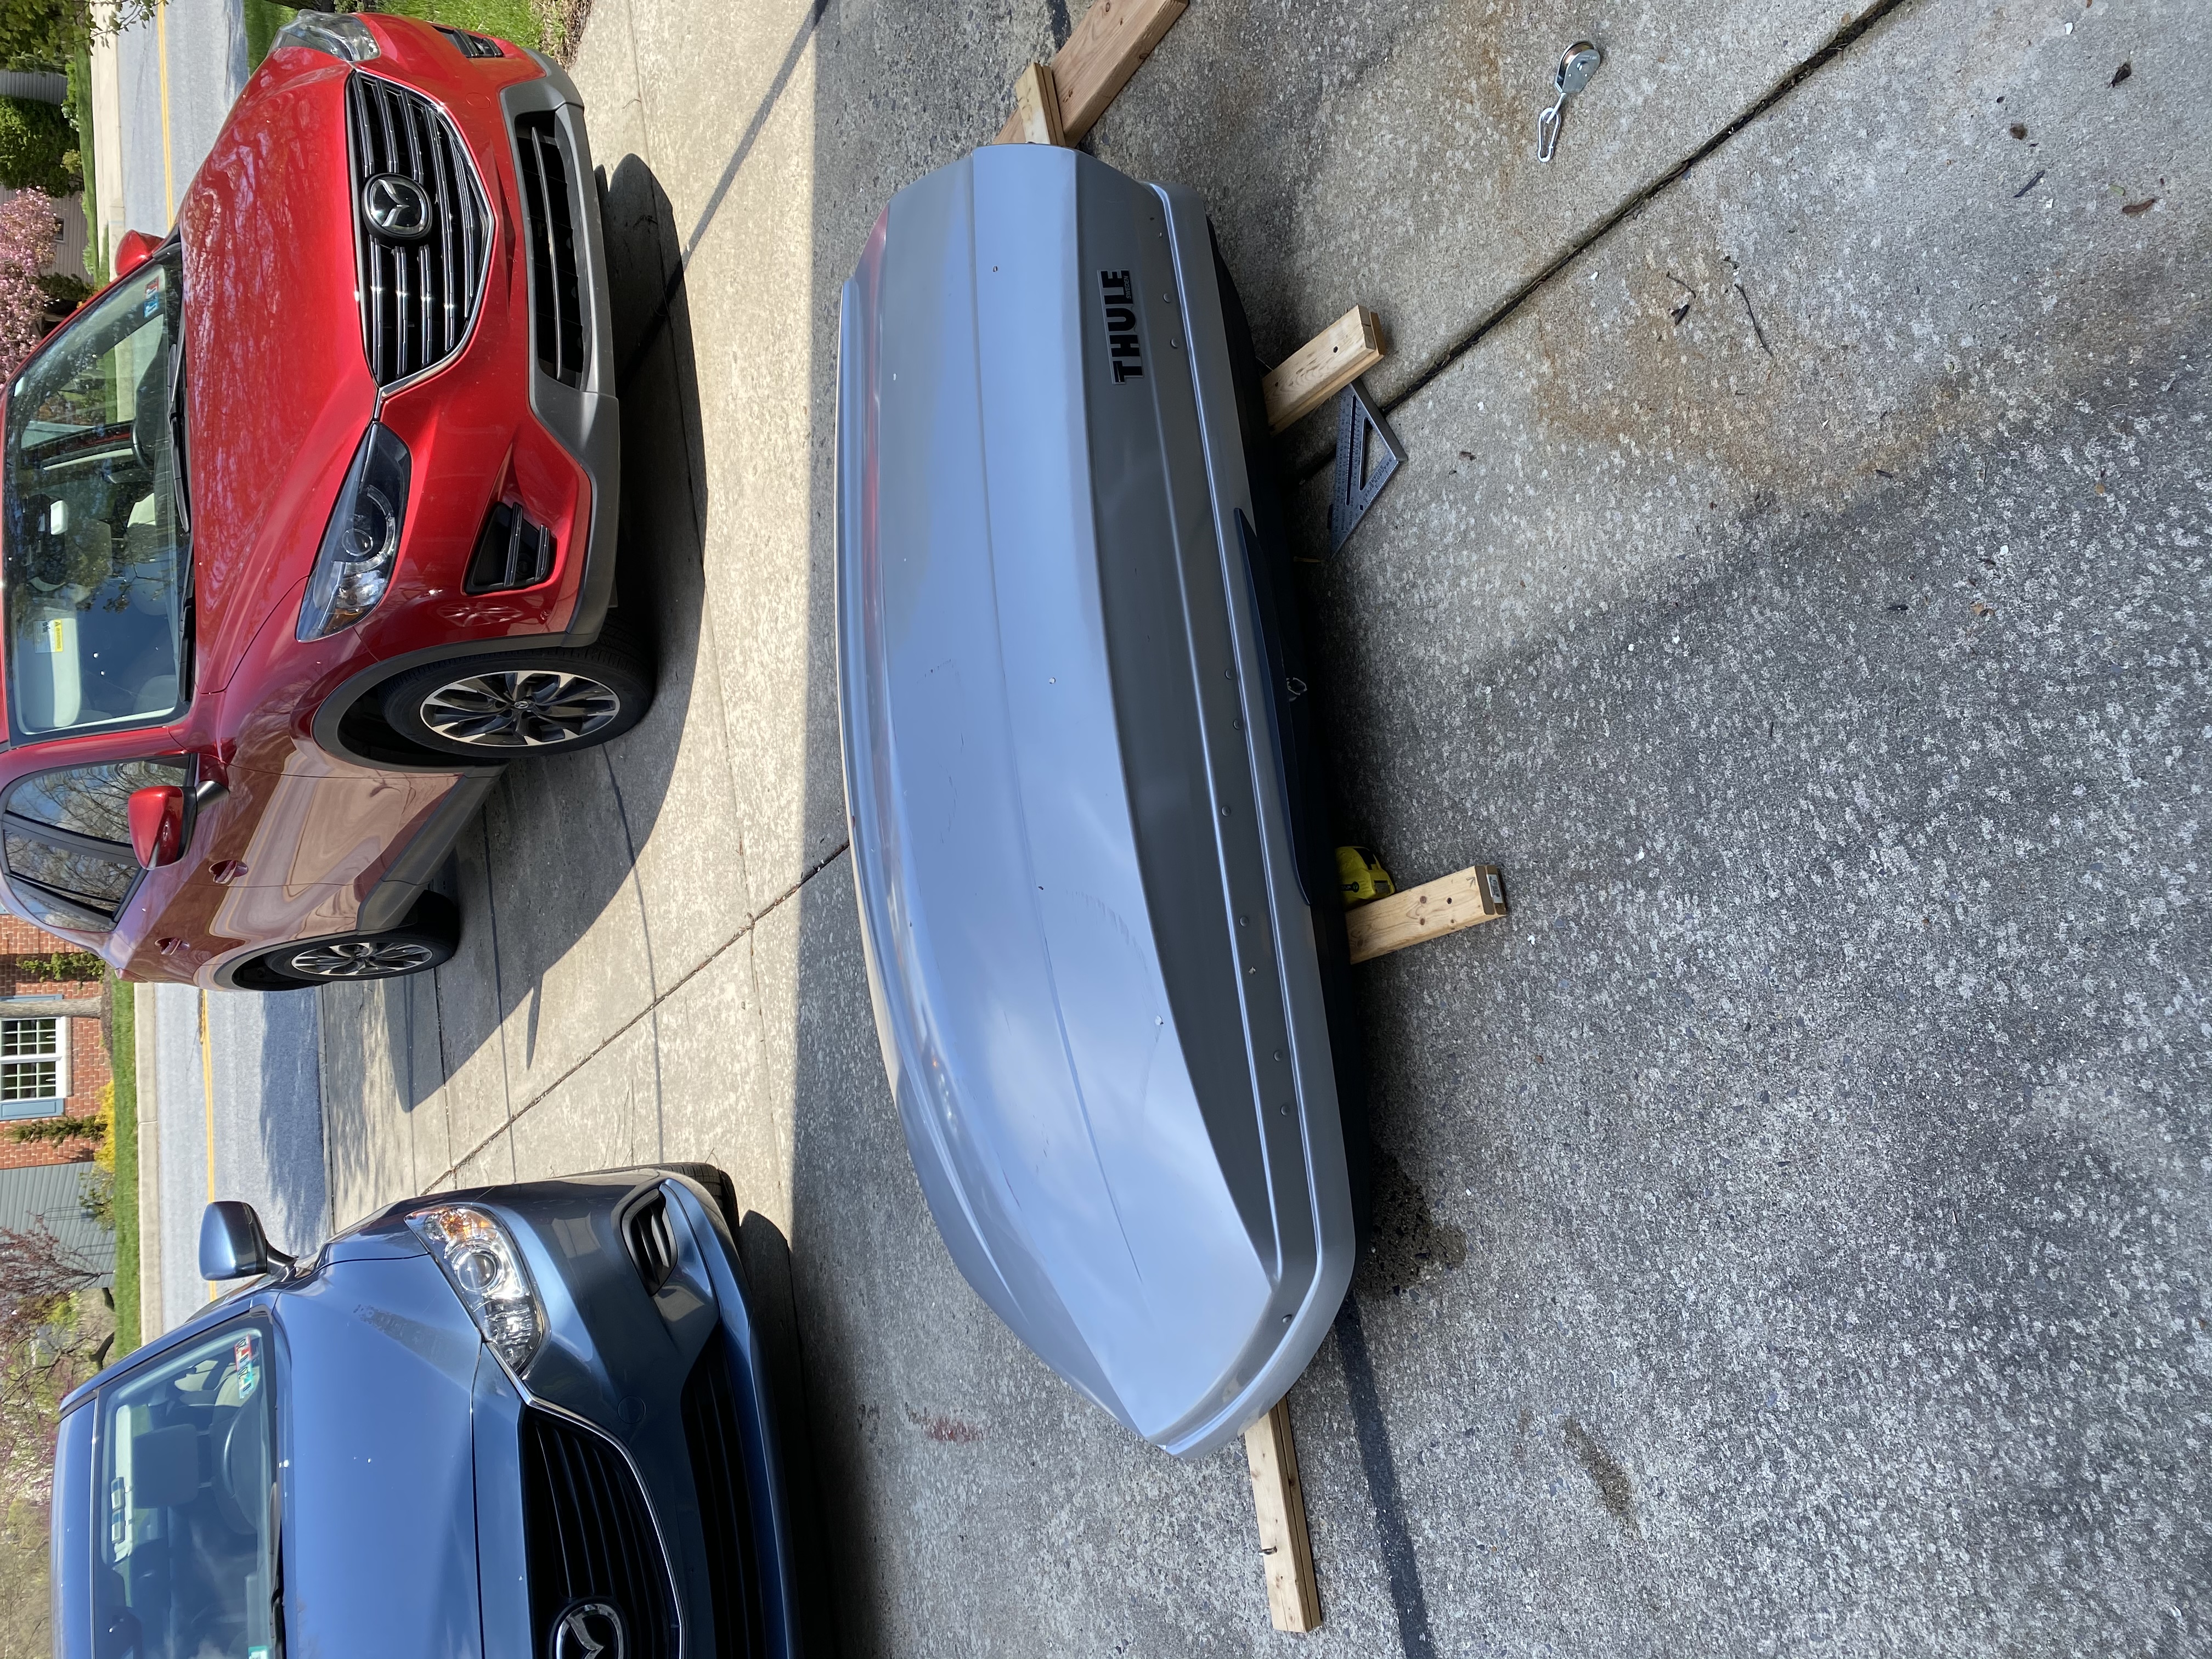
Read on for more pictures & what I did..
Pulleys are well understood by most people. What you may not remember from physics class is that three pulleys increase the mechanical advantage & thus requires less effort to hoist an object.
The Plan
A friend that is also a physics teacher helped me design a three pulley system. 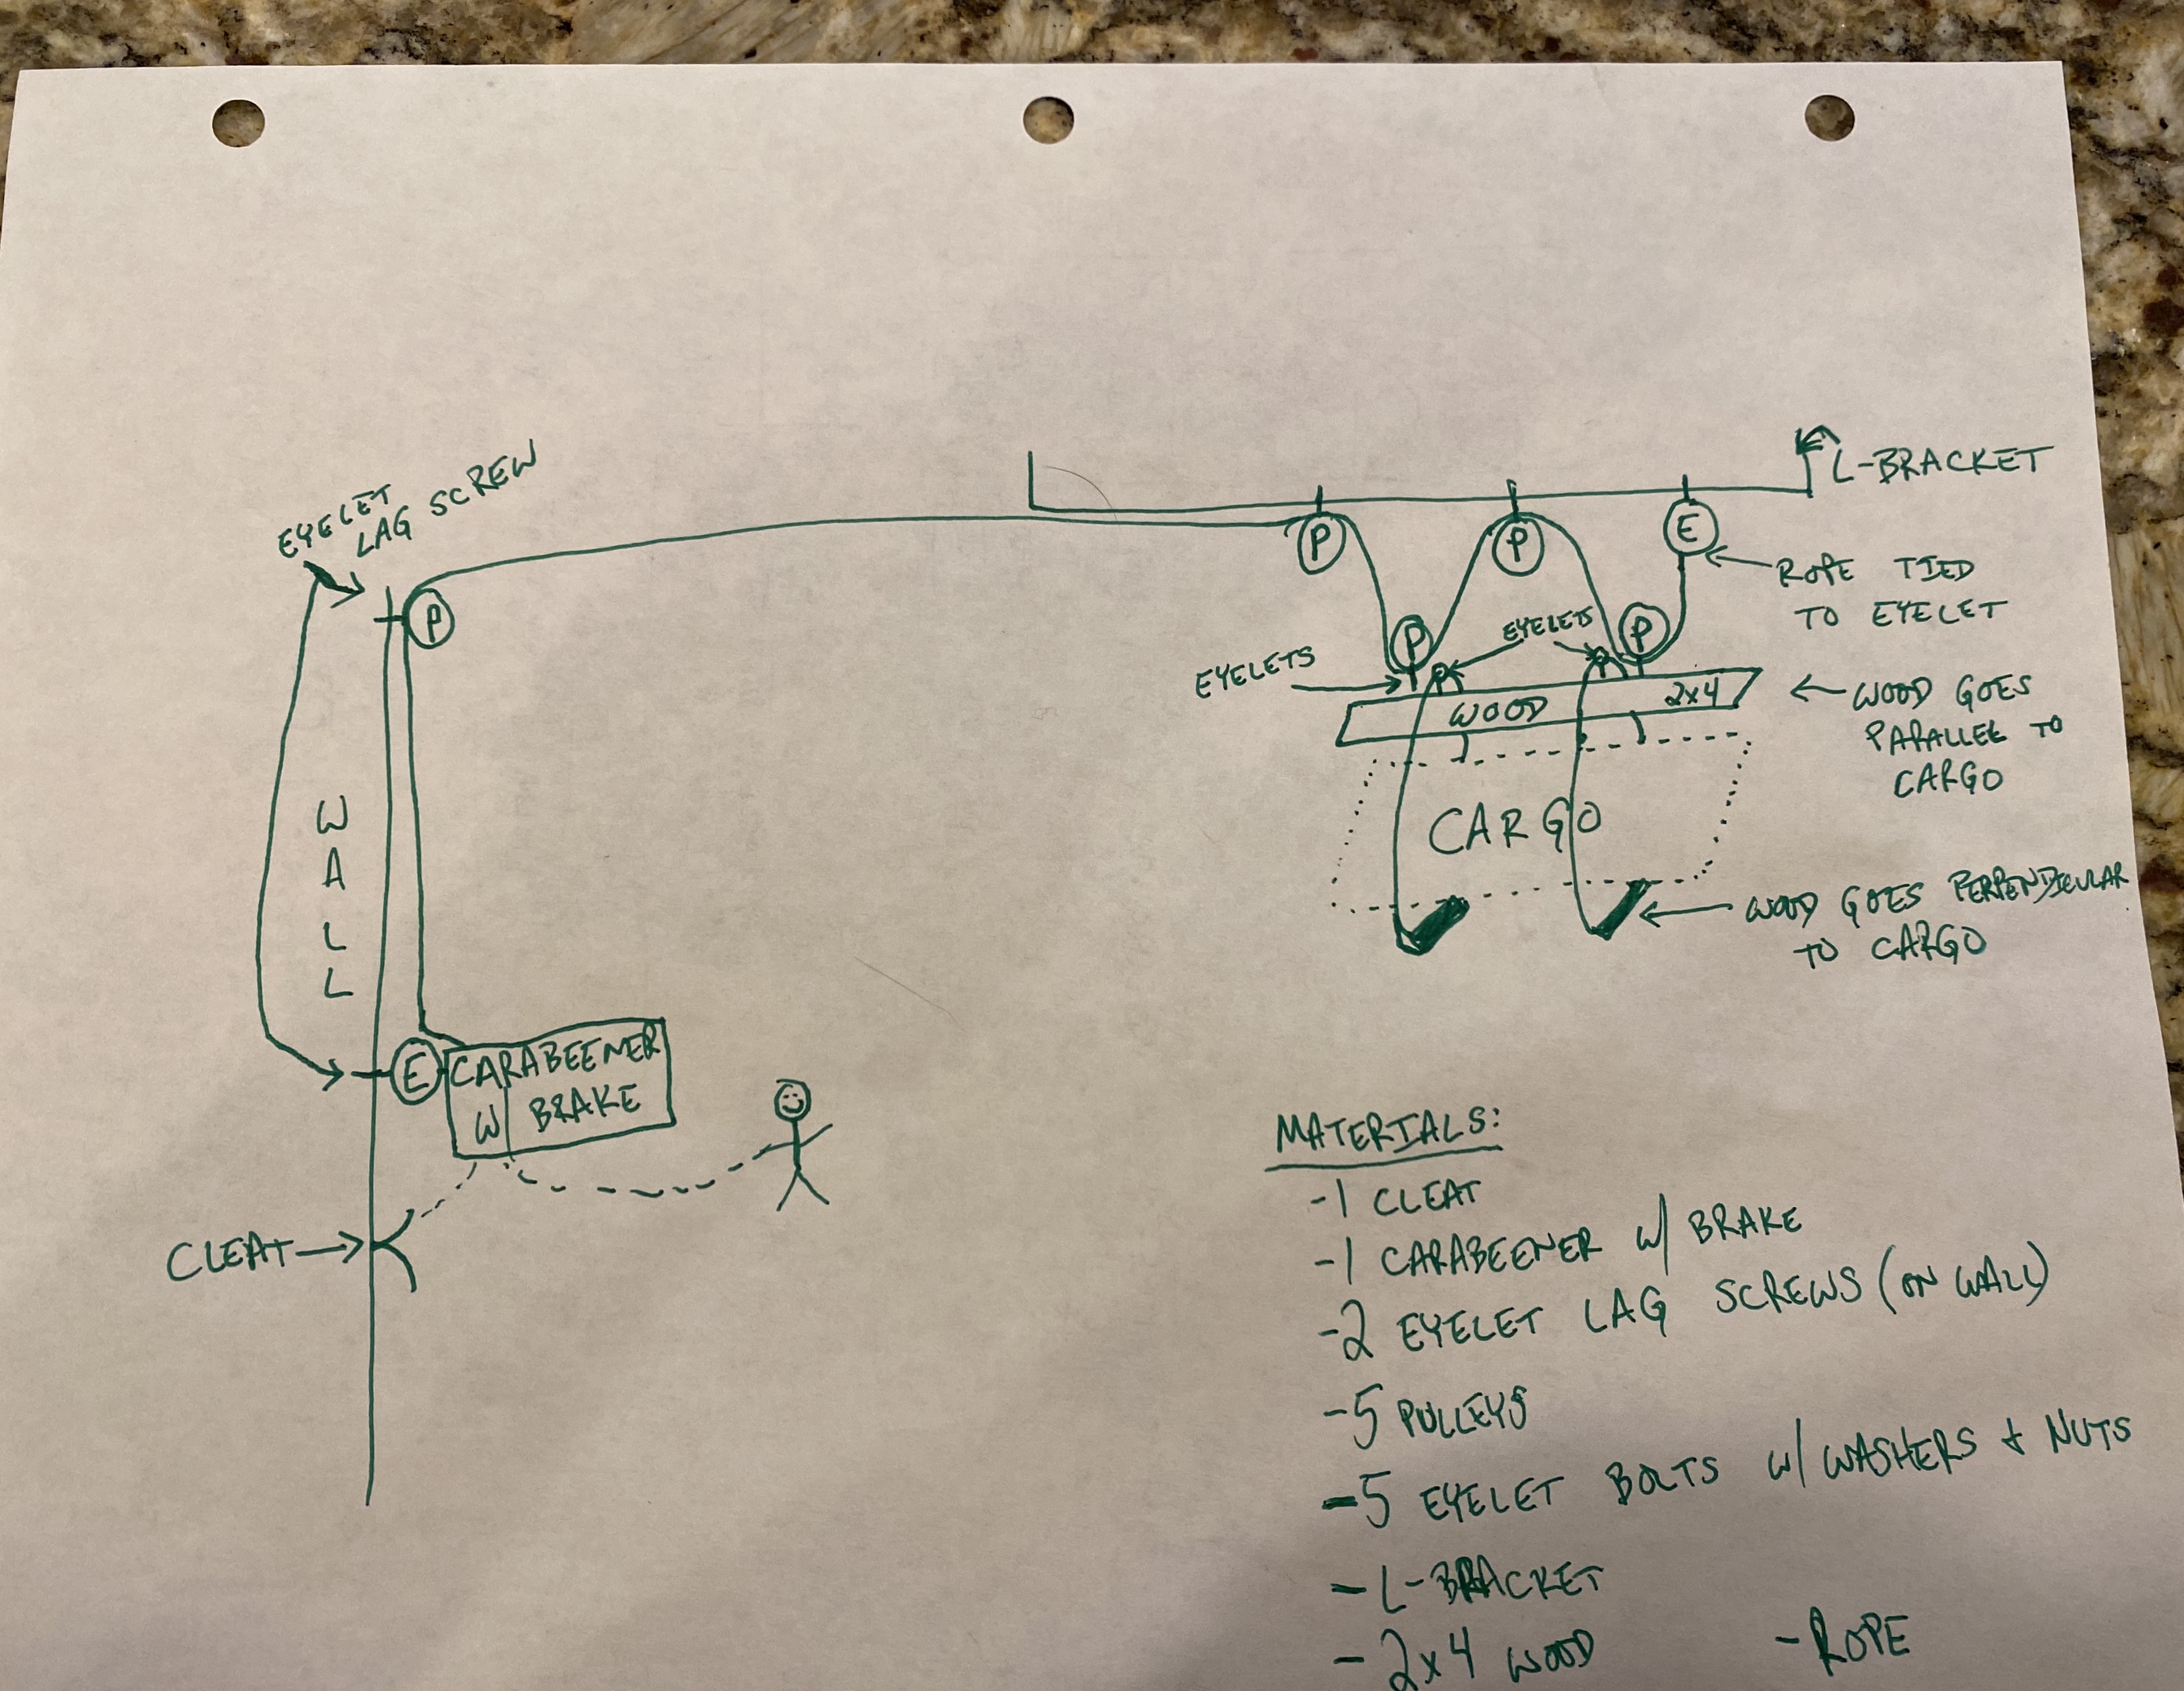
I ended up not using this design because I wanted to be able to independently raise & lower the front & back of the cargo. I modified it slightly so there were two independent ropes.
The Holder
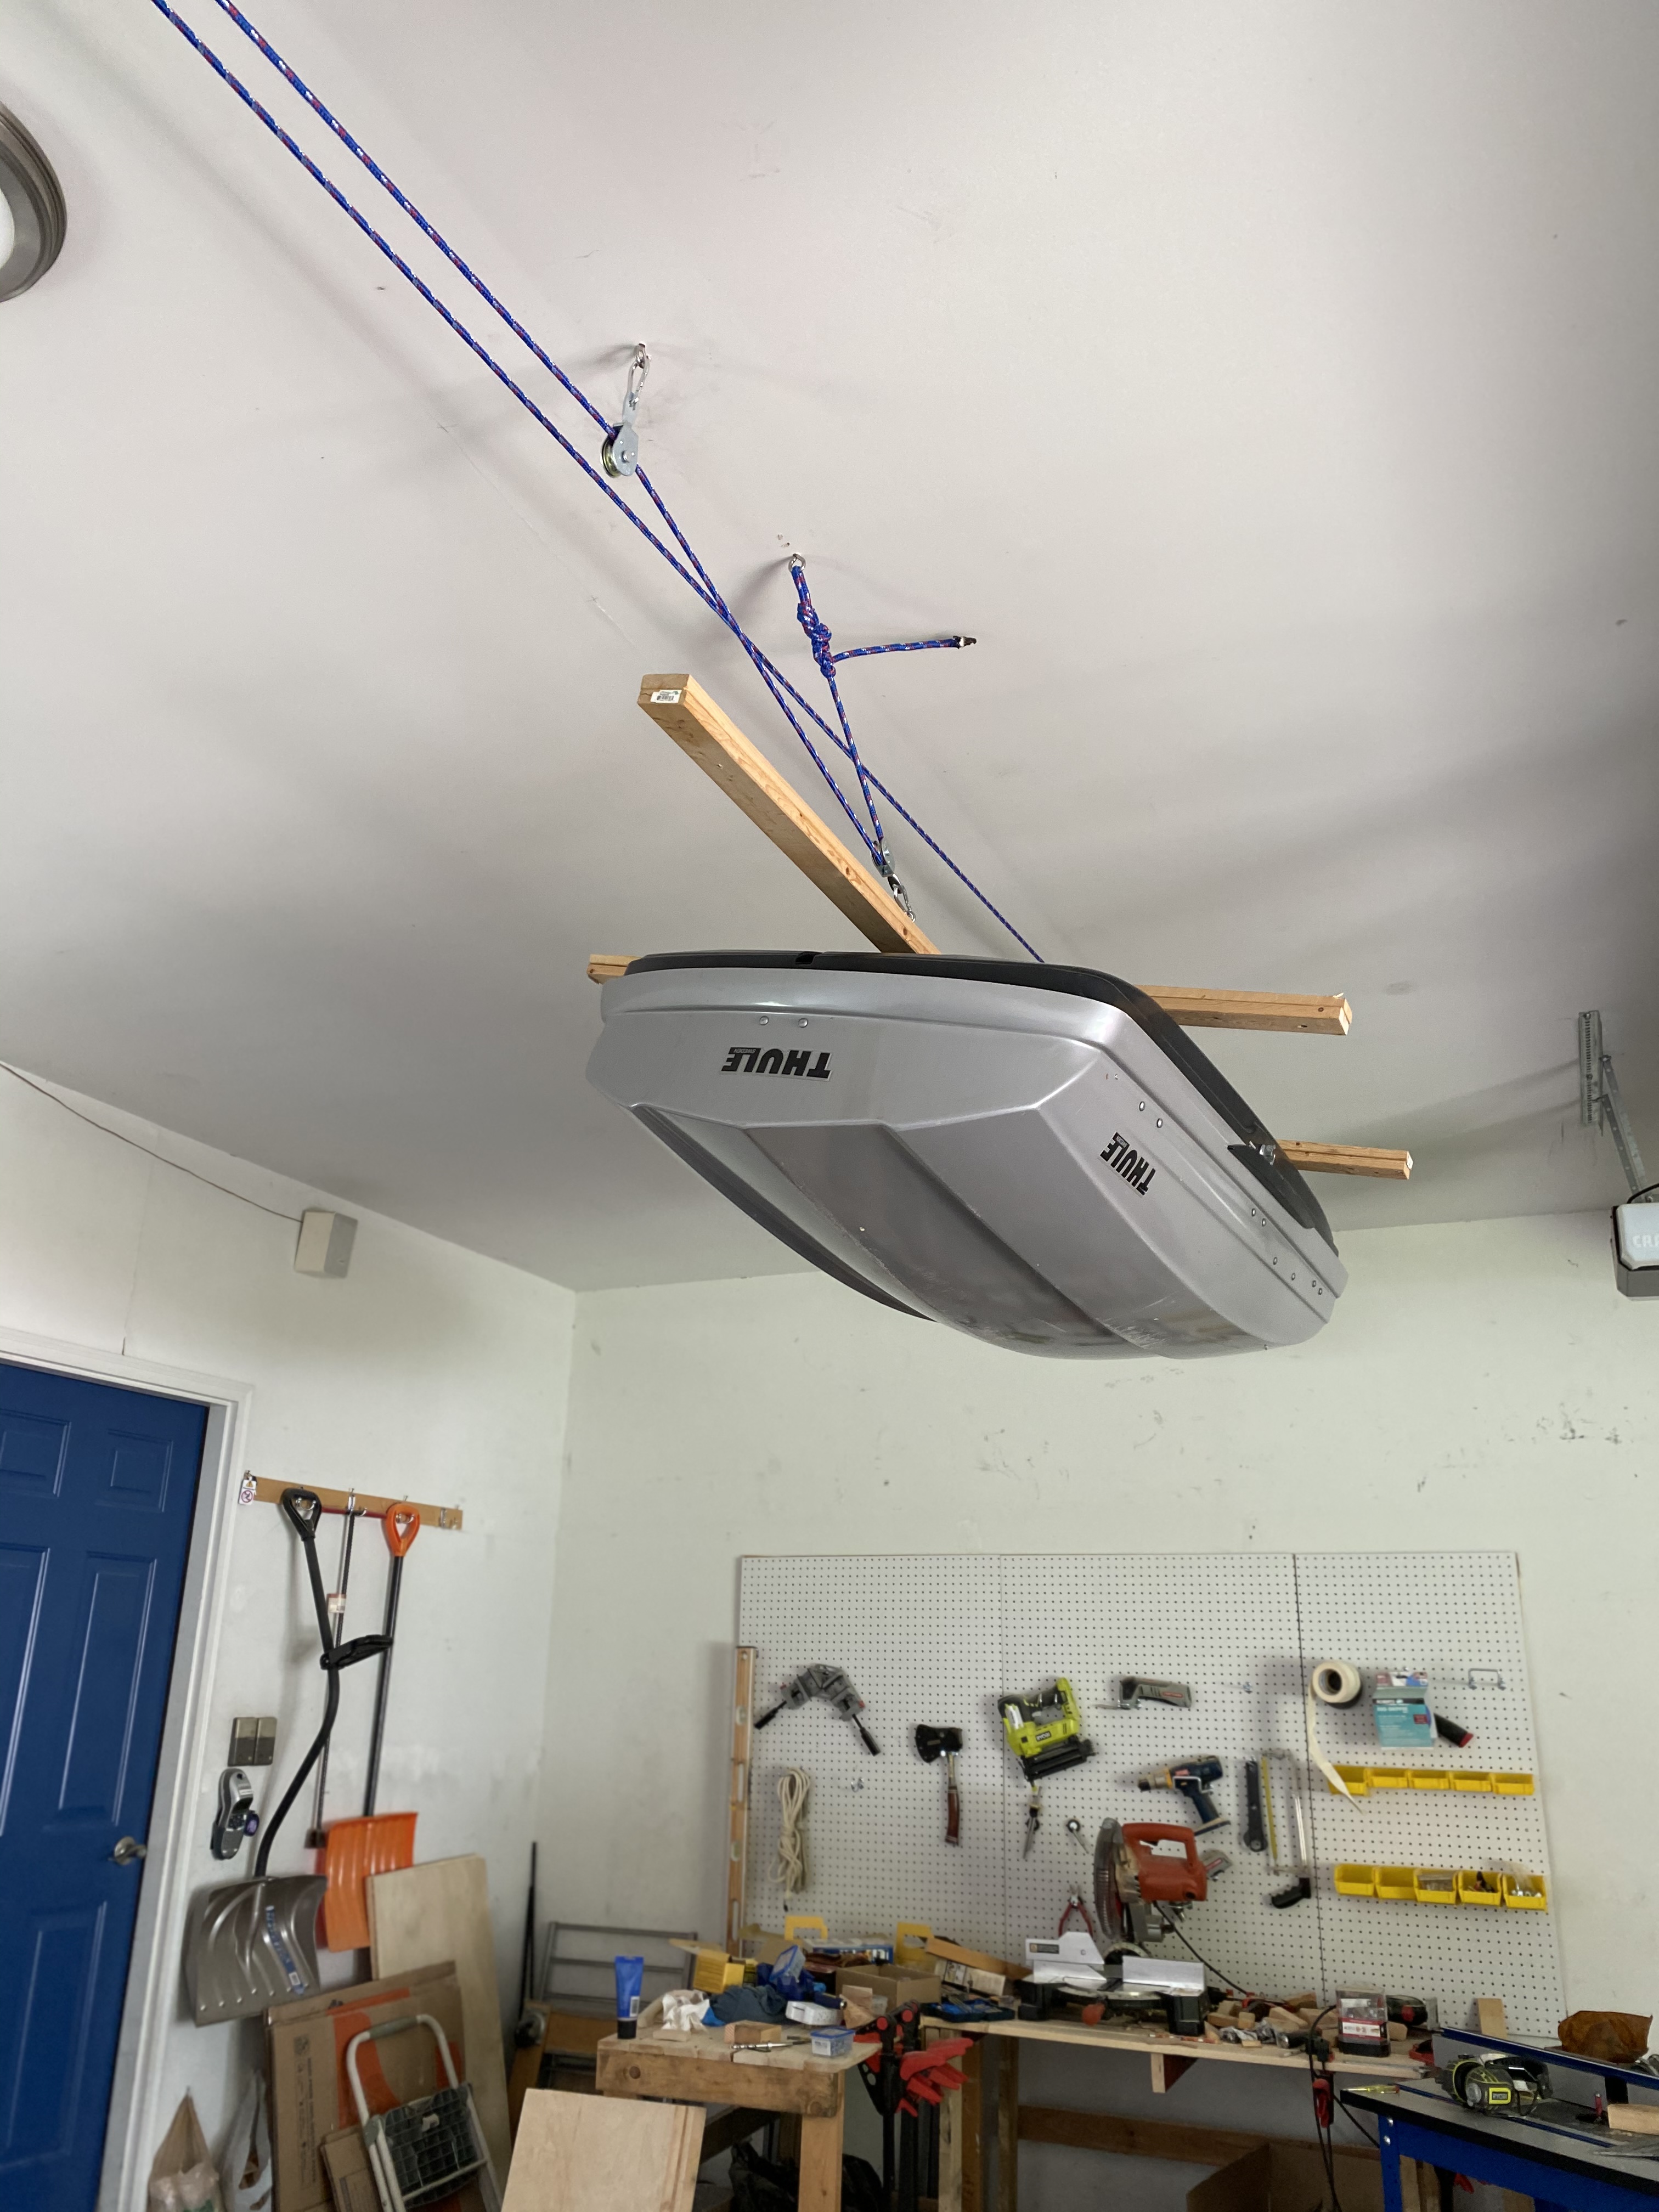
My second design depended on the cargo’s talons that normally grip the car. Those talons also grip the wood. I attached the beams using a crossbar.
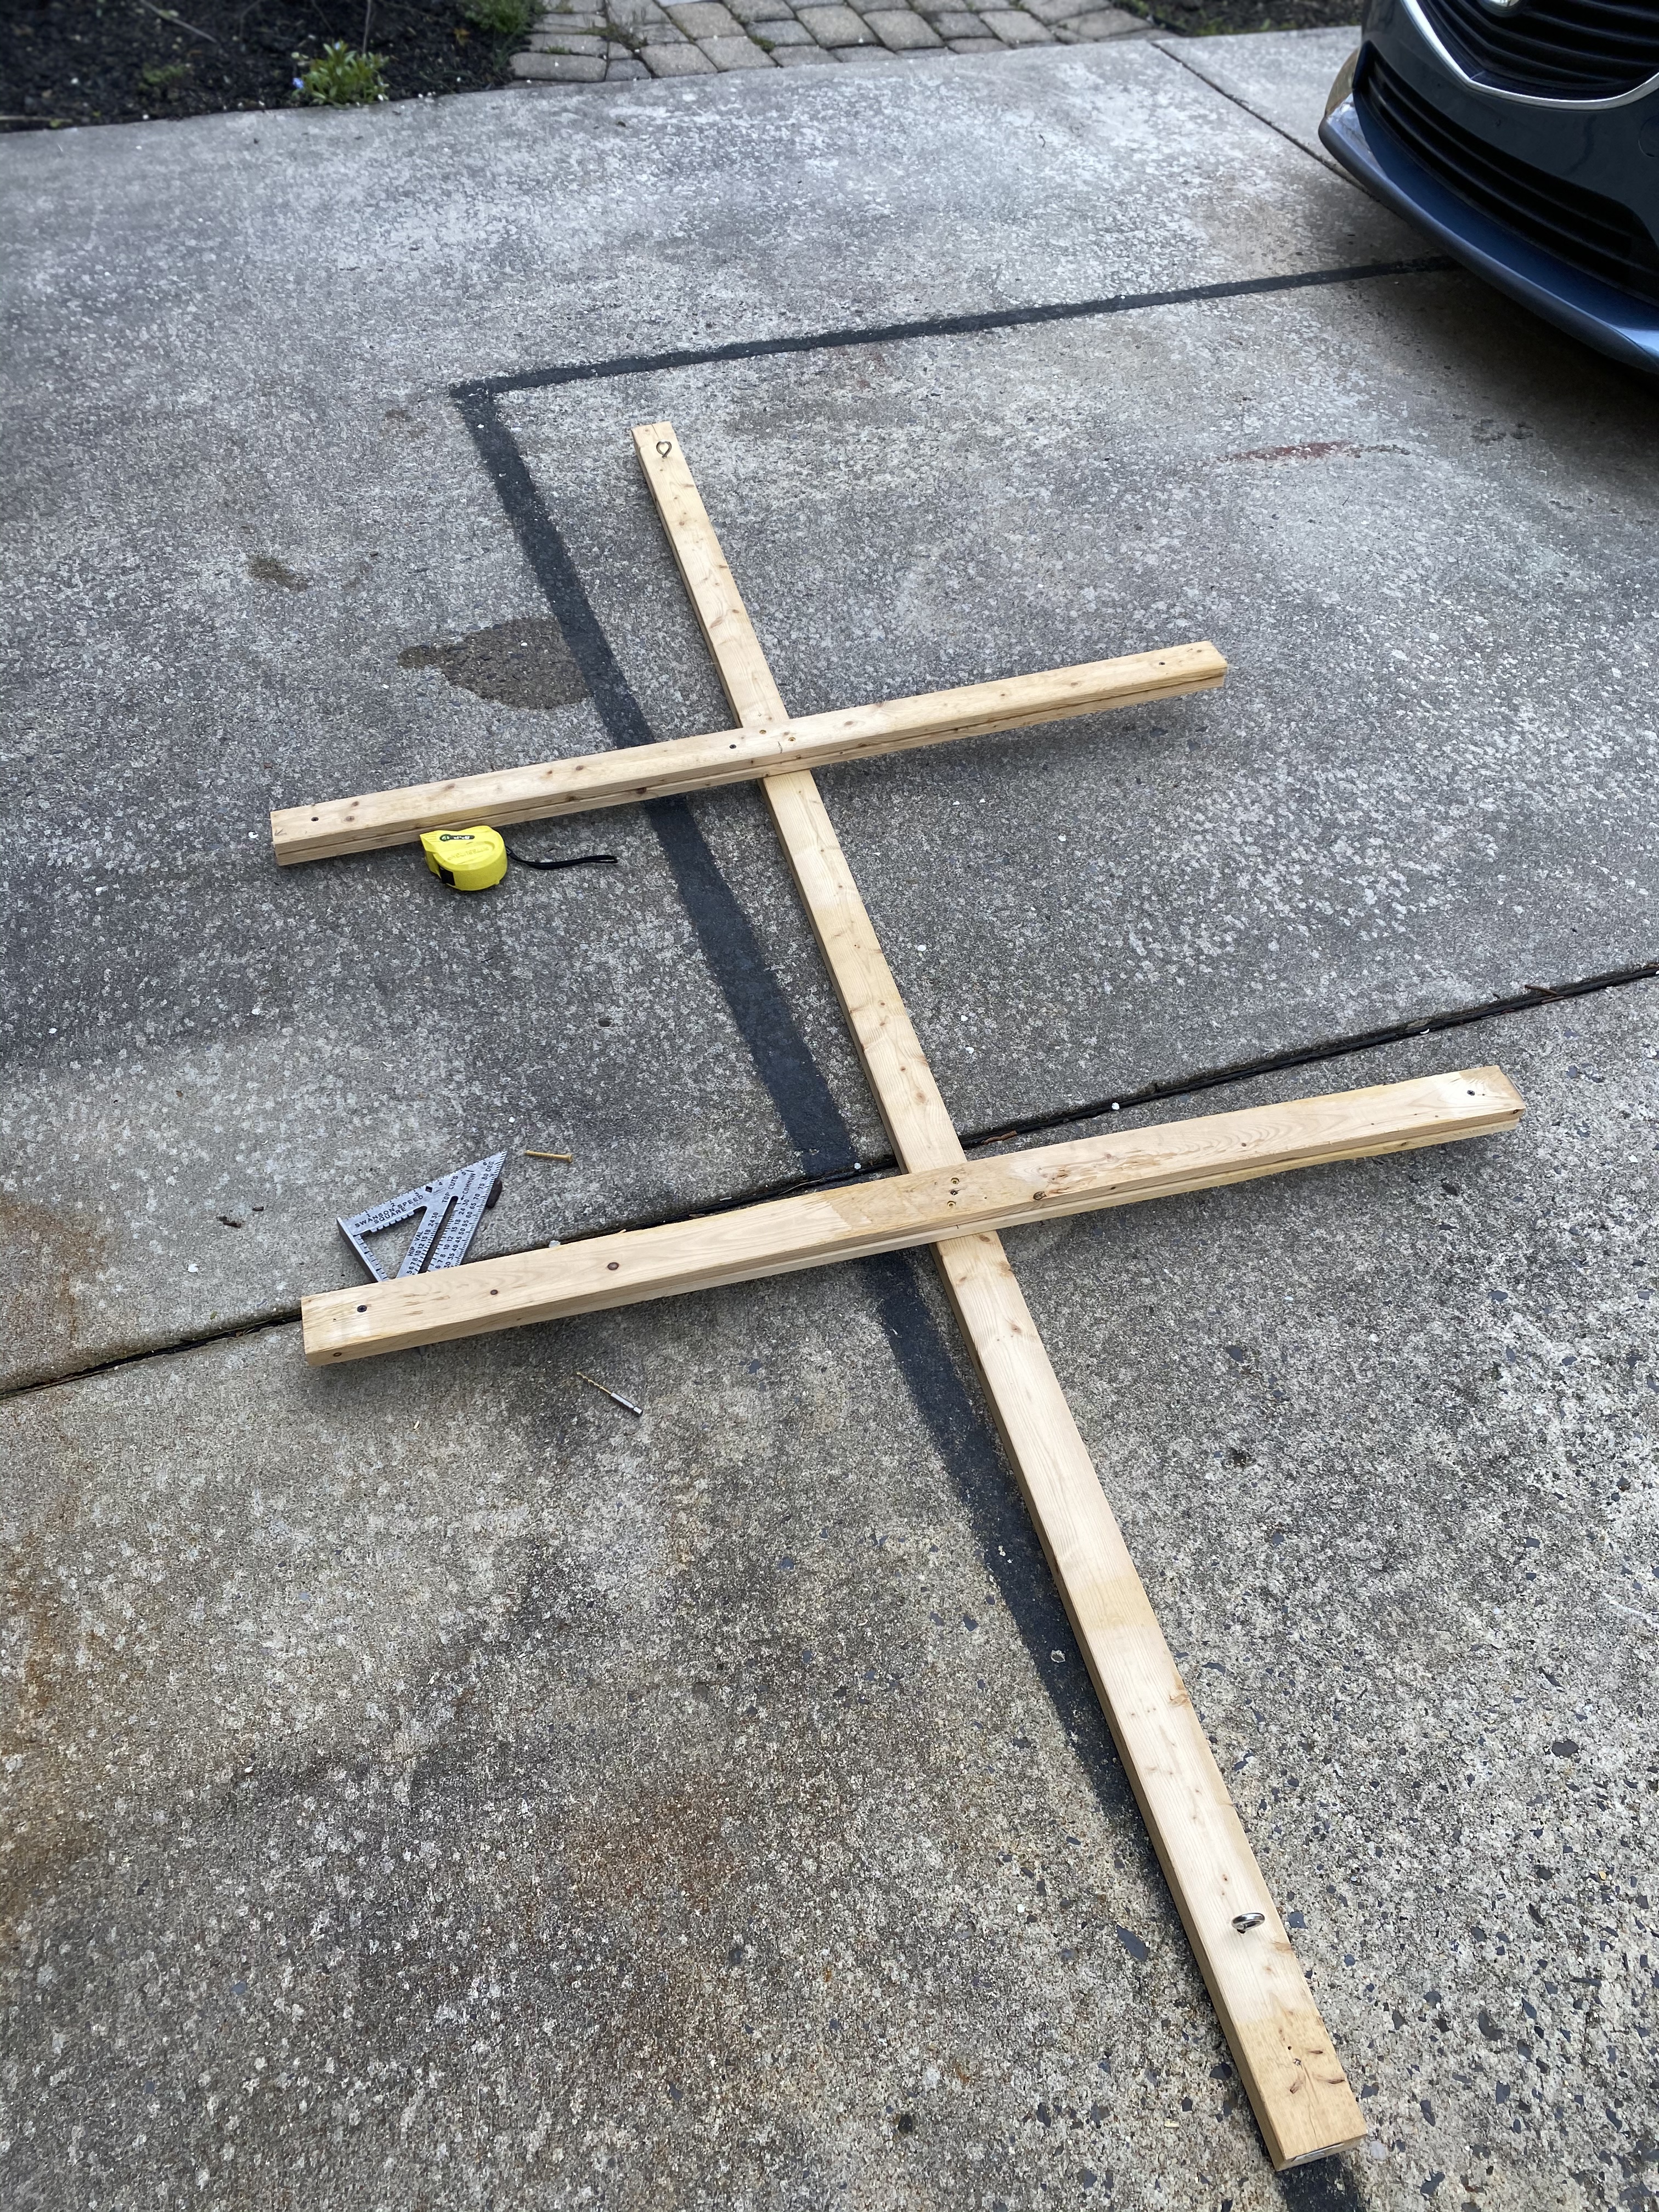
The picture above shows the eyelets at the top & bottom of the crossbar. That meant that the anchor points were not over the mass of the object. Therefore, the cargo flipped on the horizontal axis. The anchor points must be over the mass of the object to maintain stability.

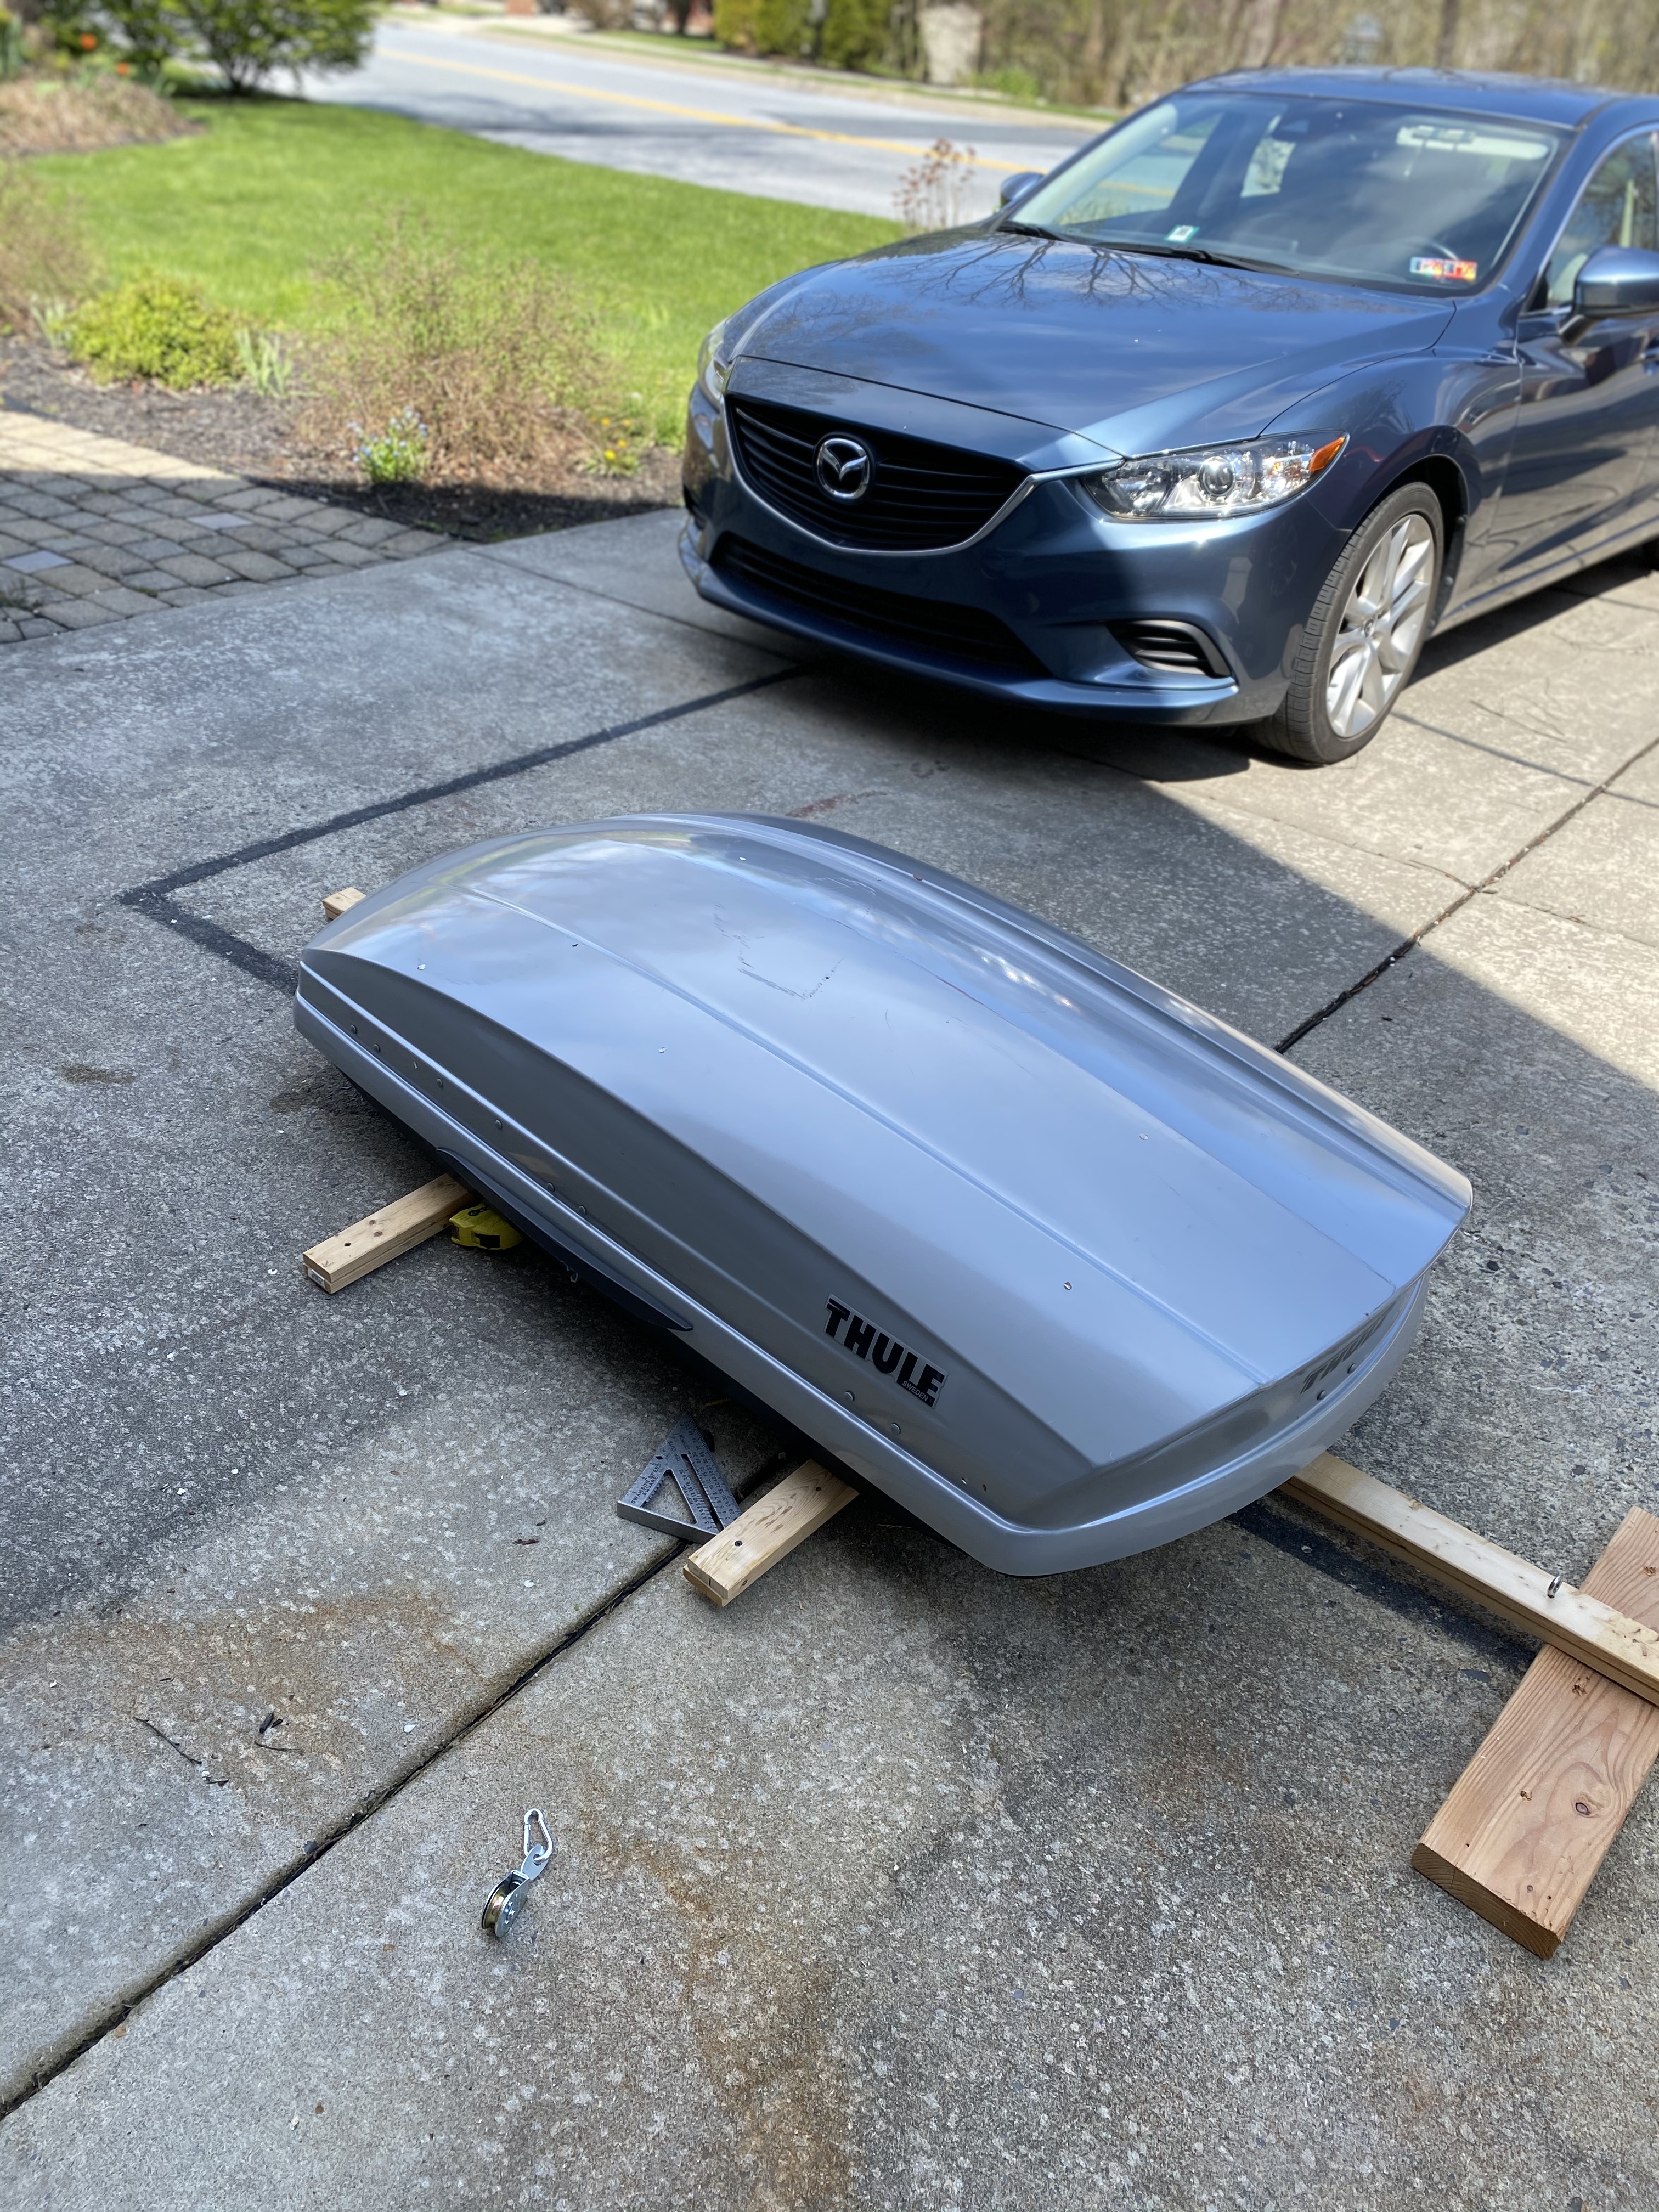
After I remembered the anchors needed to be over the mass of the object, I adjusted the design again (version 3) to flip the cargo upside down and the anchors closer to the center.
Selecting the Hardware
It’s important to consider how much weight the eyelets, pulleys, carabiners and rope can support. I selected pulleys, carabiners & eyelets rated at over 200 pounds. I also selected a double pulley so that it could support two ropes side by side (one for the front of the cargo & one for the back). The double pulley sits off to the side where the rope meets the wall.
The rope is ⅜” braided polyethylene with a rating over 300 pounds. The rating of the rope cleats is less important as they are mounted inline with the rope. Just pick ones that are big enough to wrap the rope around a few times.
Attaching the Hardware
I screwed the eyelets into joists. Then I screwed additional eyelets into different joists, attached a carabiner to each of those eyelets and then attached a pulley to each carabiner.
Ideally, the pulleys are positioned directly over the anchor points of the object below, but I wasn’t critical enough for me to reposition them.
Similarly, I screwed the eyelets into the crossbar, attached the carabiners and the pulleys.
The double pulley is also anchored with an eyelet & carabiner.
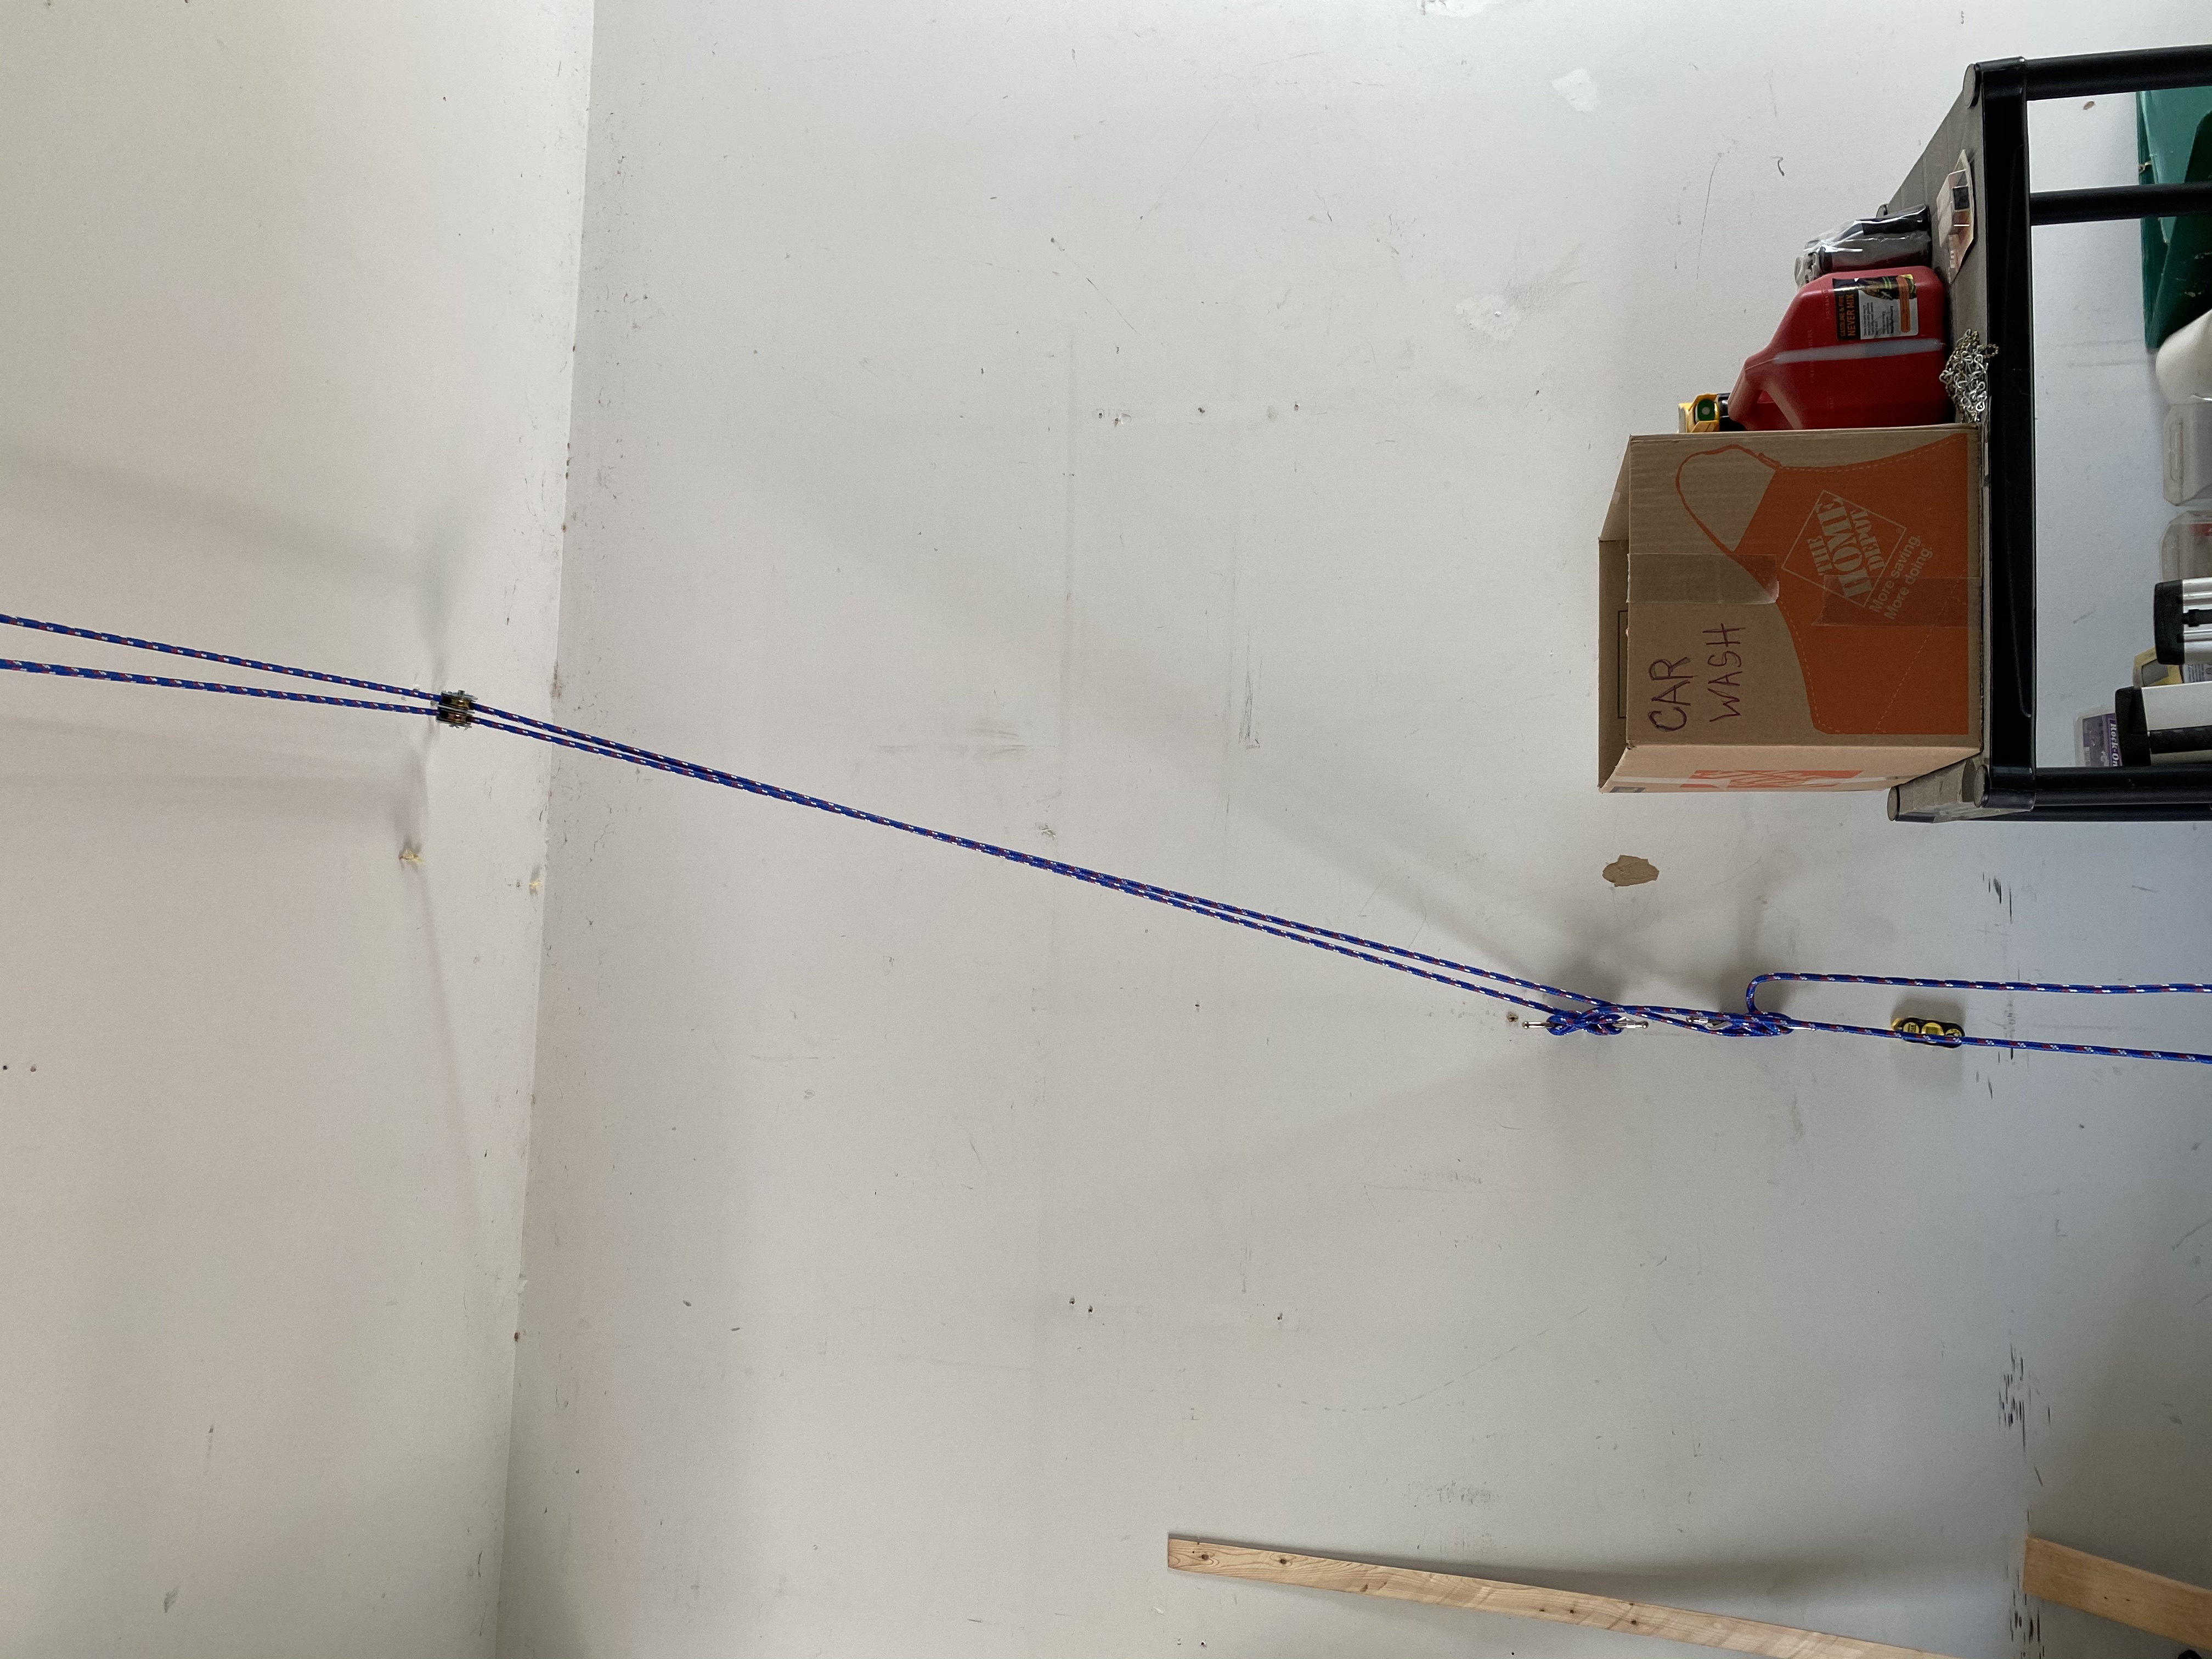
The rope
There are two critical pieces to securing the rope:
- The knot that goes through the eyelets in the ceiling needs to be a knot that won’t slip. I like rock climbing, so I used a figure eight knot.
- The ends of the rope need to be melted slightly to prevent fraying
Feeding the rope through the system is pretty easy:
- Go up to & through the double pulley
- Feed the rope through the first pulley in the ceiling and down to the pulley on the cross bar.
- Feed the rope through the pulley on the cross bar & up to the eyelet anchor in the ceiling.
- Pass the rope through the eyelet in the ceiling & tie the figure eight knot.
- Remember to burn the ends of the rope!
Hoist it up!
Tie it off
When tying the rope to the cleat, twist the rope so the end of the rope faces inward for maximum friction against the other rope. Then do it again on the other side of the anchor.
Hopefully this helps you design a system to give you more workspace in your garage!
