shantzing
  • Home
  • Home Improvement
  • Kids' Projects
  • Tech
  • Music
    • WVWC Concert Band
    • WVWC Jazz Ensemble
  • Crochet
  1. Home
  2. Kids' Projects
Subscribe for updates!

Loft Bed

Details
Category: Kids' Projects
Published: 02 January 2022
Created: 02 January 2022
Last Updated: 25 January 2022
Hits: 571
  • kids
  • home improvement
  • bed

Our daughter asked for a loft bed. We looked high and low but couldn’t find any that met all of our requirements. We’ve been building our furniture building skills, so we gave it a go. 

We wanted:

  1. Solid wood (not pressed board)
  2. A specific height so her cubbies would fit underneath. 
  3. A design where we could add to it if needed. (e.g. quick escape slide in case she needed to go potty in the middle of the night). 
  4. Not spend an arm and a leg. We spent about $400 making it ourselves.

Here’s the finished product:


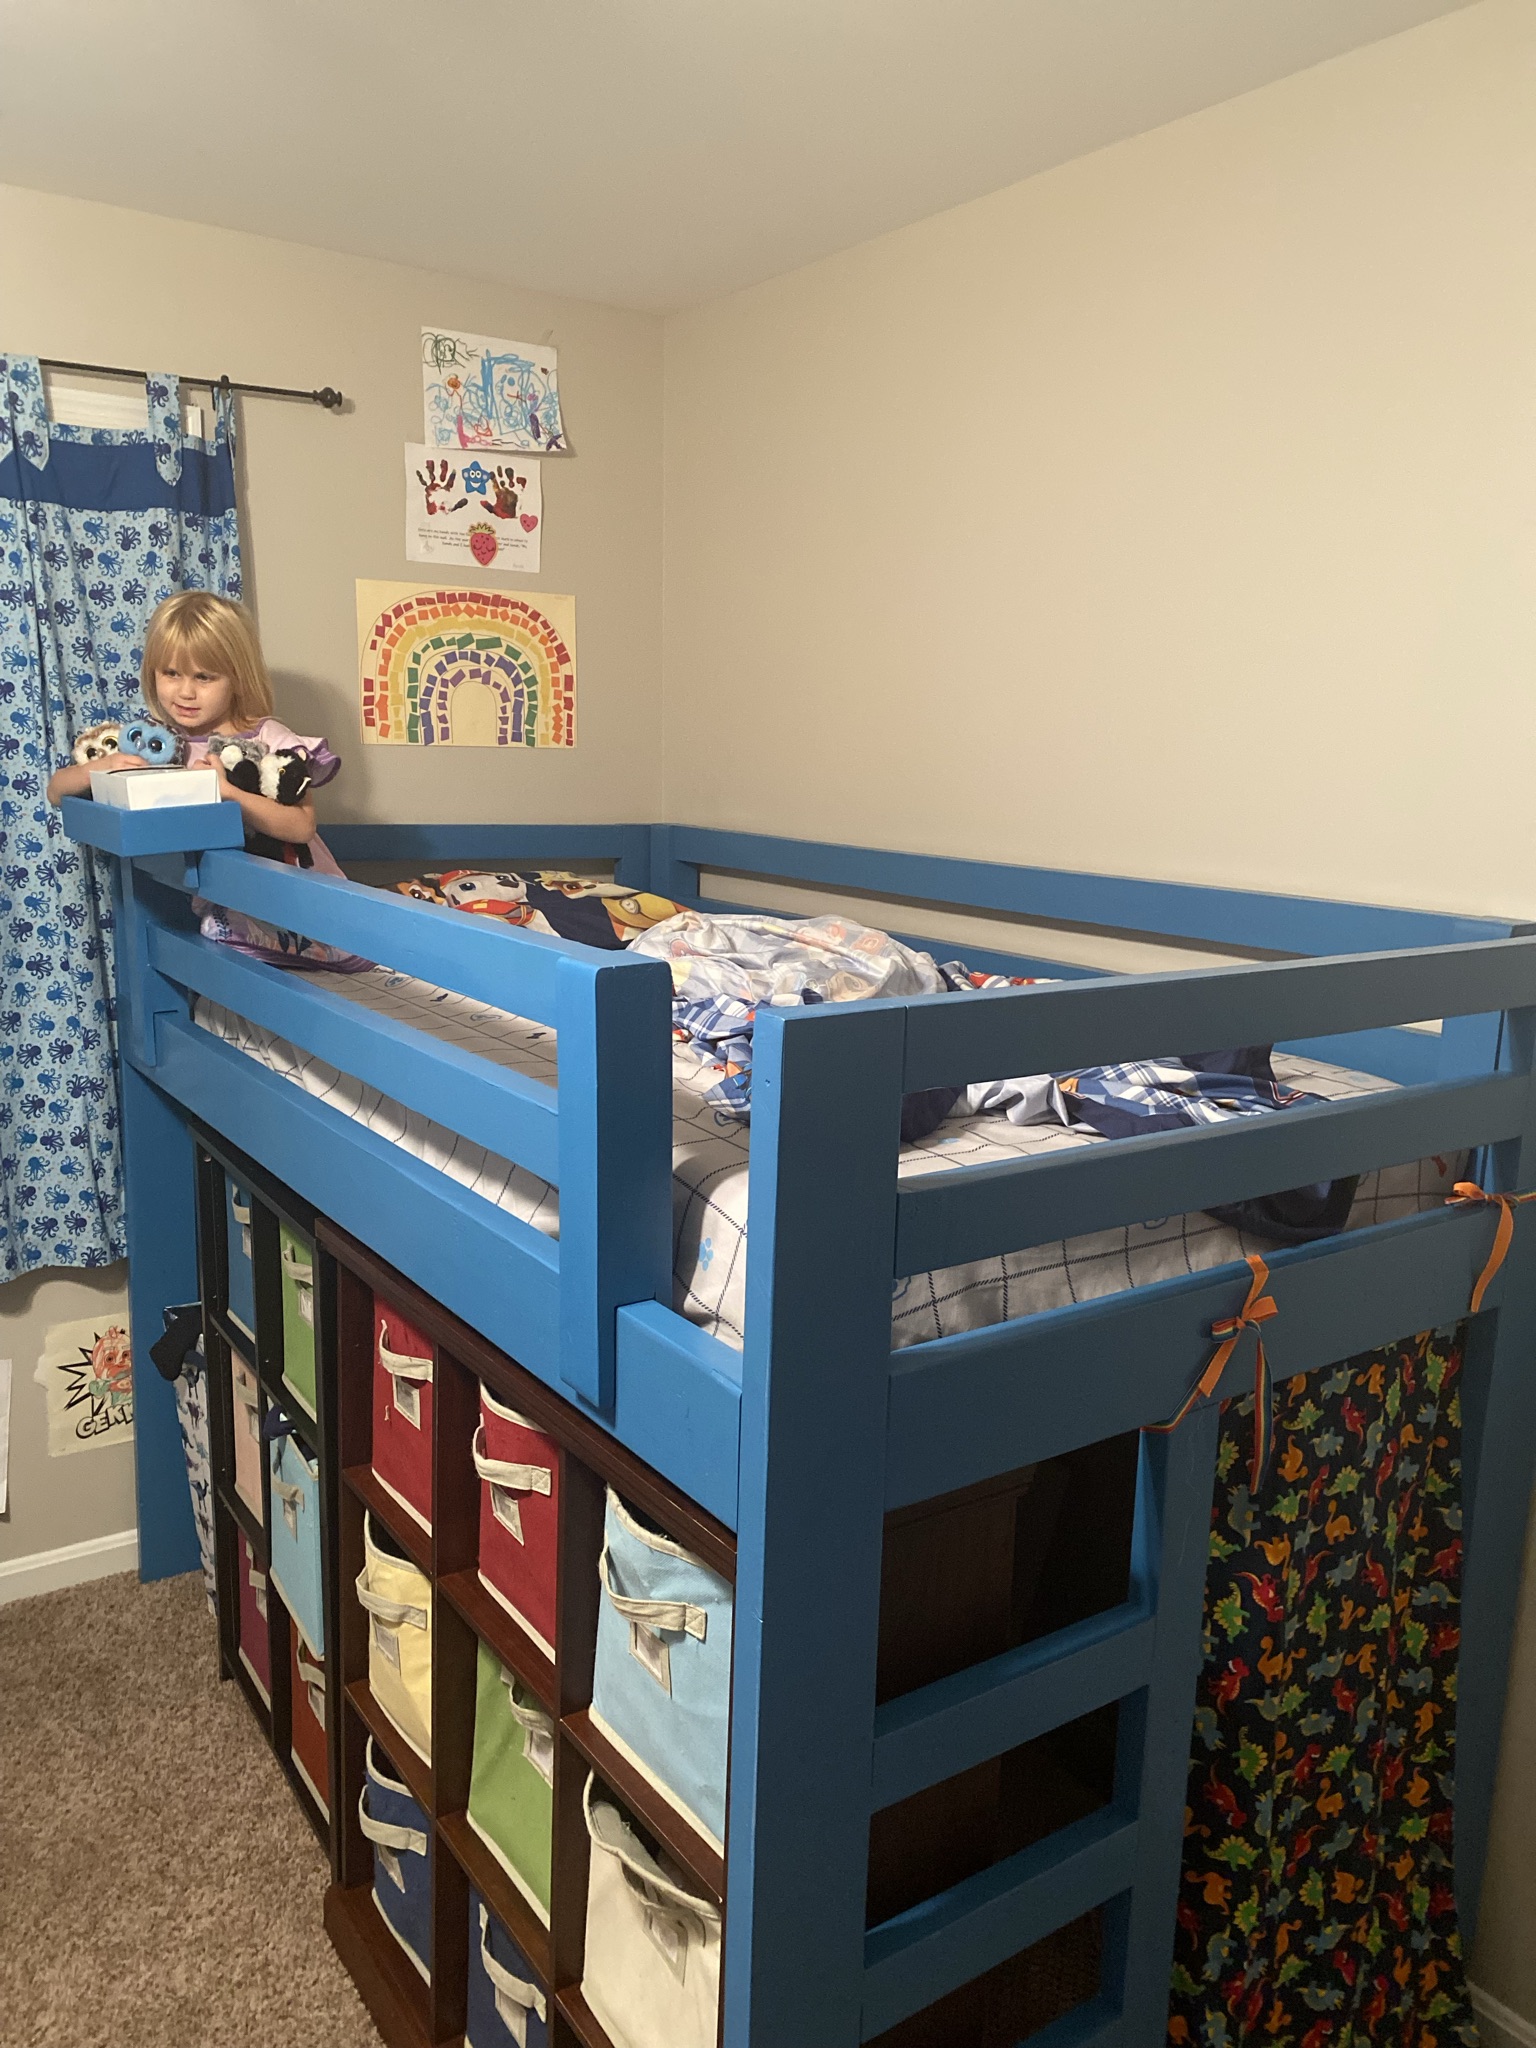
Read on to see how it went..

Read more: Loft Bed

Embroidery Heart

Details
Category: Kids' Projects
Published: 27 December 2020
Created: 27 December 2020
Last Updated: 27 December 2020
Hits: 657
  • kids

Our daughter loves hearts and rainbows. We worked together to make something special that she could help with. 


Materials

  1. Plywood (14” wide x 14” long x ½” thick) ($5)
  2. Nails with small heads ($5)
  3. Embroidery floss ($2)
  4. Black paint ($2)
  5. Paper for making outline of heart (50 cents)


Tools

  1. Hammer
  2. Drill with bit slightly smaller than width of the nail 
  3. Table saw to cut plywood (if necessary)
  4. Ruler & pencil for marking locations of nails
  5. Paint brush
  6. Scissors


Read on for the process..

Read more: Embroidery Heart

Step stool

Details
Category: Kids' Projects
Published: 16 August 2020
Created: 16 August 2020
Last Updated: 16 August 2020
Hits: 789
  • kids
  • home improvement

My daughter asked for a step stool for her birthday. We found a picture online of one she liked and went from there. This was one of the easiest projects I’ve ever done, despite there being curves involved.  The best part of this project is it was made entirely from materials we already had (except the paint & hinges).  So, it cost us about $12 to build.  Arguably one of the least expensive, best made stools ever.  Well, it was $12 unless you count the new sliding miter saw I got.  Then it’s probably the most expensive stool ever made.


I think it turned out really nice. Read on for plans & more pictures!


Read more: Step stool

Kid Table with Chalk Paint

Details
Category: Kids' Projects
Published: 03 November 2019
Created: 03 November 2019
Last Updated: 28 January 2020
Hits: 1346
  • kids
  • home improvement

When our first daughter was born, we bought a cute table & chairs with pirates on it. It’s received a fair amount of abuse over the years (enough abuse that one of the chairs broke). My wife wanted to try using “chalk paint” to restore furniture. 


done


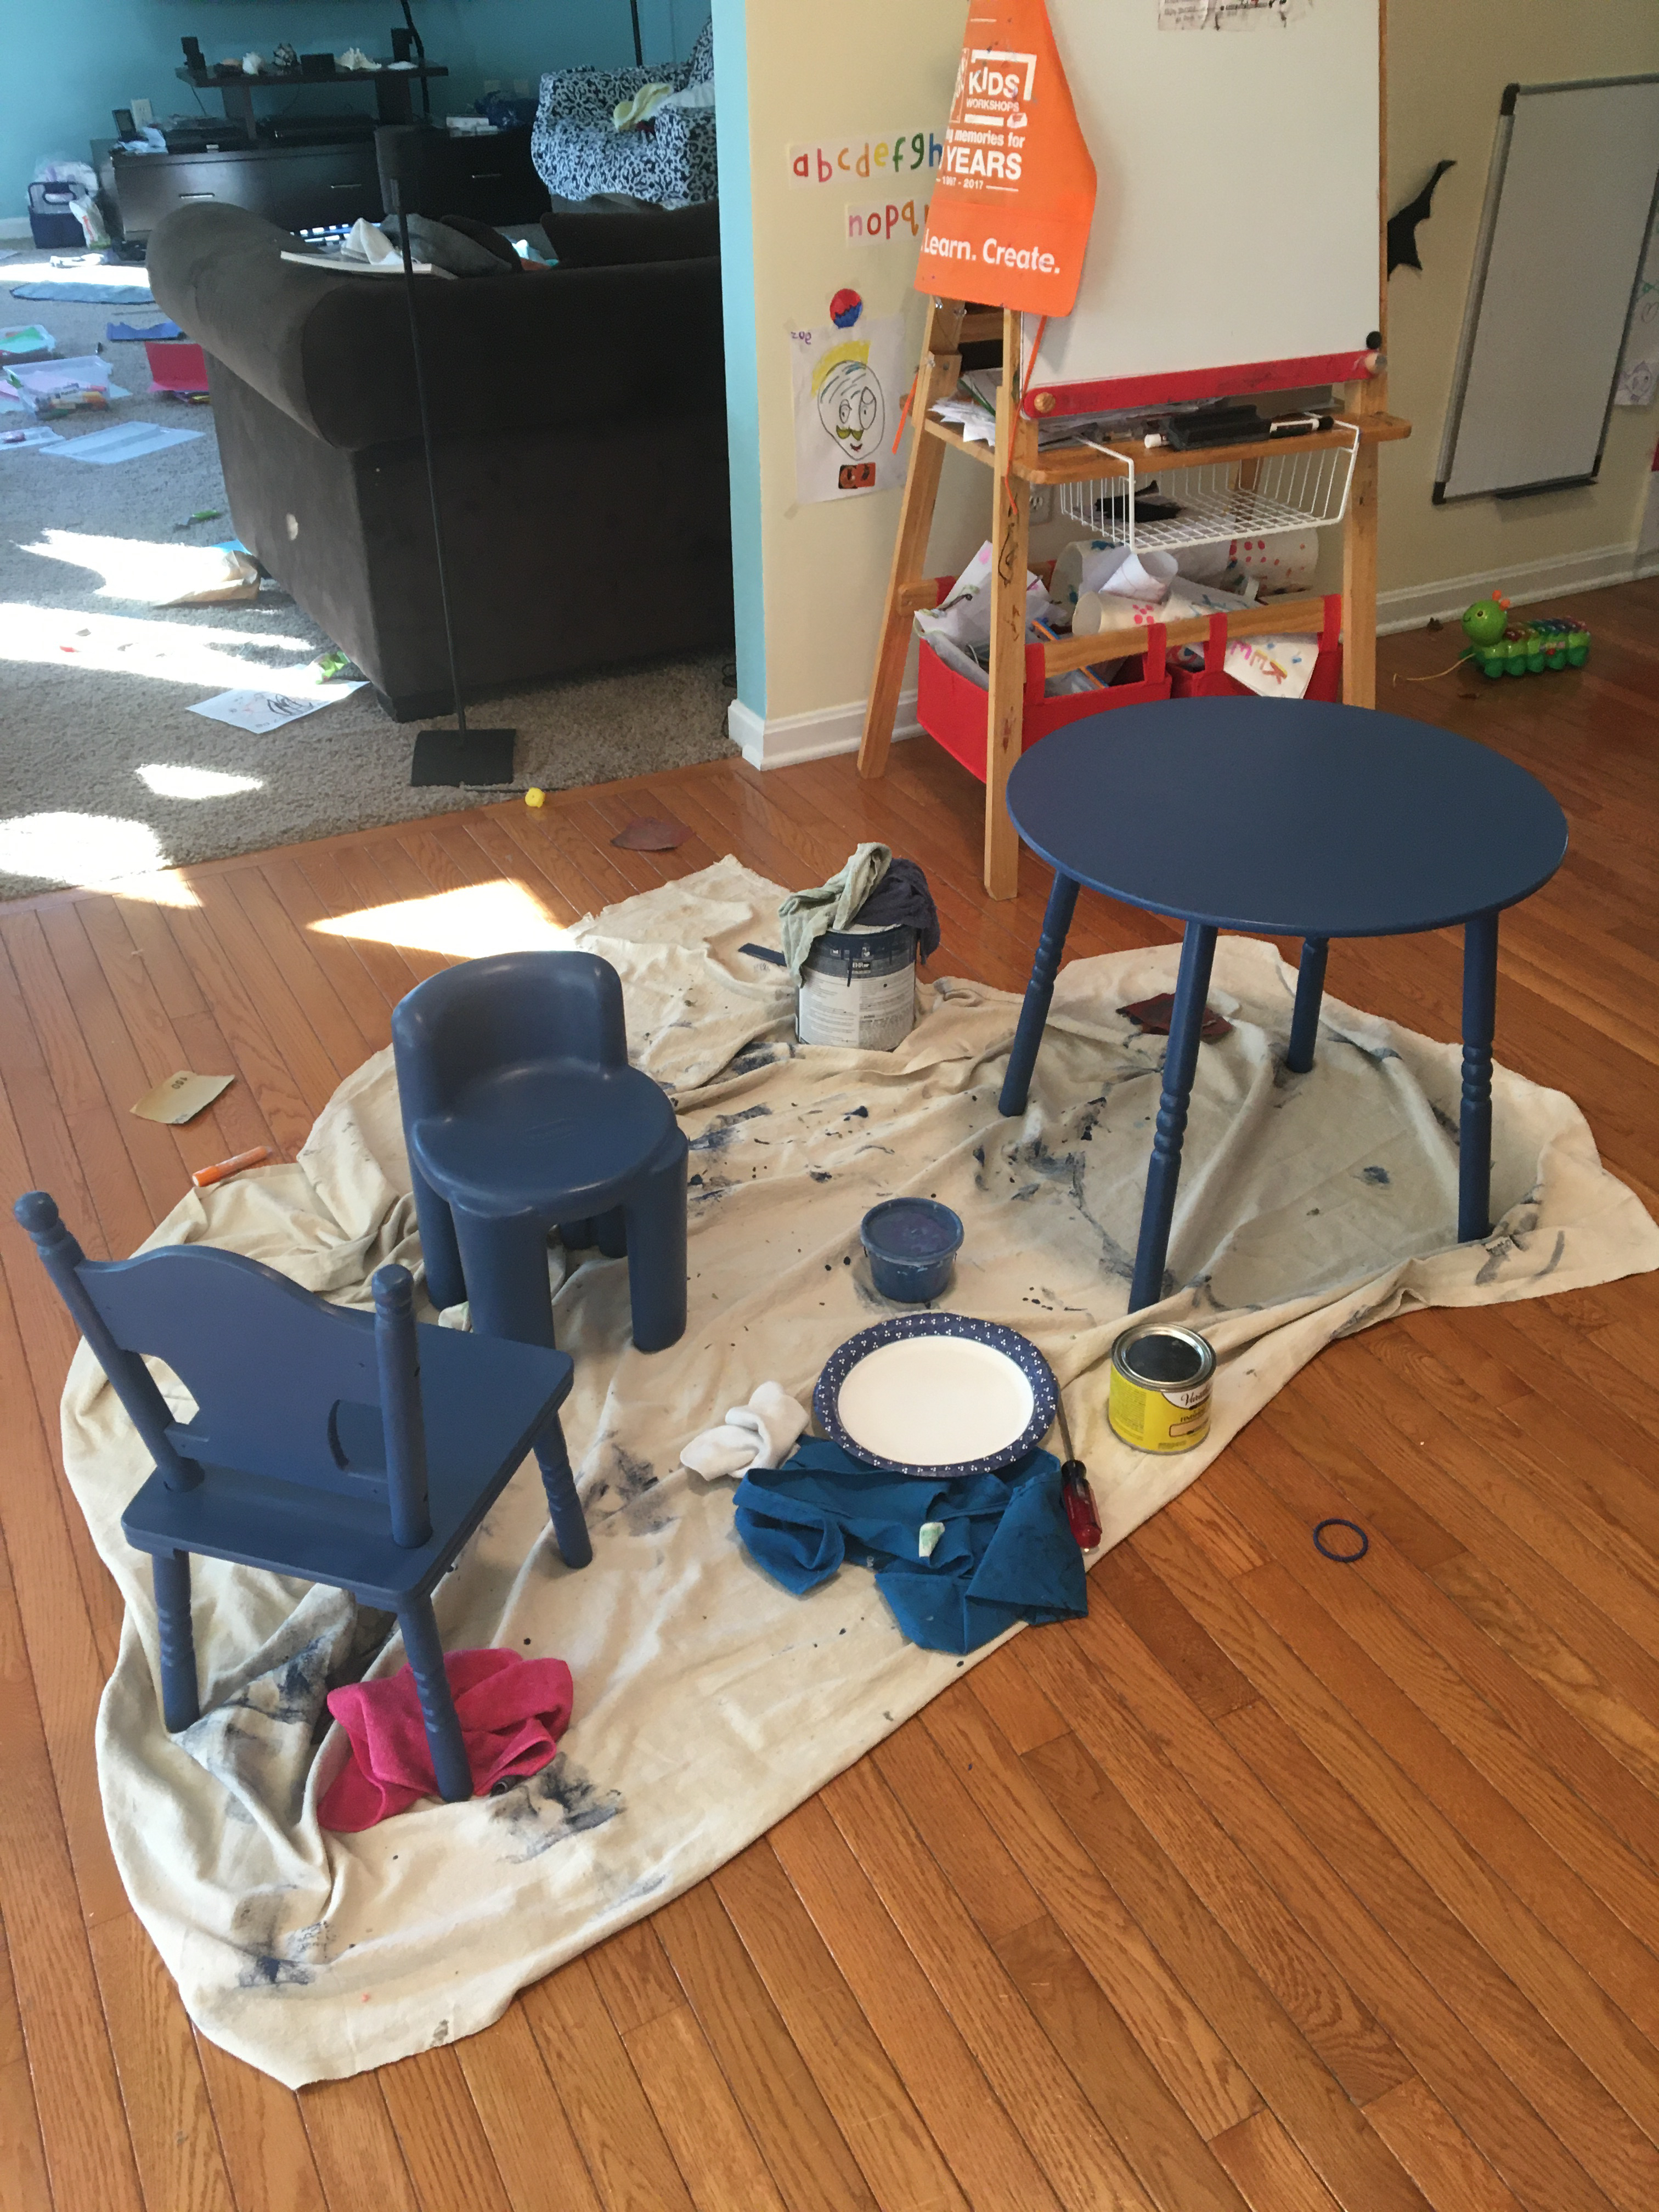
Read on for how it’s done...

Read more: Kid Table with Chalk Paint

Tent

Details
Category: Kids' Projects
Published: 10 April 2017
Created: 10 April 2017
Last Updated: 12 April 2017
Hits: 1937
  • kids
  • tent

One day, we went to Target to get some essentials.  I saw a tepee for $90.  I turned to Cindi & said, "how much do you think this should cost?"  We decided we could do it for less.  $40 later, we had fabric picked out by our daughter, and a different design to make it possible for us to play in the tent with her.  She loves it, and it was fun to make.

Materials:

  1. 3x ½ inch dowels, 4 feet long
  2. 3x ½ inch by 3 inch pine, 8 feet long
  3. Fabric of your choosing
  4. Thread to match/contrast fabric
  5. Ribbon to tie tent to the frame in strategic locations

Basic instructions:

  1. Cut the 1"x3" pieces of wood so each one is 48" long.
  2. Drill ½" holes toward the top of the each piece so the dowel can pass through. If you want the "scissor" look we have in the picture below, leave a few inches at the top.
  3. Drill ½" holes toward the bottom of each piece so the other two dowels help stabilize the tent.  You can either drill completely through these pieces like you did in step 2, or only part of the way through (like I did), and apply some wood glue to make it even more secure.
  4. If you want the legs of the tent to sit flush on the floor, set your circular saw to a 35 degree angle & trim the leg.  Reverse the angle, and trim the opposing leg on the same side.
  5. Time to measure, cut & sew your fabric!
    1. Be sure to leave some extra fabric in all of the measurements below for hems & seams.
    2. I think most fabric has a maximum width that will be slightly smaller than 4' (the depth of your new tent frame).  We got around this by cutting a strip of fabric, and using it so it didn't look like we just sewed two pieces together.  It created a symmetrical look so it appeared more intentional.  Cut two strips of fabric (one for each side) to ~8" wide x ~40" tall.  Make sure the fabric pattern is oriented in the way you want.  In our case, our daughter chose polar bears, so it was important to have them facing up.
    3. Cut four more pieces of fabric (two per side of the tent) so each panel is ~18" wide x ~40" tall.  Sew the strips in #2 above to these pieces so the strips are in the middle.
    4. Measure the back of the tent.  It's probably easiest to do this by making a triangle on the floor with the fabric.  Fold it until it looks right.  I never thought I'd need geometry again real life, but good ol' Pythagorus came in handy.  Use his theorem to calculate the right measurements.  The base of the triangle should be 42" wide.  Cut that in half (21"), 35" tall.  A2+B2=C2.  So, 212+352=1666.  The square root of 1666==40.8".  Thus, the hypotenuse of the triangle should be ~41".  Use that to build the triangles.
    5. Do the same thing you did in #4 to build the door to the tent, but leave extra fabric so you can cut the fabric down the middle for a door, and still have enough fabric to have the pieces overlap.  See the pictures for a visual.
    6. Attach the triangles to your panels, leaving the top/tip of the triangle open so the cover an slip on & off the frame for easy washing.
    7. Sew your hems so everything looks nice.
    8. You'll notice I overlapped the polar bears on the side of the door so they were visible while kiddos were playing inside.
    9. Attach the ribbon in strategic locations so it keeps the fabric taught to the frame.
  6. To stow the tent, just fold it up!  That's the beauty of the scissor design.

I hope this inspires you or gives you some ideas for a tent for your kiddos.  Have fun!

Click the button below for images.

Read more: Tent

Popular Tags

  • home improvement 22
  • kids 11
  • crochet 6
  • garage 4
  • arduino 3
  • blanket 3
  • Kitchen 3
  • Bathroom 3
  • Table 3
  • garden 2
  • paint 2
  • outside 2
  • bedroom 2
  • wireless 1
  • switches 1

Latest Articles

  • Dresser restoration
  • Towel Holder
  • Animal Room
  • Pirate/Ocean Room
  • Galleries Intro
  • Loft Bed
  • Garden L
  • Live Edge Coffee Tables
  • Embroidery Heart
  • Garden Table Restoration
  • Step stool
  • Driveway Fence
  • Shop Vac Cyclone
  • Cargo Pulley System
  • Hidden cat box
  • Condo Bathroom
  • Trash & Recycling Cabinet
  • Kids' Bathroom
  • Kitchen Remodel
  • End Table
  • Attaching a Tire Swing
  • Garage Workbench
  • Kid Table with Chalk Paint
  • Garage Pegboard
  • Toy shelf & cubbies
  • Baby Fish Blanket
  • Baby Hat & Blanket
  • Queen-sized blanket
  • Mommy/Daddy & Son scarves
  • Rock Climbing Bag
  • Mittens
  • Music archive
  • Outdoor Couch
  • Anti-deer garden
  • Arduino with solenoids
  • Wireless Switches with Arduino
  • Arduino Stop Light
  • Tent
  • Welcome

Galleries

  • Galleries Intro
  • Trips
  • Family
  • Projects
  • Art

Login Form

  • Forgot your password?
  • Forgot your username?